Custom Sabers Guide
MissRaynor's guide to making Custom Sabers.
DANGER
If you're creating models for versions above 1.29.1, it's extremely important that you read the Shader Migration Guide to avoid any shader issues
Intro
Since people are still having trouble with making custom sabers, we think that it's best to update our current tutorial. Thank you to angeliod0103 for making the previous guide. Additional contributions to this guide made by Bobbie and Mdot.
Preparation
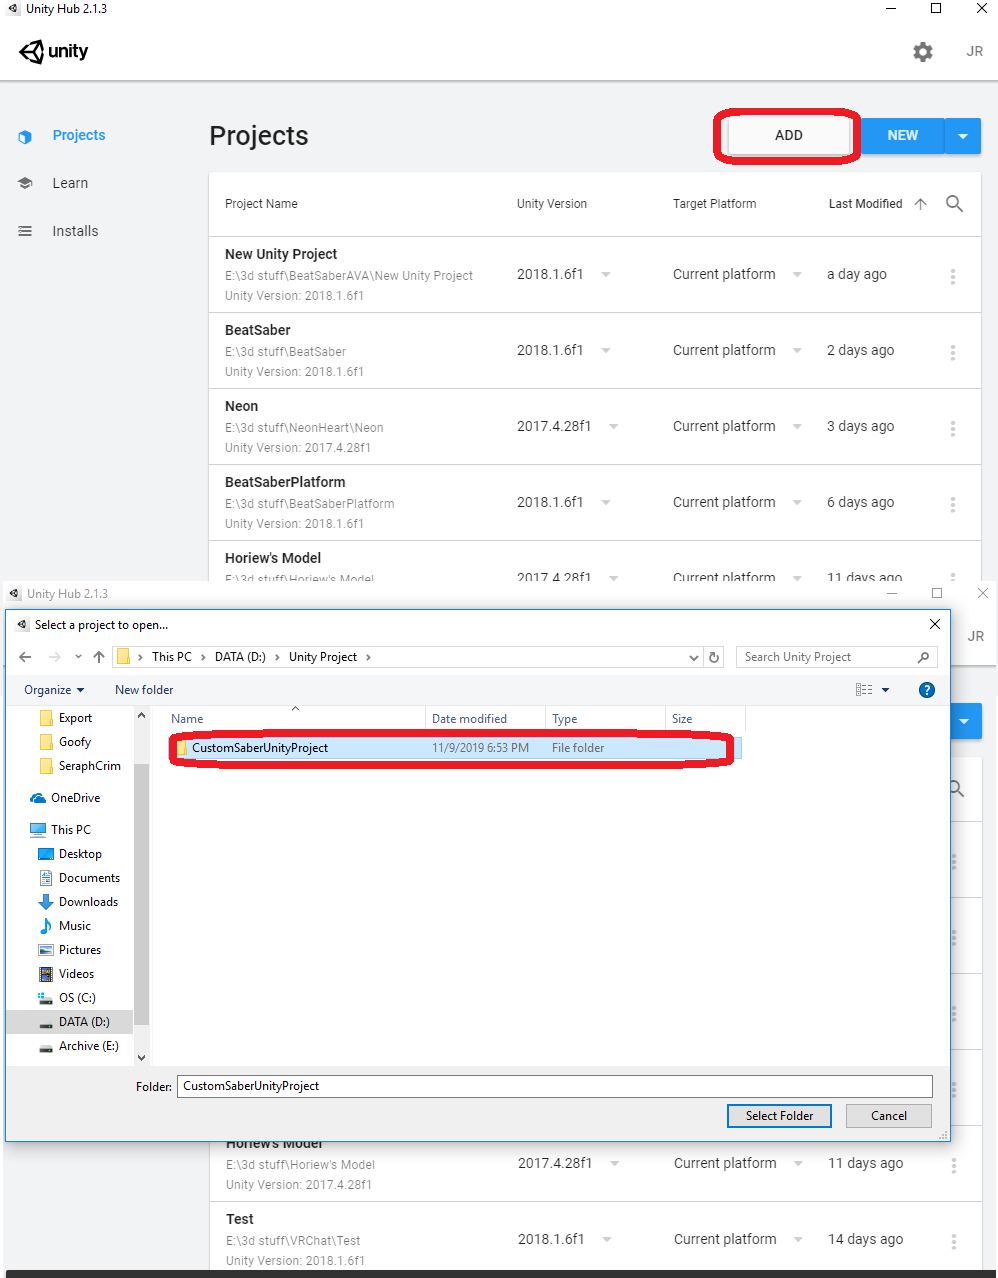
YOU MUST HAVE:
- Unity 2019.3.15f1
- You need to go to the tab that says
Unity 2019.xand scroll down to 2019.3.15. This has to be installed with Unity Hub. - Need a guide on how to install? Check out this Unity guide to Unity Hub.
- You need to go to the tab that says
- The Custom Saber Unity project.
- A 3d model file of the saber of your choice. The most common and acceptable file formats are .obj and .fbx files. You can download your saber from 3d model hosting/showcase sites like Sketchfab or turbosquid.
Optional:
- 3D modeling software: Blender is a good free option, or 3dsmax if you have a license for it (educational license is fine)
- Image editor: Photoshop or GIMP work if you want to make your own saber texture
- The saber model used in this tutorial.
Setup
Extract the Custom Saber Unity project to your desired location.
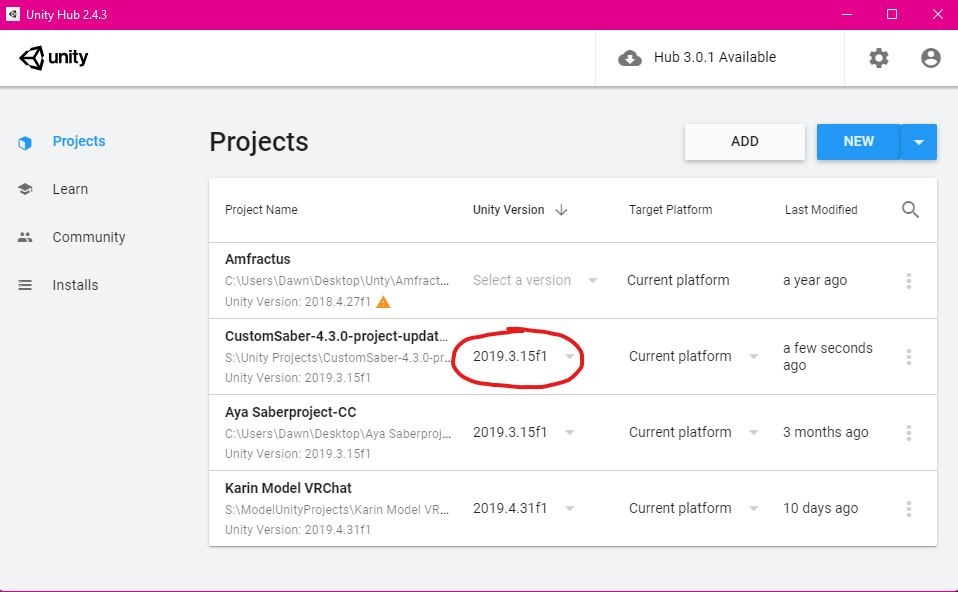
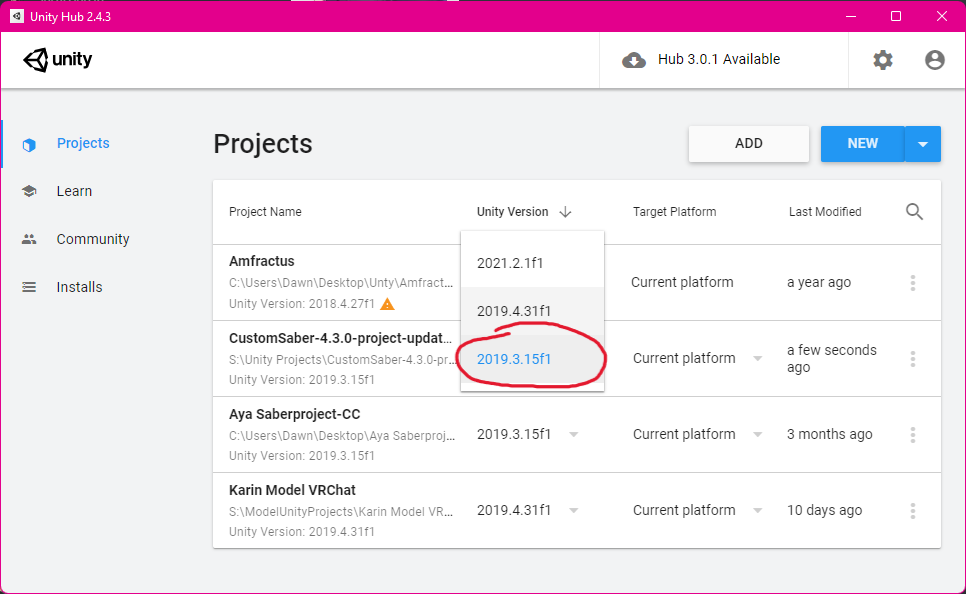
Importing and setting Unity version of the project
The Custom Saber project should appear on the list. Make sure the Unity version is correct for the project.
Opening and setting up the project in the Editor
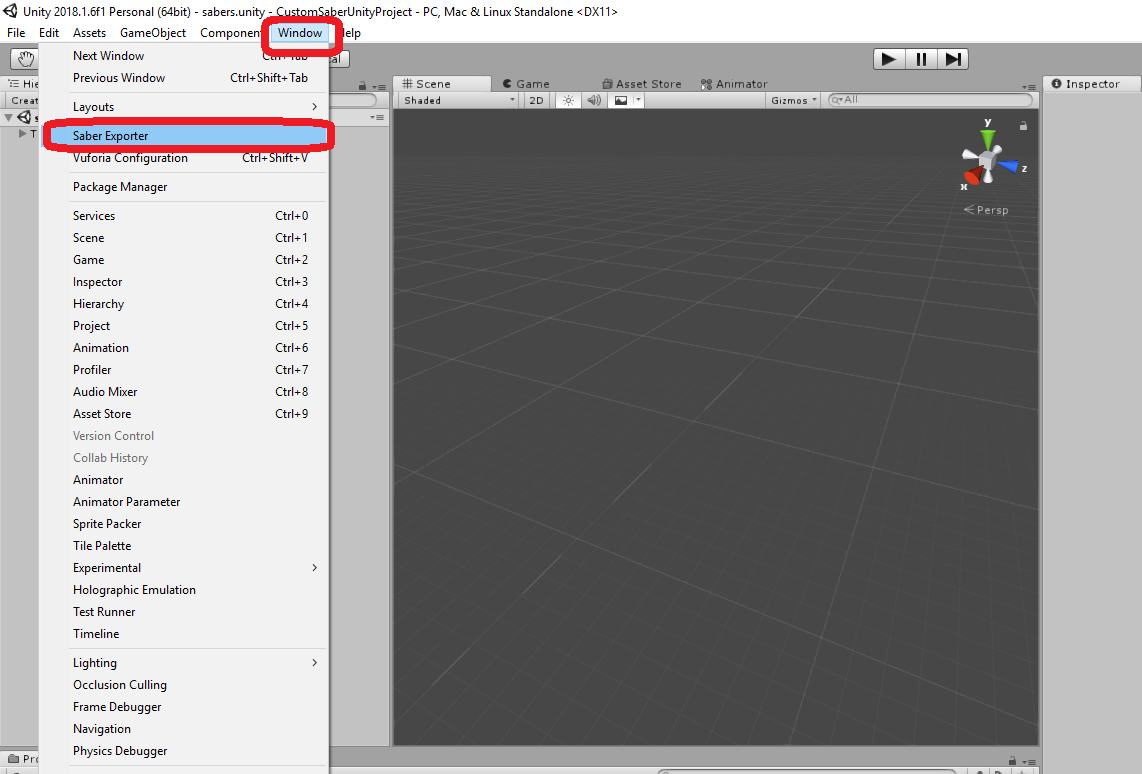
Open the Custom Saber project, it should show up like this:

Check if the project is functional by double checking that the Saber Exporter shows up in the Window tab.
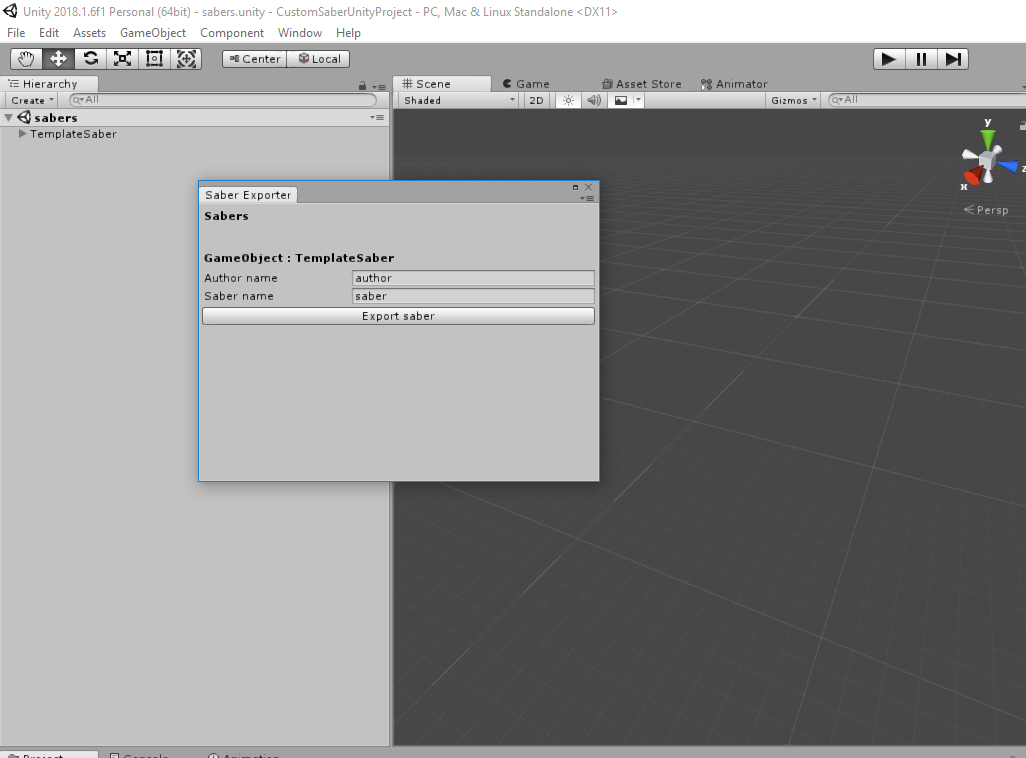
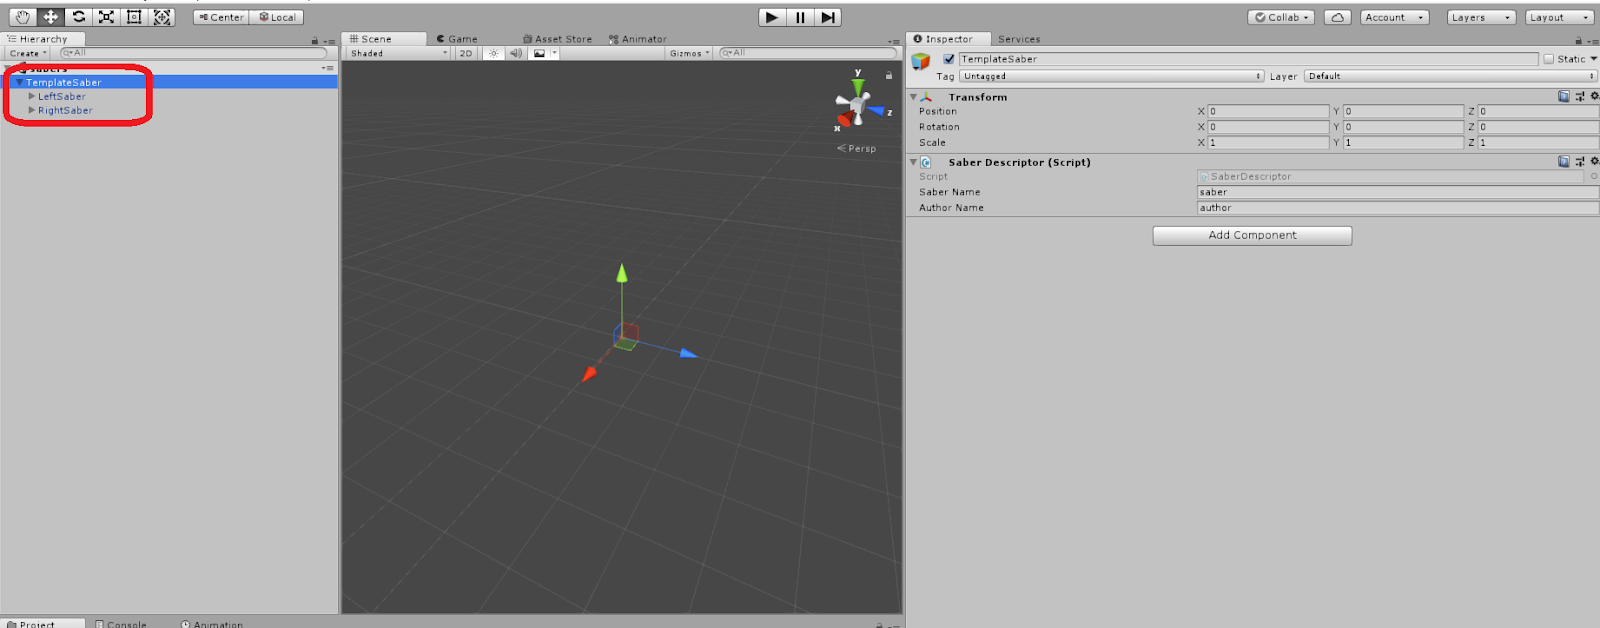
The current scene should contain a GameObject called TemplateSaber.
If it's your first time opening this project, the Unity viewport will be very far away from the saber. To see the template saber in the viewport, doubleclick on the TemplateSaber GameObject.
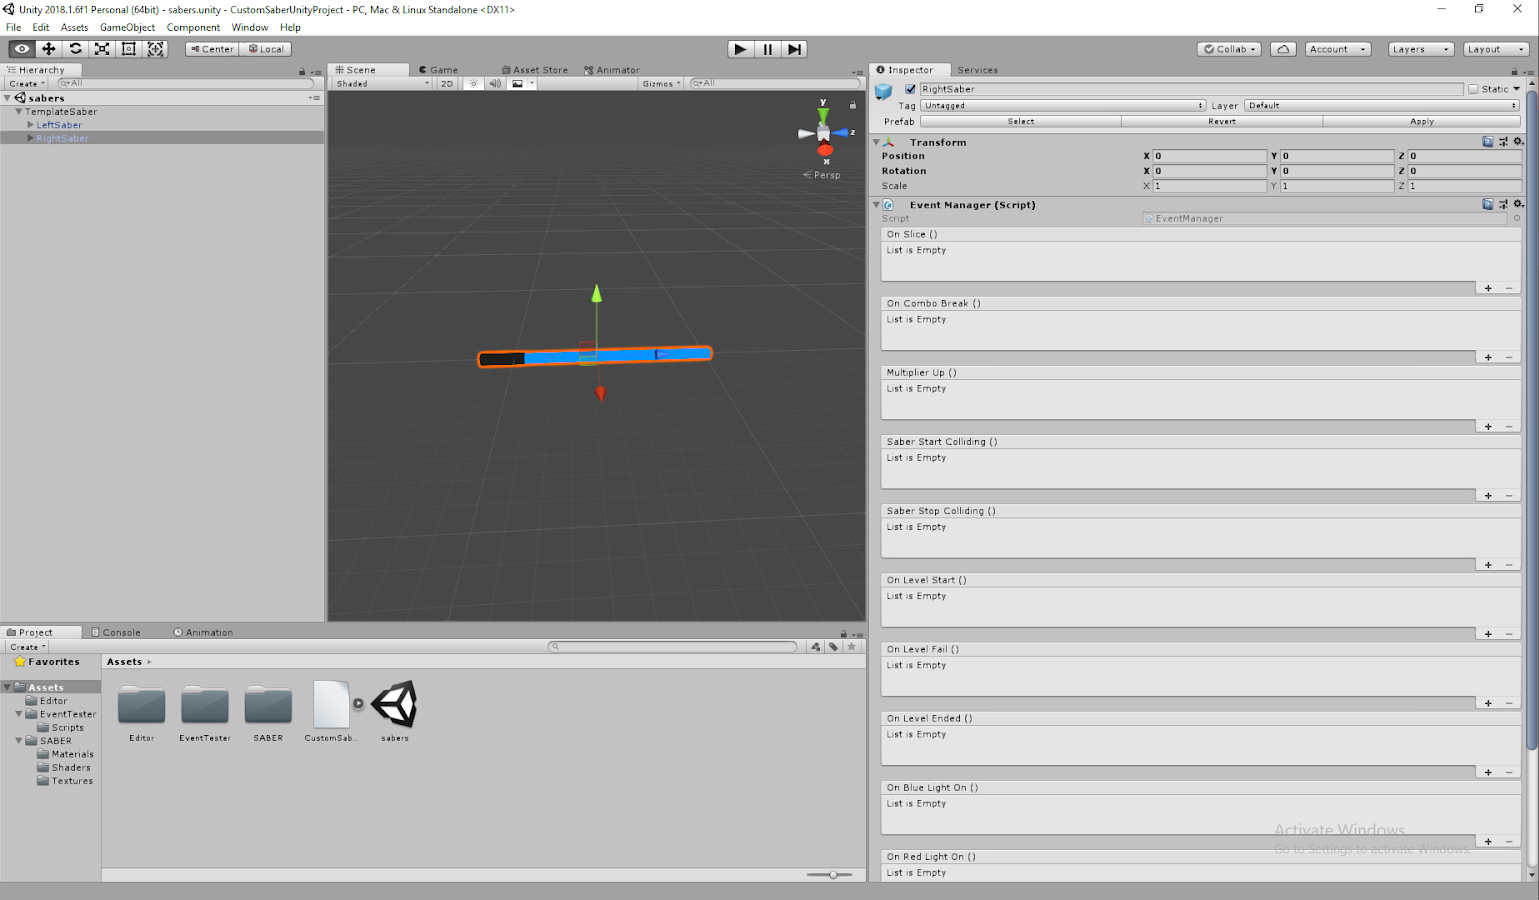
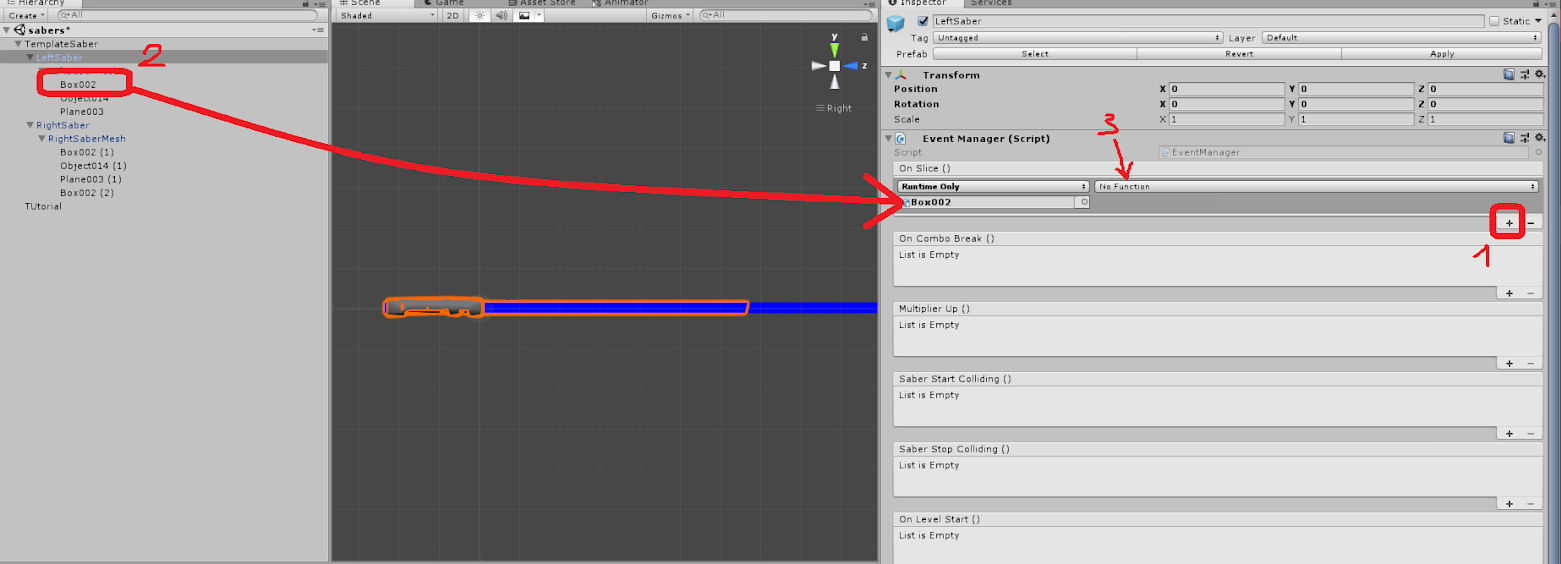
Click both the RightSaber and LeftSaber GameObjects and make sure that they have an Event Manager component attached.
Now try exporting the Template Saber into your CustomSabers folder with the Saber Exporter.
If the Template Saber appears and works properly ingame, setup is complete and you're ready for the next part.
Modeling
I won't go into detail about making a 3D model. If you don't have already have a model and want to learn how to make one, you can find tutorials here:
Blender
https://www.youtube.com/watch?v=ICBP-7x7Chc is not a valid YouTube URL!
3DS Max
https://www.youtube.com/watch?v=DzBTcDY3_Q4 is not a valid YouTube URL!
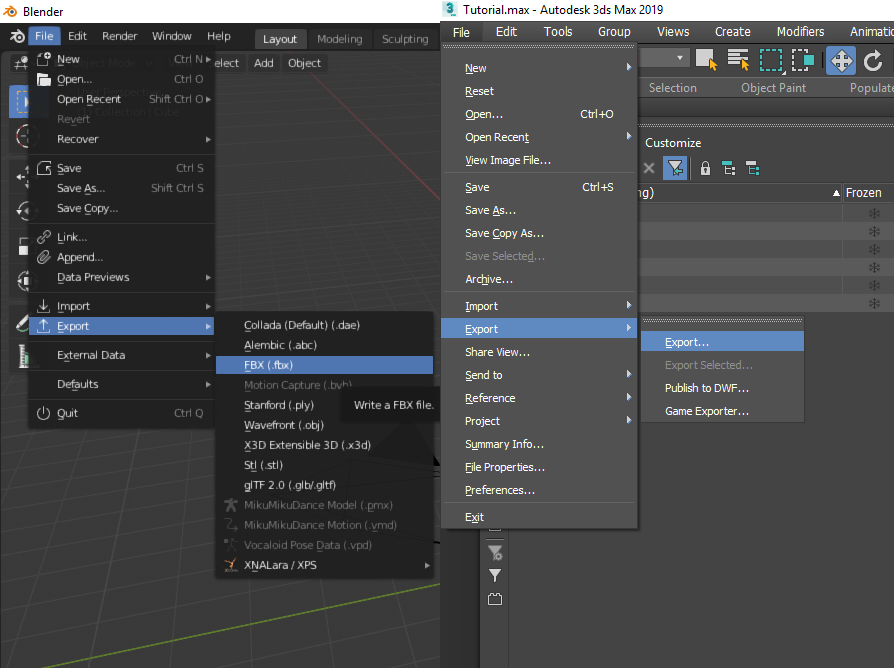
Once the saber is done, you can export it by choosing File-Export, choosing the desired file format, and importing it into unity.
NOTE
OBJ is best used for simple sabers. FBX is best used for complex sabers that have rigging or animations.
NOTE
You don't have to export both sabers if they both have the exact same shape. If they're identical, exporting one should be good enough.
NOTE
Merging meshes that share the same color/glowing attributes will help a LOT in the long run.
Unity
To import the model into Unity, simply drag and drop it into the Assets window. Afterwards, line the saber up with the TemplateSaber. Video example:
https://www.youtube.com/watch?v=mphD87zOer4 is not a valid YouTube URL!
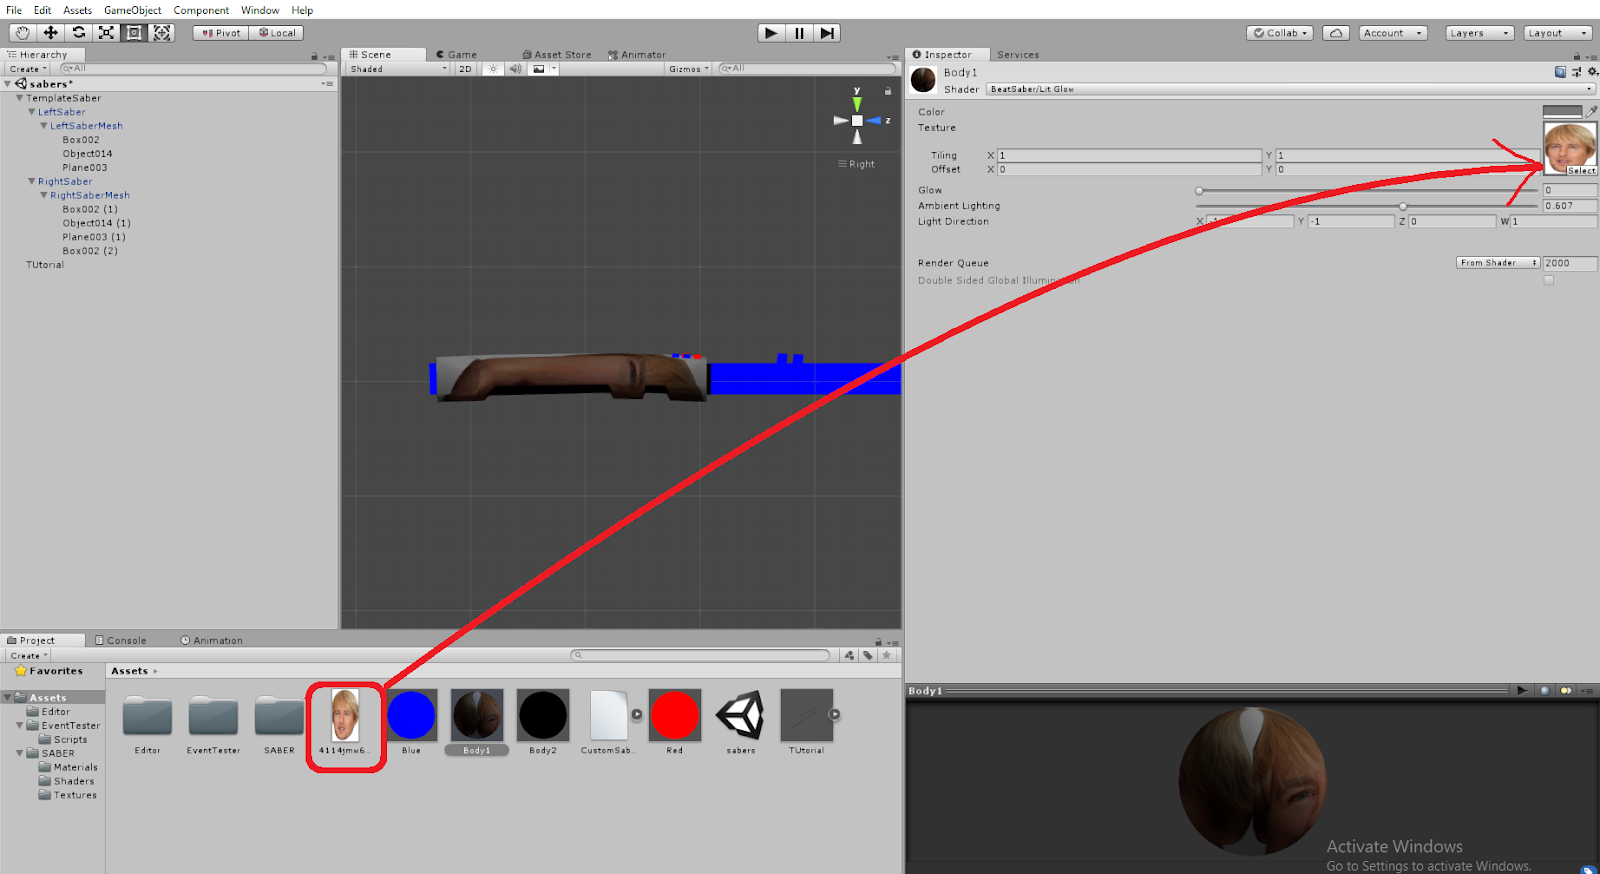
Next, you need to add Beat Saber compatible materials to your sabers.
The Custom Sabers unity project comes with 4 different Beat Saber compatible shaders. Here are the main differences between them:
- Lit glow is lit and has shadows. You can change the direction the light comes from and how strong it is
- Metallic makes the material slightly darker and allows you to add a metallic reflection
- Unlit glow is similar to lit glow but it doesn't have any lighting effects.
- Unlit glow cutout dither is the same as unlit glow but allows you to add transparency to your material.
The materials you use will depend on what traits you're looking for.
WARNING
Make sure you ONLY use shaders that are compatible with Beat Saber. If you use a shader that isn't compatible (the Unity Standard shader, for example) your material will simply show up as white in-game.
NOTE
For more information on shader compatibility, visit the Advanced Shaders Properties section of this guide.
Video example of applying materials:
https://www.youtube.com/watch?v=zKFCNJoQOWk is not a valid YouTube URL!
You can add a texture to a material by dragging an image file in the texture slot.
NOTE
The Glow slider modifies how bright the saber glows. Additionally, when the glow is above 0, that material will be affected by the player's custom colors.
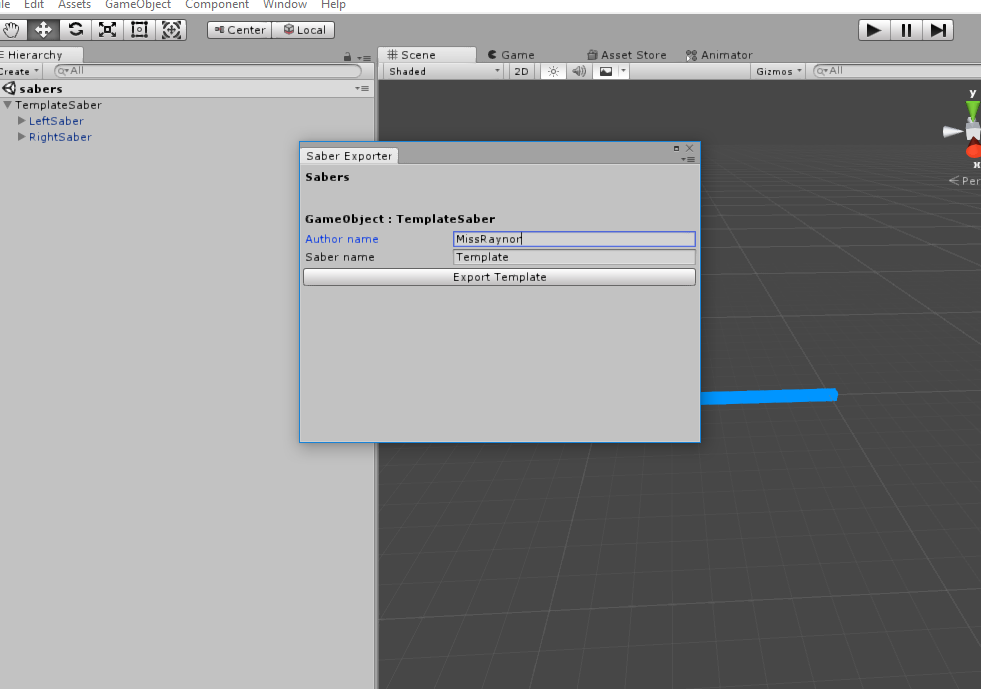
Once you've completed all of this, you can export your saber. Open up the Saber Exporter in the Window tab and then fill in the saber's name and author.
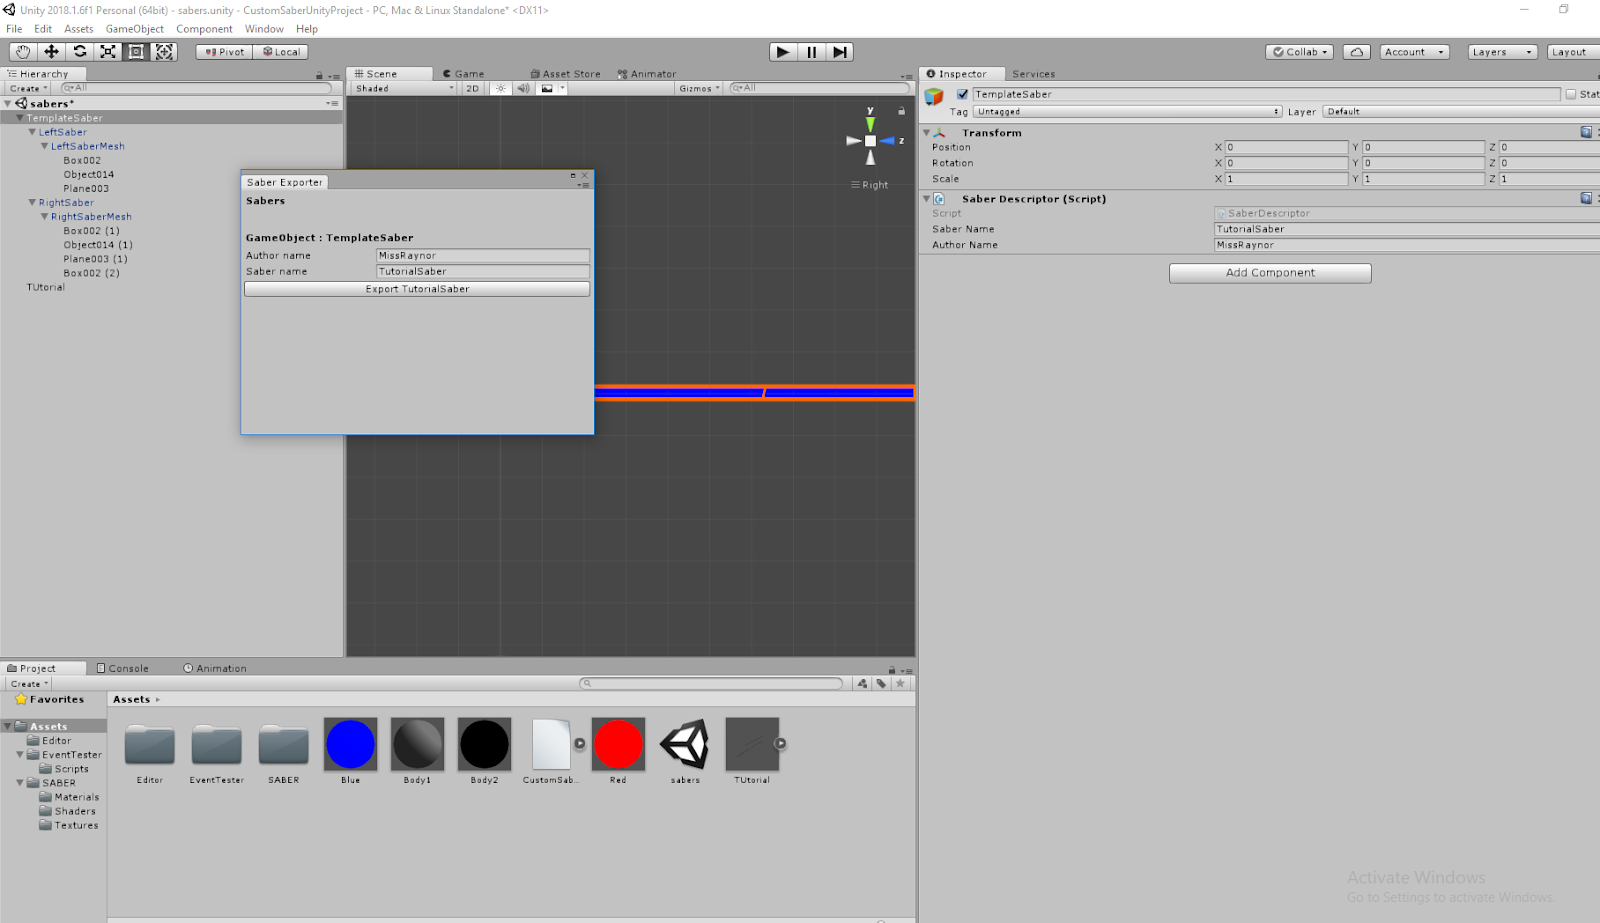
Put your sabers in your CustomSabers folder and test them out in game. If they look good ingame, you're all done!
NOTE
Once you've got your new sabers working, upload them to ModelSaber if you want to share them with the world.
Advanced
This section covers things that aren't included in the main tutorial, such as how to add Events and Trails.
Other scripts are contained in Assets/CustomSaber.dll. Click on the little arrow to expand it. 
EventManager
This component lets you set up an action when an event condition is met. This includes when you hit a note, miss a note, when you start a level, etc...
To use it, click on the plus button to create a new event, drag the gameobject performing the action in the slot, and then choose the desired action.
If you want more information on events, read the Events section in the Custom Avatars guide.
Every Nth Combo Filter
This component lets you perform an action every N combo. It works the same as the Event Manager, but with the only trigger being every time you hit N combo.
Custom Trails
This component lets you change the default trail for sabers. For a comprehensive tutorial on how to use custom trails, check out MDot's custom trail guide.
Animation
If you want your sabers to play a certain animation, you need to use an Animator component.This will allow you to better manage what animation you're making, in addition to letting you control how the animation transitions/triggers using the Event Manager. More information on the animator component can be found in the unity docs here.
Advanced Shader Properties
If you want to modify your shaders to use Custom Colors without having to change the glow, it is possible to modify them support this.
Add this snippet of code to your shader's Properties section. If you have another property named _Color, make sure to remove it!
_Color ("Color", Color) = (1,1,1,1)
[MaterialToggle] _CustomColors("Custom Colors", Float) = 0
Now your materials should have a nice Custom Colors checkbox instead of custom color support depending on the currently set glow.
Similarly, if you want to import a non-beatsaber shader to use it on a saber and want it to display correctly ingame, you need to strip the Alpha channel out.
Each shader is different, so there's no universal approach to doing this. If you're not sure exactly how to do this, feel free to discuss the process in #pc-3d-modeling in the Beat Saber Modding Group.
Materials
For more advanced information on how to make materials, check out gamesequence's guide to materials.
Still Stuck?
Check out this video created by Raz0rBeam and Parapass for a more visual walkthrough.