Intermediate Mapping
NOTE
This page builds on the information covered in the Basic Mapping page of the wiki.
If you are just starting out as a new mapper it is recommended to learn the basics then come back later once you have gained some experience.
In this page you will find a summary of most topics mappers usually think about when mapping a song. Some topics also have a section in Advanced Mapping which goes into further detail.
NOTE
There is a lot of content on this page so do not try to read it all in one sitting. Go through it at your own pace in order or consult specific topics directly.
Ultimately, the best way to learn to map is to simply experiment!
What Makes a Good Beat Saber Map?
There are many aspects that matter to this question, but generally speaking, we can classify most aspects into two main categories:
- Gameplay - Does the map play well? Is it comfortable, fun, and of an appropriate difficulty? Topics about the way the map feels to play, more or less independent of the music.
- Representation - Does the map represent the song's rhythm, mood, and feel? Topics about the relation between the music and the map.
A good map will do well in making both of these aspects work together.
Arguably, there is a third, more subjective aspect that relates to the two above, and separates good maps from great maps:
- Identity - Is the map memorable? Does it leave an impression on the player? Does it offer something that other maps do not?
Read more...
GalaxyMaster has published his perspective on this question.
Accounting for playstyle and taste
It's hard to quantify what good, comfortable, fun, appropriate, and memorable mean. All of these are highly subjective and will vary wildly between players. There is no map that everybody will love or that nobody will dislike. There are many different tastes and many ways to play: fast or slow, move a lot or optimize scoring, difficult or easy, complicated or simple patterns. Mapping is level design - both an art and a science. There is no "best" answer, but there are many "wrong" answers.
Identify a Target Audience
Keep in mind your target audience: the players who you want to make the map for. Broad target audiences are nice, but it is important to prioritize some core ideas as it is hard to cater to every taste.
Most concepts in this page are relevant to most playstyles and tastes, but how much priority you give them will vary.
Examples
The following are all good but very different maps, because they target very different audiences:
- https://allpoland.github.io/ArcViewer/?id=1a0b6 - Dance map - More casual audience who wants to dance to the music.
- https://allpoland.github.io/ArcViewer/?id=1a2cd - Speed map - Higher skill audience who likes physical intensity and challenge.
- https://allpoland.github.io/ArcViewer/?id=2d4e6 - Momentum tech map - Audience that likes complex patterns and large and unusual motions with good flow.
Mapping is a Balancing Act
As with any art form, there are trade-offs that you need to decide on in your map.
Better representation might require less comfortable gameplay, or making your ideas playable might make them too simplistic. In order to make vision work you may have to use suboptimal positioning, or you may have less consistent emphasis to achieve better body motion.
You should attempt to find solutions that offer the best of all worlds, but accept that you will not always find them.
Example
Consider https://allpoland.github.io/ArcViewer/?id=2c25a&t=0 on beats 0-40 and focus on the percussion (kicks).
There are kicks on beats 8, 11, 16, 19, 24, 27, 32, 35 and finally 40. All of them are mapped as doubles with scissor parity, except 40, which is mapped as a stack.
The main reason behind this is to prevent the right hand from starting on a forehand swing in this section, which would have made the parity opposite to what it was in the previous iteration of the same musical structure.
Thus, the mapper decided to be a little loose on representation, mapping it as a stack instead of a double on this occasion.
On the flip side, sometimes there are improvements that you can do at almost no cost to other aspects, even if it is not part of your original vision. Whenever you're faced with a small choice between your vision and an objective improvement, it's almost always better to go with the latter.
TIP
Rather than asking yourself "do I really need to change it?", try asking "do I really need to keep it?".
Gameplay
Gameplay in a mapping context focuses on how the map plays and can be understood independently from the song it represents. However, in practice, strong representation can also make a map feel better to play.
There are dozens of aspects that can describe how a map plays. Usually they include at least the following:
- Is the map physically comfortable? Maps can be uncomfortable on purpose, but it should be a conscious and calculated choice, not a consequence of sloppy mapping.
- How fast does the player need to move?
- Is the map readable? Are players able to understand the movements they are expected to do without memorizing the map?
- How difficult is the map?
- Is it possible/easy to score well on the map? Many maps don't worry much about scoring, but for some target audiences, this might matter.
Awareness of how your mapping choices affect these aspects can be critical to making your map play exactly the way you want. Unlike Representation, Gameplay aspects are usually more objective and can be described in more technical ways, even though there is still subjectivity involved.
Flow
Flow is one of the hardest to define - but still widely used - terms in Beat Saber mapping. A general definition is the way in which the movements implied by the map's notes, bombs, and walls transition between each other over time.
Usually, a map "flows well" when it's comfortable and natural to play, and the movements are intuitive and physically pleasant.
However, there's no written rule that a map must "flow well" to be a better map. Sometimes, less comfortable flow can be used as a tool for emphasis and representation, or simply as a means to increase the difficulty of the map.
Nearly every aspect of a map affects flow, so providing a list or summary here would not do it justice. Instead, you can learn about how each of the technical aspects of a map affect flow.
TIP
To understand flow, think about the relation between sequences of notes, not about individual hits.
Read more...
Kansas made an incomplete list of some of the terminology often used when discussing flow.
Speed
When talking about map speed, we usually refer to the speed that the player must swing to hit the notes.
Speed is one of the most easily quantifiable measures of a map in terms of difficulty, relation to rhythm choice, and how intense it feels to play. However, it is not fully determined by rhythm choice, it also depends on how the sounds are mapped between the two hands.
There are other aspects to speed as well, such as the speed of full body movement or the sensation of speed that certain patterns produce.
The feeling of speed can also be affected by a map's jump settings.
Playstyle changes with map speed. For slower songs, it is easier to perform large arm swings, curved swings, hand repositioning, and contort the whole body to hit more unusual patterns. At high speeds, there is less time to process and adapt to the next hit, mentally and physically. Thus, fast maps and patterns tend to be made more linear.
The section on swing speed contains more technical concepts that are usually used to discuss a map's speed.
TIP
A good mapper is always aware of how fast their map is.
Example
In https://allpoland.github.io/ArcViewer/?id=34dc5&t=124, the mapper uses a standard pattern (one-handed jumps) to increase the sensation of speed at the end of the drop without overmapping.
While the song does not technically speed up at the end of the drop, it feels more intense due to the repetitive sound. Using jumps as a representation choice allows the mapper to convey that intensity in the mapping.
Readability
A Beat Saber map is a message with limited vocabulary between the mapper - trying to communicate a motion - and the player - trying to perform it. Readability refers to how well a map communicates its intended movement to players.
Since readability is about communication, it depends on both the player and the mapper speaking a common language.
To make matters worse, players have limited time and ability to read and process the map while playing, especially when sight reading (playing the map for the first time).
Thus, it is not enough that a map can be played well, it also needs to do a good job of showing the intended movement to the player. Most players will play a map once ever, or once every few weeks or months, so expecting them to know the types of movements that the map requires without making them adequately readable often leads to disappointment.
The target audience is particularly relevant when considering readability, as it will determine the particular dialects of Beat Saber maps that players understand.
An example of playable, but usually problematic and difficult to read patterns are implicit parity resets, particularly triangles. 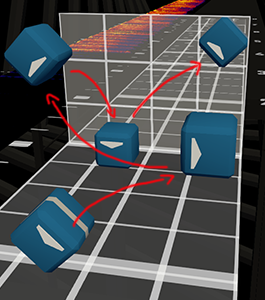
This pattern is ambiguous as it requires a reset motion at some point, but it's unclear to the player when would it be best to do so.
Note that, like flow, a map can be hard to read on purpose. This is a risky choice but it may work to provide identity, help representation or provide a more memorable experience.
TIP
The best way to evaluate a map's readability is to get fresh testplays from players who have not seen the map before.
Mapper Blindness
A condition experienced by most mappers, especially novices, is called mapper blindness: where a mapper will struggle to identify readability issues in their map because they already know the intended motion when they test it.
While mapper blindness can be reduced with good understanding of best mapping practices, nothing replaces having other players and mappers testplay your map and analyzing their reactions to patterns the first time they see them.
WARNING
Just because a map can be played well it does not make it readable. Maps need to communicate their motions properly.
Suggested / implied motions
In some cases, extra motion is suggested to make the pattern play comfortably. An example is a scoop: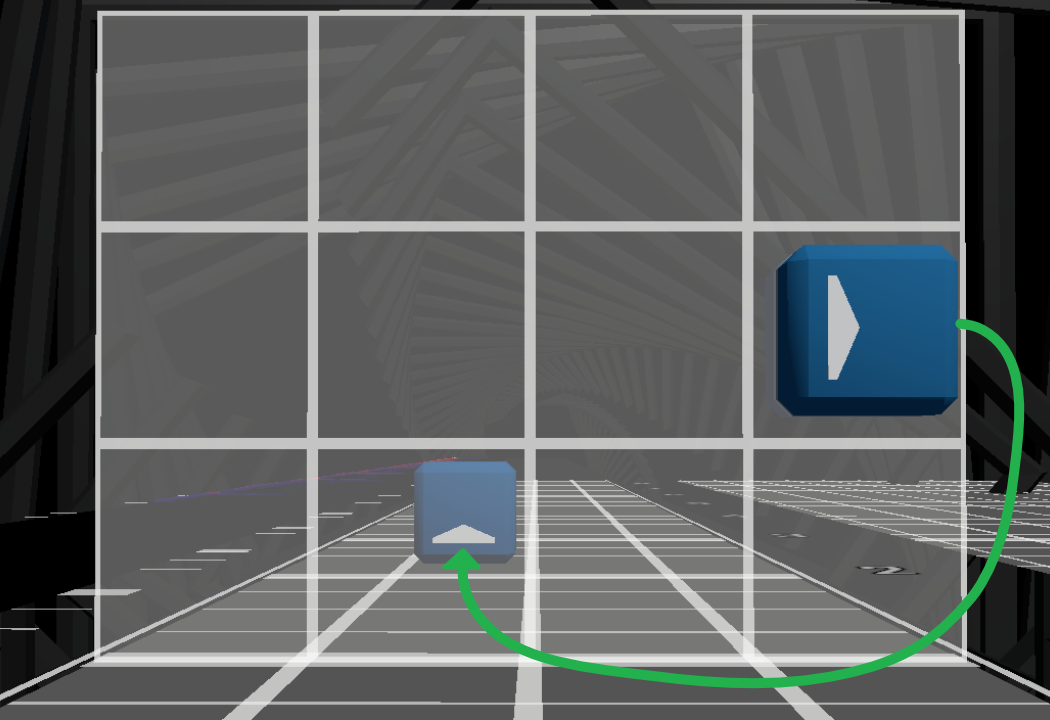
In order to hit the up note following the side note, the arm must take a longer scooping path to get into position.
Suggested or implied motion is risky because players will read and react to patterns differently. One player may hit a scoop as intended, but another may recoil or flinch and have a negative experience. This problem can never be avoided when using suggested motion, but clever use of bombs, walls, and momentum, and managing the player's expectations can all help with communication.
The scoop pattern above might play well in a map that regularly encourages big movements and trains the player to expect this kind of motion, but could be completely unexpected in a different map.
Clutter
An important challenge to readability is clutter, where patterns are visually difficult to process by the player. Clutter is more likely to happen when a map is faster, as it will have more notes approaching the player at any given moment.
Good positioning to space out the notes over the player's view, clearly emphasizing the most important hits, adequately managing vision blocks, and optimizing jump settings are the main ways to reduce clutter, although it can sometimes be very difficult to avoid.
Difficulty
Difficulty is ultimately a combination of other aspects, but it can be useful to identify independently.
Readability, flow, and speed are the main factors affecting a map's difficulty. Difficulty should normally be a consequence of other aspects of the map, and be accounted for.
We say that a map has artificial difficulty if it includes elements that make it more difficult without enhancing any other aspect of the map (i.e. it does not play better or represent the music better). You should normally avoid artificial difficulty. Instead, consider whether your map can represent more of the song, or whether you can up the intensity of the gameplay.
Bad Practice
Do not artificially increase difficulty. If your map feels too simple you can up the intensity of movements and/or represent more parts of the music, but ensure these changes add value.
Difficulty is very important to consider with respect to your target audience. If your audience finds the map too hard they will not be able to play it. Although some players might find a map to be too easy, this is normally a side effect of under-representation or overly simplified gameplay, and not because of raw difficulty.
Adding multiple difficulties to your mapset can be a great way to expand your target audience without watering down your main vision. Downmapping is the process of taking your top difficulty, and then breaking it down to be appropriate for lower skill levels. Most mappers start with Expert+ and downmap from there. Check out the Downmapping page for a deep dive into this process.
TIP
Make sure that the difficulty of your map is adequate for your target audience.
Read more...
GalaxyMaster has published his perspective on map difficulty, mostly from a competitive/ranking perspective.
Scoring
Due to the mechanics of Beat Saber and the predominant playstyles of players, certain patterns and maps are easier to achieve a higher score on than others. Scoring concerns typically become more relevant when the target audience regularly achieves a full combo on the map, or is close to it.
At these levels, accability relates to how easy / possible it is to get high accuracy on the notes. That is, how easy / possible it is to hit the notes in the center.
Generally, most maps don't need to worry about how accable they are, unless it's relevant to your target audience.
The easiest ways to increase accability include making swings more linear and ensuring the cut direction of notes goes from the center outwards.
Representation
Representation refers to the relationship between the map and the song. Representation happens at multiple levels:
- How do the individual notes represent individual sounds?
- How do the transitions between notes represent the progression of the music?
- How does the overall structure of the map relate to the structure of the song?
There is no one recipe to good representation, but there are a few core concepts that most mappers consider.
Read more...
GalaxyMaster has published his perspective on Representation, covering most topics included in this section.
Rhythm Choice
Rhythm choice is deciding which sounds and instruments to represent.
This is one of the most important decisions to make. It should be well justified and will condition most other aspects of the map. Here are some principles to consider when deciding rhythm choice:
- What are the most prominent or central sounds that you hear in the song?
- Rhythm choice does not need to be the same for the whole map, but it should not change abruptly.
- Does your rhythm choice allow you to produce a map of adequate intensity for the feel of the song?
As a result, rhythm choice usually corresponds to either a single instrument (vocals are an instrument) or a few of them working together, though other options are valid, for example:
- Focus on some instruments, and fall back to the others when they are silent.
- Focus on some instruments, and occasionally map some important sounds from the others.
Rhythm choice can also be used to enhance the experience of the music. It may be used to highlight elements of the music that would normally go unnoticed but which are relevant.
Bad Practice
Do not try to map every sound as this usually creates unplayable maps. Focus on what's most important, and consider using bombs, walls and lights to fill in the gaps.
Example
Map https://allpoland.github.io/ArcViewer/?id=276bb&t=30 maps both the synth and the percussion in full for most of the song, whereas map https://allpoland.github.io/ArcViewer/?id=33c3b&t=28 (of the same song) focuses more exclusively on the synth and simplifies some rhythms.
Both are legitimate rhythm choices.
Read more...
A short description of rhythm choice, by GalaxyMaster.
Emphasis
Emphasis is matching the relative intensity of different sounds and/or song sections with the mapping that represents them.
While big towers, windows, doubles, fast jumps, and fast streams are fun, consider whether the patterns reflect the intensity of the music.
- Within a section, the most prominent sounds should be emphasized more. Emphasis can be done in a variety of ways, such as:
- Adding larger hits (doubles, stacks, windows...) for oomph.
- Spacing notes further apart to induce bigger swings.
- Producing larger rotations between note angles.
- Mapping faster rhythms to induce faster swinging.
- Not mapping less significant sounds so the more important sounds stand out more.
- Using walls to induce body motion.
- Using bombs to generate tension or secondary movements.
- The intensity of the mapping in each section, relative to other sections, should be somewhat in line with the intensity of the music.
TIP
Emphasis is relative. If everything is emphasized, nothing is emphasized.
Example
https://allpoland.github.io/ArcViewer/?id=34f56 uses a wide variety of tools for emphasis to represent the variety in mood both throughout the song and within each section.
These include faster patterns, heavier rotations, larger swings, bombs in various forms, arcs, cross-over hits, dancier patterns, inlines, and palm-up and palm-out swings.
Consistency
Consistency is using the same or similar map elements to represent the same or similar song elements, not exact repetition. This contrasts variation which is about nuanced representation and keeping things fresh, not arbitrary changes.
It is important to strike a balance between the two as you want to have a clear consistent vision for your map while keeping the player engaged with some variation. Mapping every instance of the same sound exactly the same can become boring, while mapping each instance of the same sound completely different loses out on representation and structure.
Consistency comes into play in two places: within a section and when comparing separate sections of a song.
- Within a section, rhythm choice should generally stay consistent as it allows players to establish that rhythm and follow it.
- Within a section, consistency in patterns is desirable as well, but some variety within the bounds of the established patterns and rhythms is appreciated.
- Similar sections of the song usually benefit from having similar mapping.
- Contrasting sections of the song benefit from contrasting mapping.
- Representing variations in the music through variations in the mapping while preserving consistency is ideal.
TIP
Use familiar patterns for familiar sounds and sections, but do not obsess over exact correspondence.
Example
In https://allpoland.github.io/ArcViewer/?id=338fe&t=49 similar but different patterns are used in sequence providing great variety while preserving familiarity and consistency.
- On beat 172, lean scissor doubles are used for 4 iterations.
- On beat 204, scissor doubles with horizontal displacement are used for 4 iterations.
- On beat 332, lean same parity doubles are used for 4 iterations.
- On beat 364, palm-in same parity alternating side doubles are used for the remaining iterations.
Structure
Music has a high-level structure. A song is normally divided in sections, which have different intensities and fulfill different roles within it.
Even without a music theory background, with practice you can identify the different parts of a song, how they are made of smaller parts and how they relate to each other. This is a great tool for representation, as it gives you an outline for examining the music and planning your map.
These are some of the typical sections present in songs:
- The introduction introduces the listener/player to the vibe and basic rules of the song/map.
- The verses usually work at an intermediate intensity, applying the ideas of the song/map.
- In some genres, some verses (sometimes called build-up) work to increase the intensity of the music/map in preparation for the main part of the song/map.
- The chorus (in some genres replaced by a drop) is the "heart" of the song/map and usually has the most intensity.
- The bridge is normally an intermediate intensity section that changes the tone of the song/map and resets our expectations. Sometimes introducing new elements of the song/map not present before.
- Some songs/maps will have an outro to slowly disengage from it.
TIP
When you begin a map, spend some time understanding what sections the song has and how they relate to each other. This will help you make better use of consistency and variation.
Identity
Identity refers to a map being memorable, leaving a mark in the player, encouraging players to replay it and differentiating itself from other maps.
This can be achieved through good representation and gameplay. However, there are additional, subtle details that may help a map generate identity. Highly specific and well executed representation choices, encouraging unusual playstyles, perfectly executing a very specific gameplay idea, memorable visuals, etc.
Sometimes, it is precisely the ways in which maps cleverly break standard rules of mapping that they become memorable. Good understanding of these rules and how they can be broken without making the map unplayable is key to pulling this off.
There is not much science to describe identity, as it is on the far artistic side of mapping, but it should be noted that it does often matter. The most popular and renowned maps tend to be those that have great identity on top of competent representation and gameplay.
Examples
- https://allpoland.github.io/ArcViewer/?id=2853e&mode=Lawless&difficulty=ExpertPlus is extremely memorable because it introduces actual physical jump patterns in a fitness map in a song called "Jump Around" while still being playable and fun.
- https://allpoland.github.io/ArcViewer/?id=2dd7f focuses entirely on palm-out hits that require a lot of physicality to play, while still providing an interesting map; giving it very clear identity.
- https://allpoland.github.io/ArcViewer/?id=32901 takes a very slow song with growing intensity and heavy emotional mood and maps it as patterns that go from simple to very complex and requiring very large motions as the music's intensity grows. This accentuates this aspect of the song and gives the map identity.
Technical Aspects of a Map
The following sections go into more detail about the aspects of maps that contribute to producing good representation and gameplay. For some of these, you will find links to more advanced guides.
Note Timing
Note timing refers to the specific timing for notes swung at by the player. This excludes walls and bombs that may be used to guide the player/sabers.
When timing, the focus should be on identifying and mapping to the rhythms in the song. Most of the time, this means placing notes at the exact time that sounds appear in the song, however there are cases where you may need to map to a regular rhythm on the grid rather than precise timings. There are various reasons as to why this may happen, and it should be dealt with on a case by case basis by understanding the music properly.
Bad Practice
Do not place notes when there are no identifiable sounds. This is called overmapping and is almost universally problematic.
The vast majority of songs (even those with variable tempo) use simple timings that require only 1/2, 1/3, or 1/4 editor precision (occasionally 1/6 or 1/8 precision is used). There are songs that use more complex timings, however this is rare. In many cases where a mapper thinks higher precision is required, they either did not align the audio properly, or are overthinking the rhythms of the song.
As long as you have setup your audio properly (which may involve adding all the necessary BPM changes to keep the map aligned with the changing tempo of the song), mapping to the most clearly identifiable rhythms with simple precision will usually provide a good result.
Vocals and Live Recordings
Even when the sounds in the song don't align to simple precisions, you may want to snap the notes to a simpler precision, or the intended rhythm. This is often the case with live recorded songs with imperfect timing, and especially when timing vocals.
Vocals are normally difficult to time because they are generally a low attack (slow to begin) sound, and vary slightly from the beat because of human error. Trying to accurately map these smaller timing variations usually makes the map feel worse to play. Instead, stick to the intended rhythm implied by the music.
TIP
When mapping vocals and/or live recordings, stick to the intended rhythm and simple precisions, rather than precise timings.
 |
|---|
| Map to the intended rhythm over precise variations in timing |
Identifying Timings
There are three main methods for determining the specific timing of a note.
Listen to when the sound happens. This should be your primary method to identify timings. Turning on note hitsounds on the editor and checking whether the mapped sound and hitsound align in time is a good way to check your timings. Slowing down the audio may help in some cases, but may also distort the sound too much.
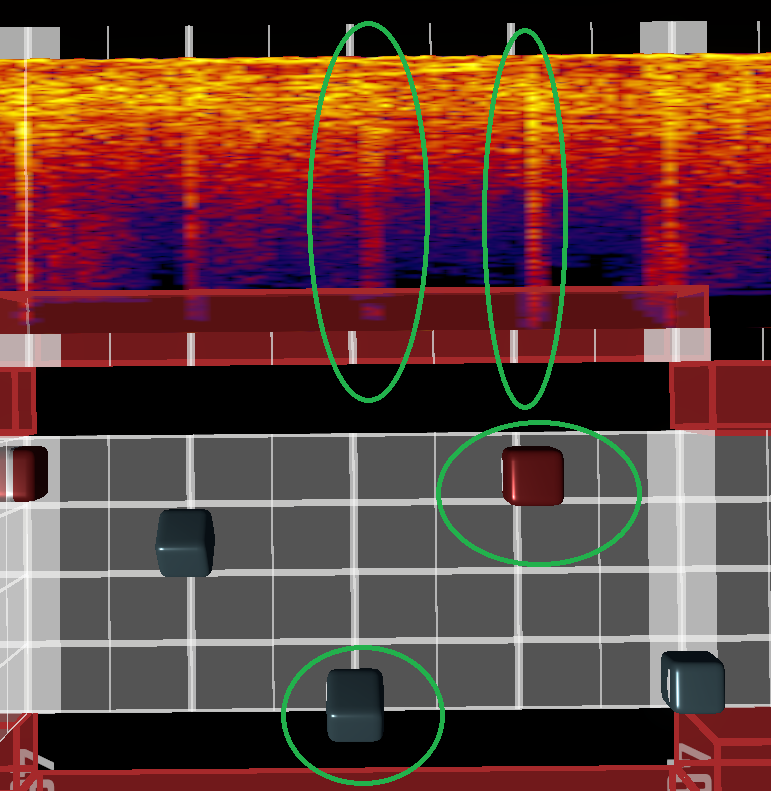
Understand the rhythm and intervals between notes in the song, and use that to deduce the timings. This can be great to sanity check or to produce accurate timings quickly when the rhythm is simple.

This syncopated sequence of intervals (3/4 - 3/4 - 1/2 - 2 beats) is common in Dubstep and repeats consistently throughout the song. Understanding that helps with note timing. Use the spectrogram to validate or help you identify specific timings. This method should be used with care, as the spectrogram will often not represent some sounds accurately (like deep bass and vocals) and over-represent a lot of background sounds. The spectrogram should never be the only method you use.
TIP
Time to what you hear above everything else.
The Advanced Timing page contains some additional topics like variable BPM and Swing in songs.
Read more...
GalaxyMaster has some tips for determining timings.
Handedness and Hit Type
The handedness of a hit refers to which hand (or hands) swing on that hit. Thus, there are three possible values for handedness:
- Left hand.
- Right hand.
- Double.
There are many ways in which handedness is particularly relevant:
- Handedness is a simple tool for representation. While not ideal, mapping different instruments to either hand is a simple way to produce decent mapping. More flexible approaches will instead focus on how handedness changes between swings, and how that relates to the variations in the music as a means of representation.
- Double swings are a great way to increase emphasis.
- Changes in handedness between hits can influence the swing speed. A section where all hits have the same handedness will feel considerably faster than one where they are alternating hands (a stream).
In close relation with handedness, we can consider hit type. Larger swings require a faster swing with more distance and precise swing angle to perform. The following is a list of some standard hit types that mappers consider:
| Name | Example | Typical Uses |
|---|---|---|
| Single | 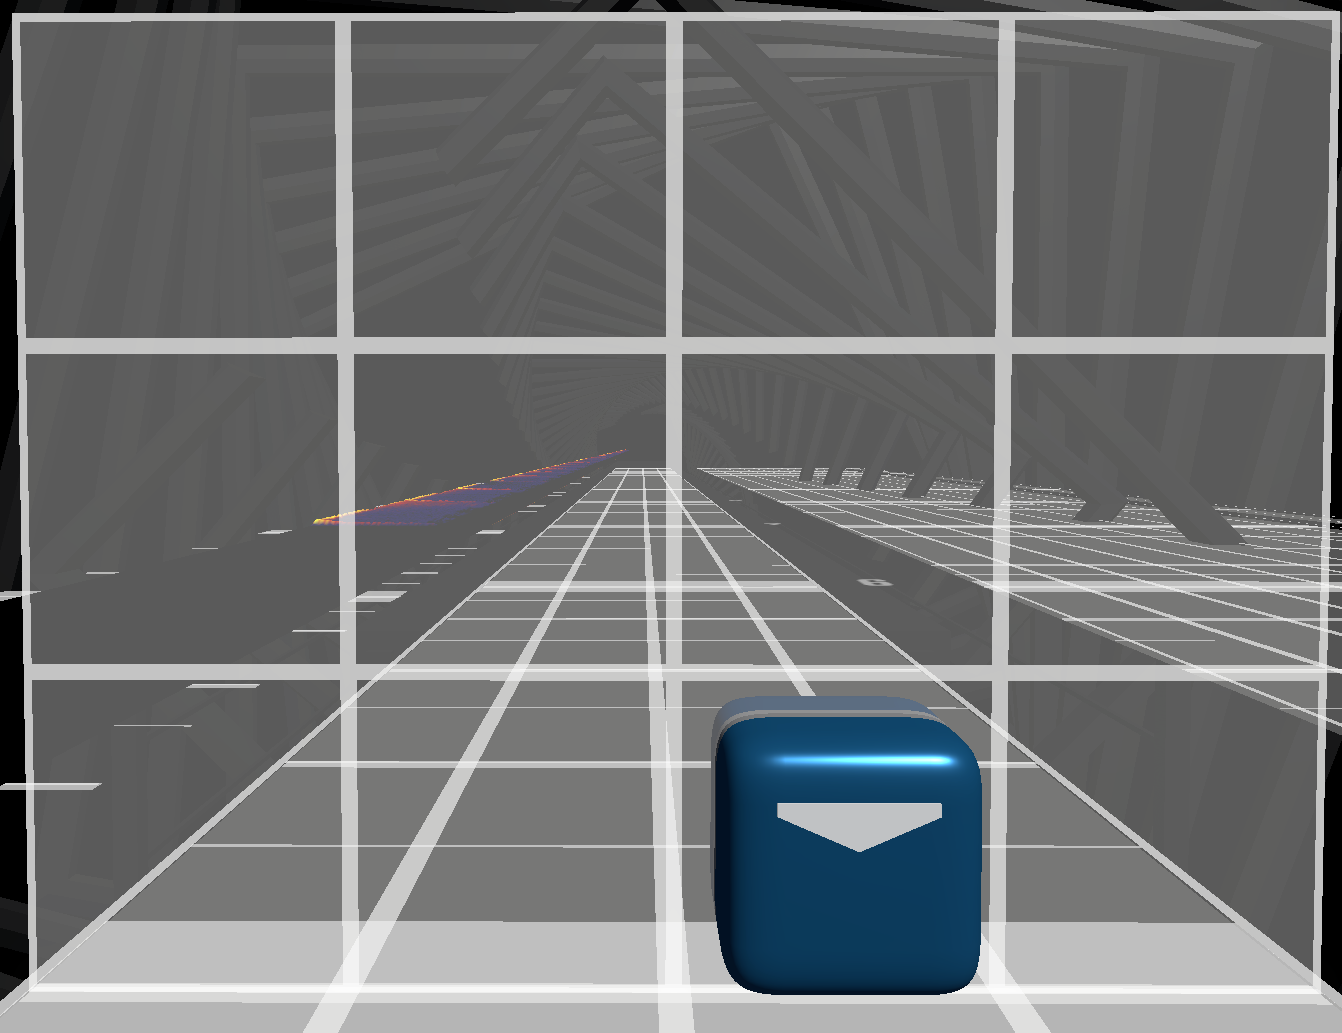 | Base hit, for normal or small sounds. |
| Slider | 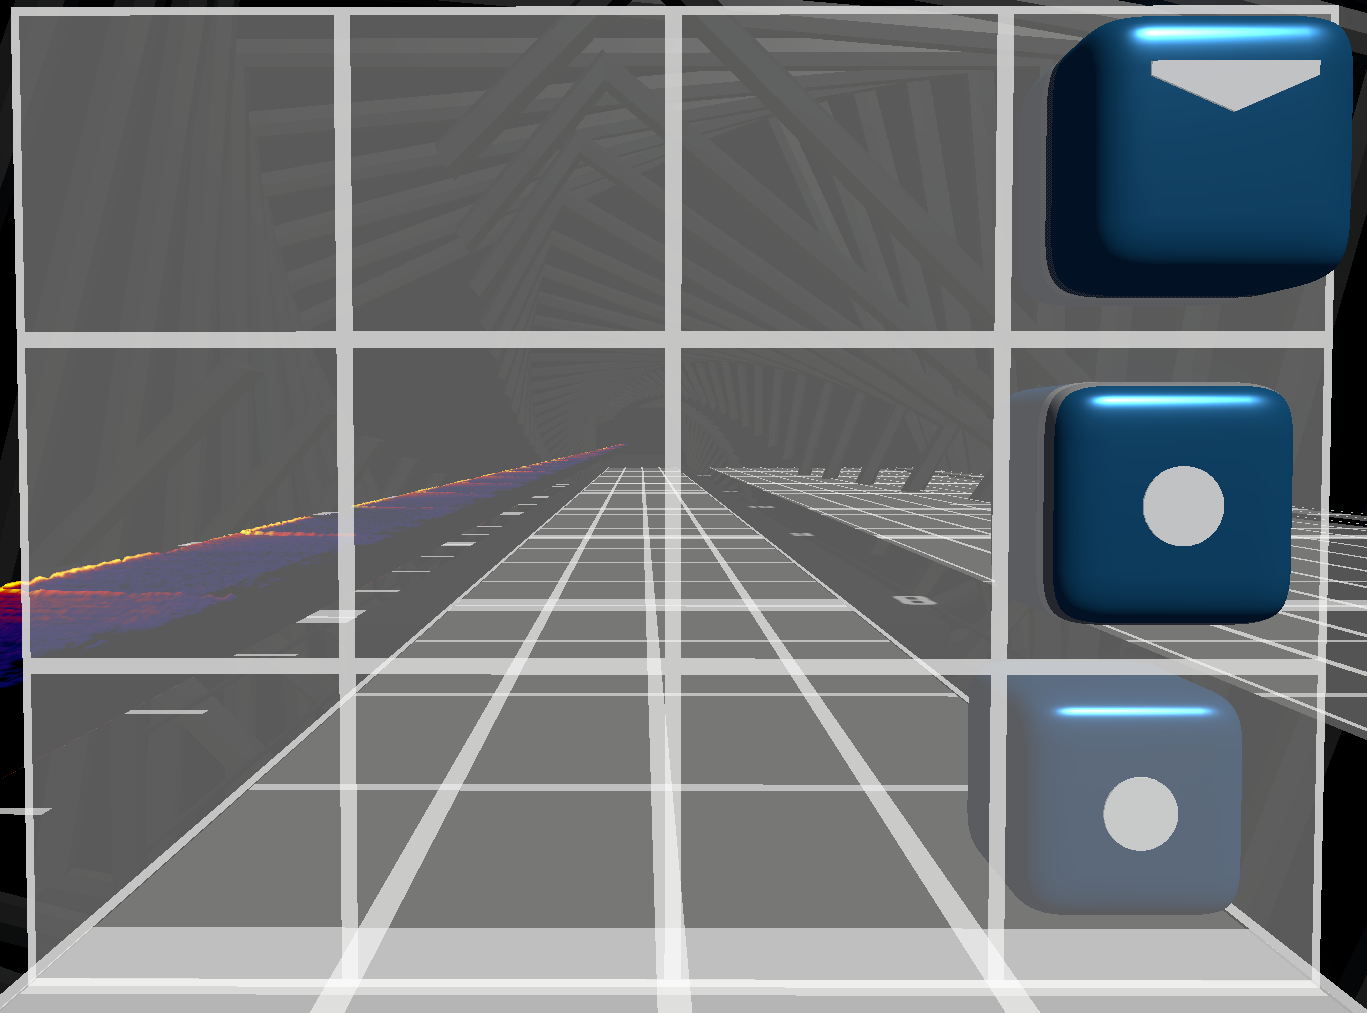 | Sounds with longer duration, reverberation or echo. "Burst" sounds. |
| Chain | 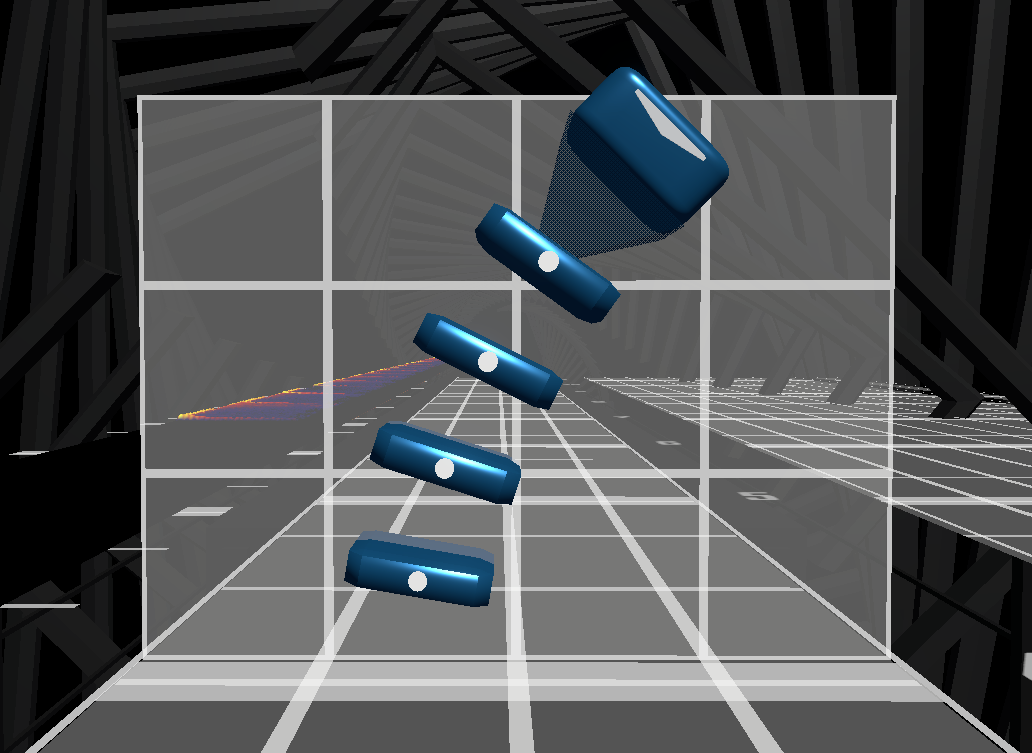 | Similar use to sliders. |
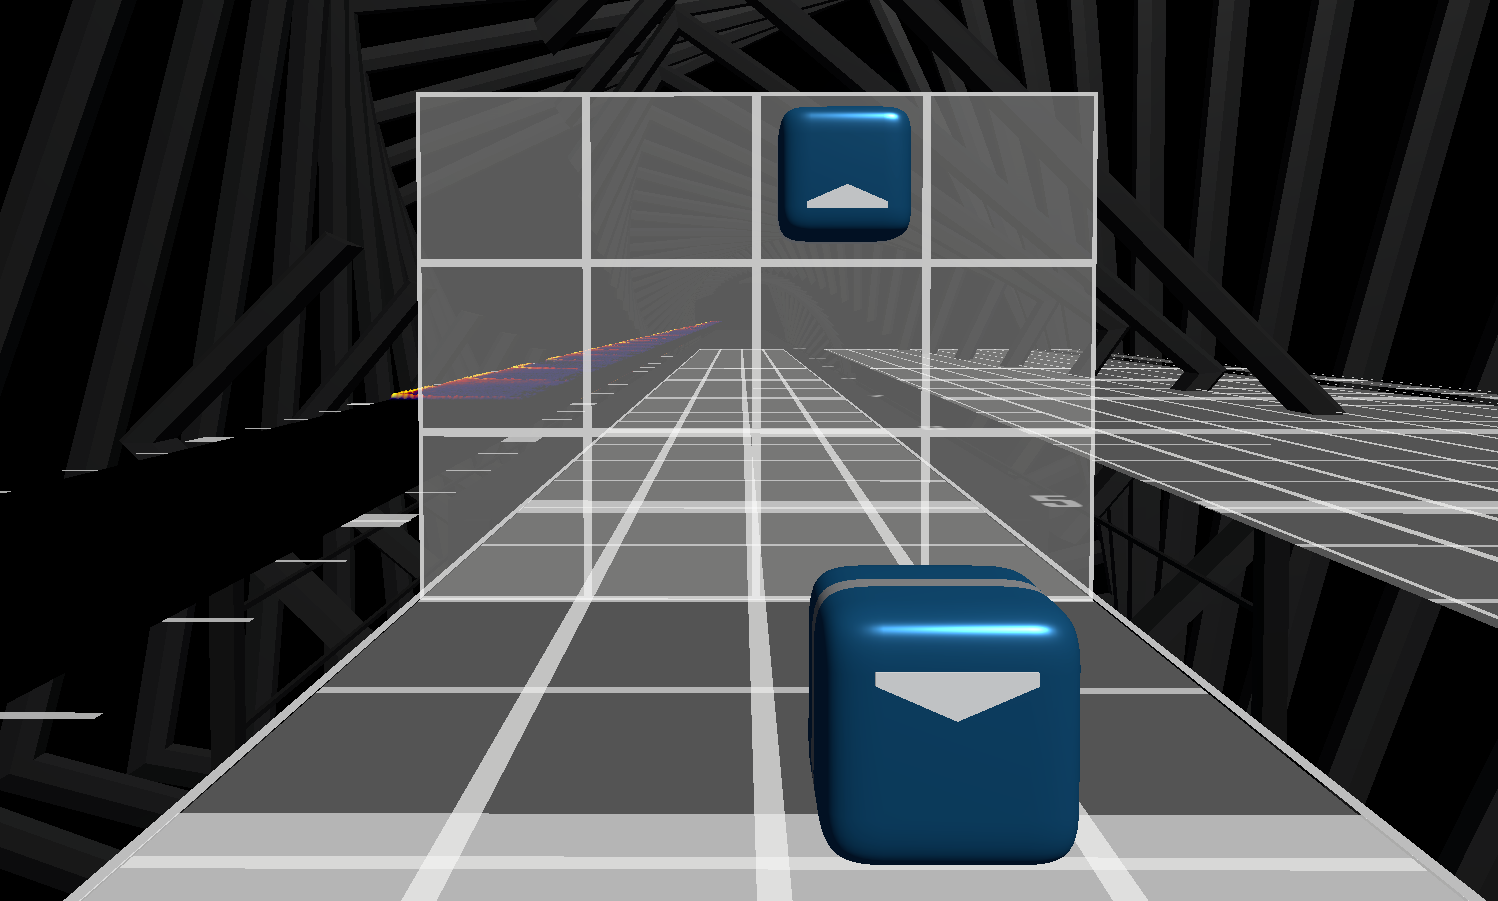
| Stack | 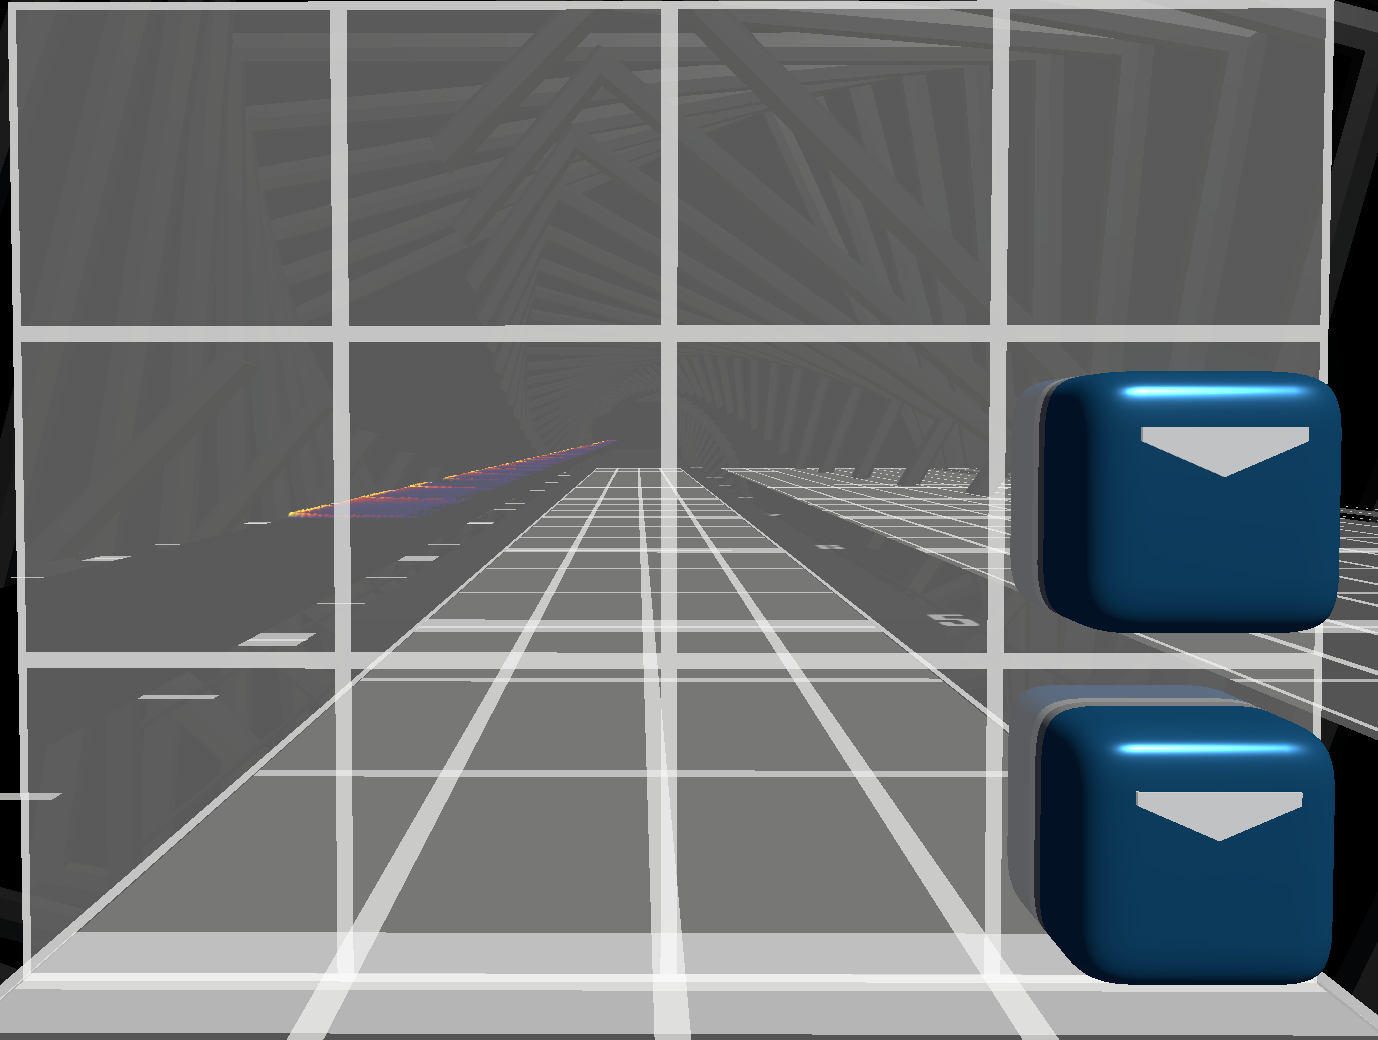 | Sounds with moderate emphasis. Percussion. |
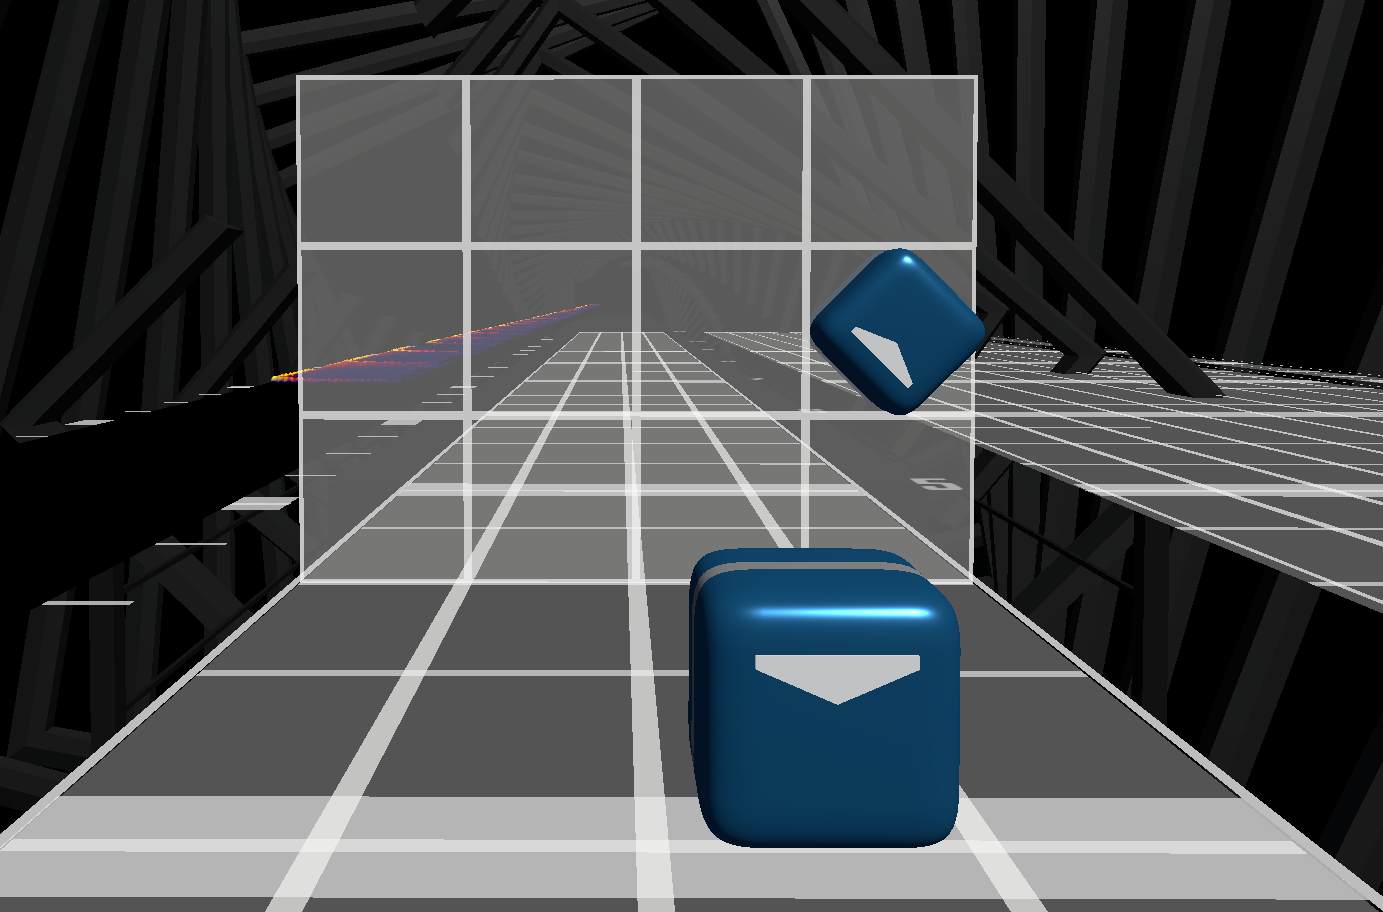
| Window | 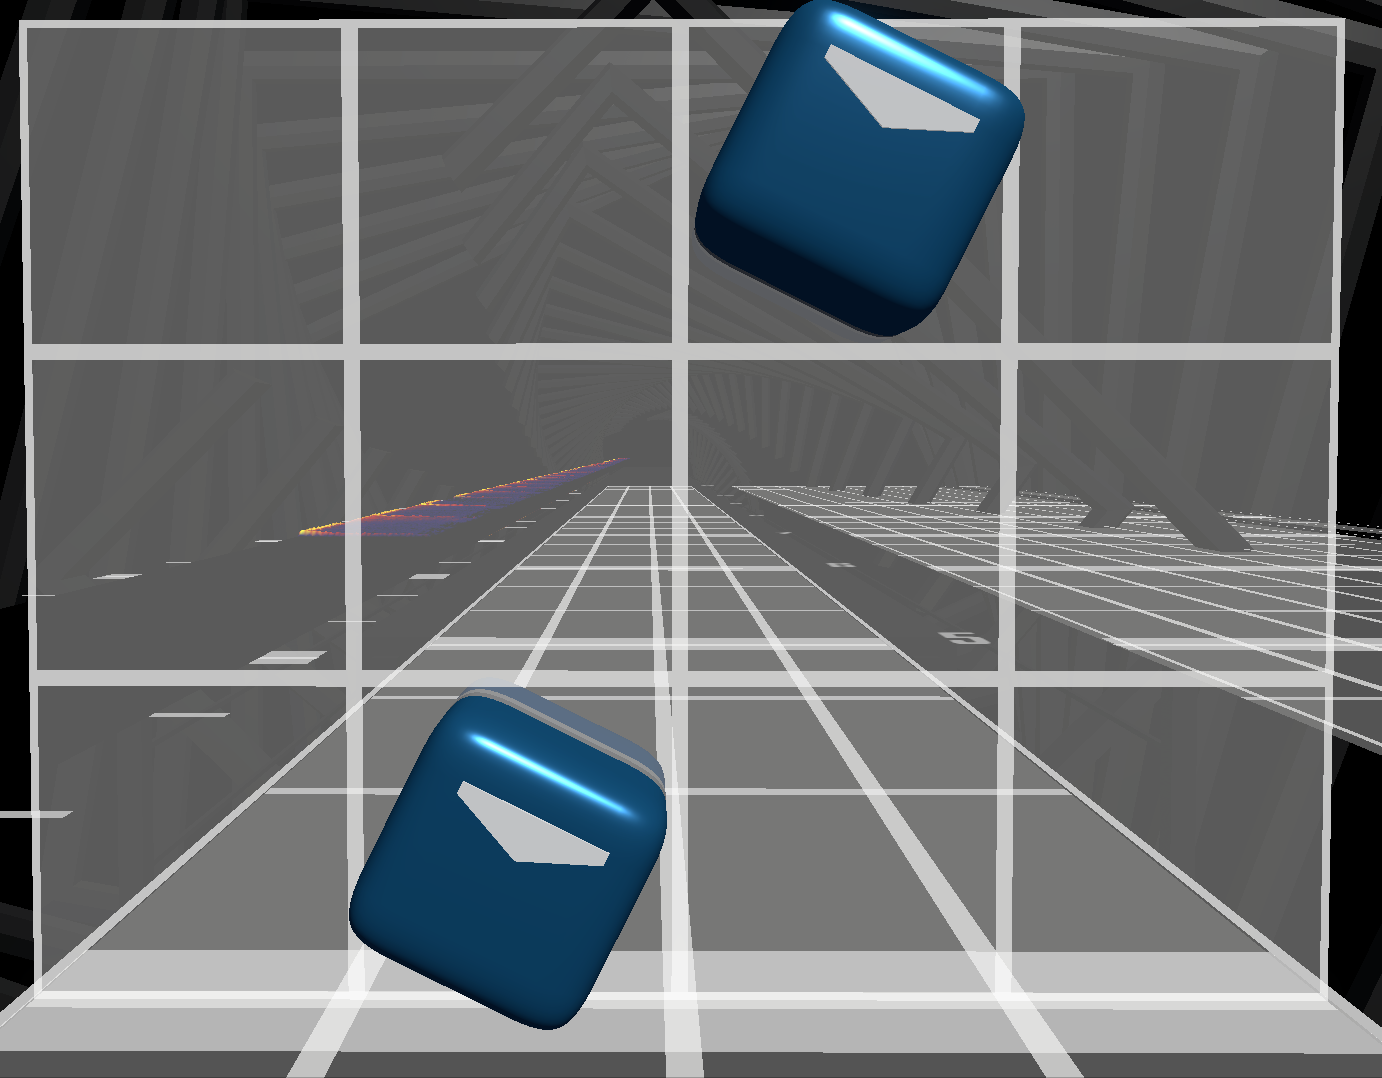 | Intense sounds. Good for avoiding vision blocks. |
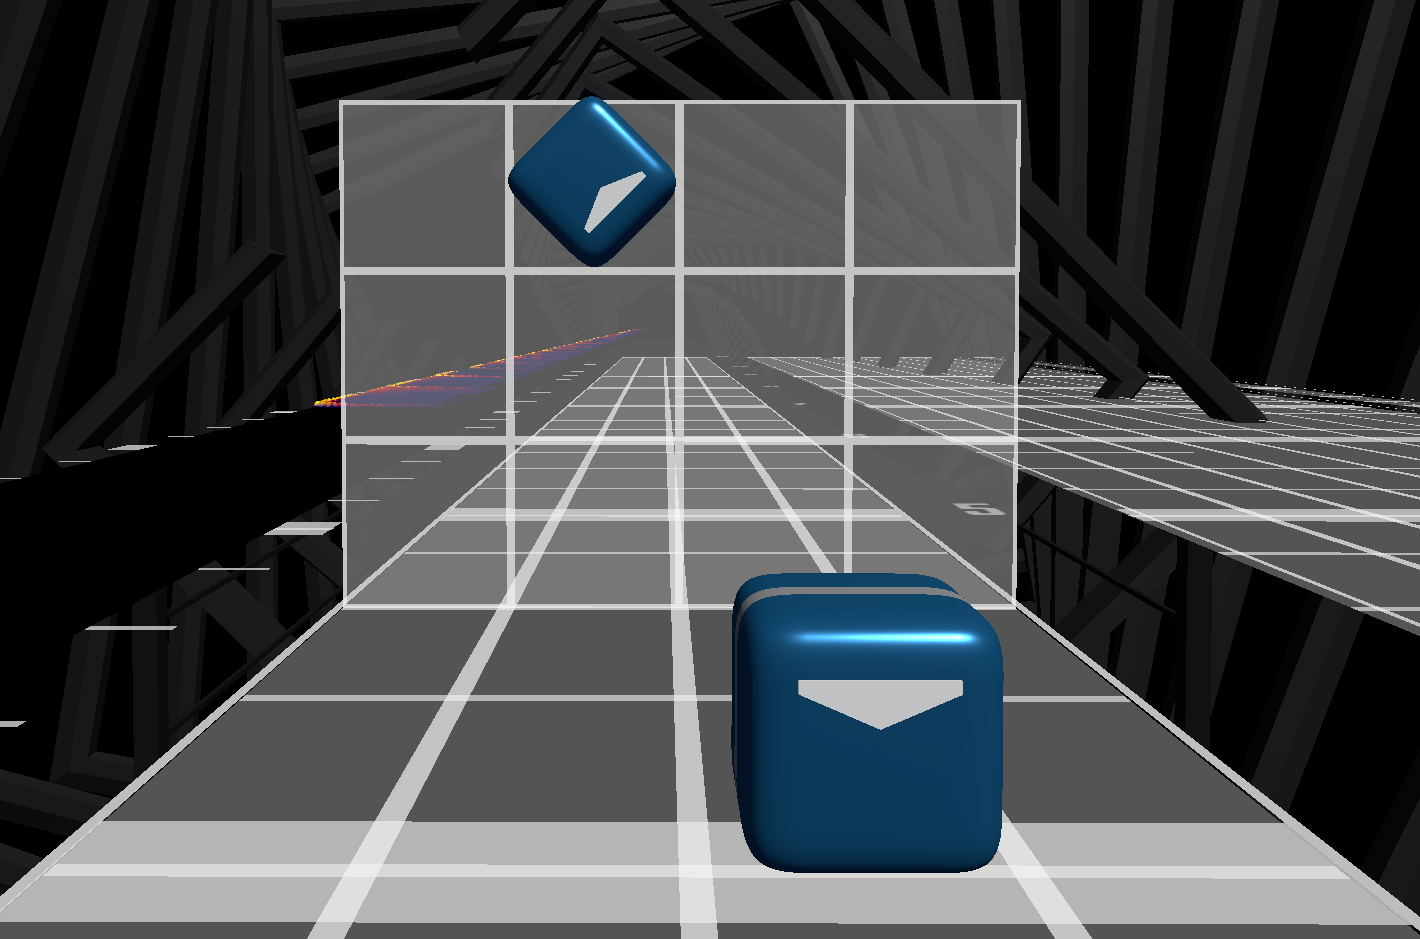
| Tower | 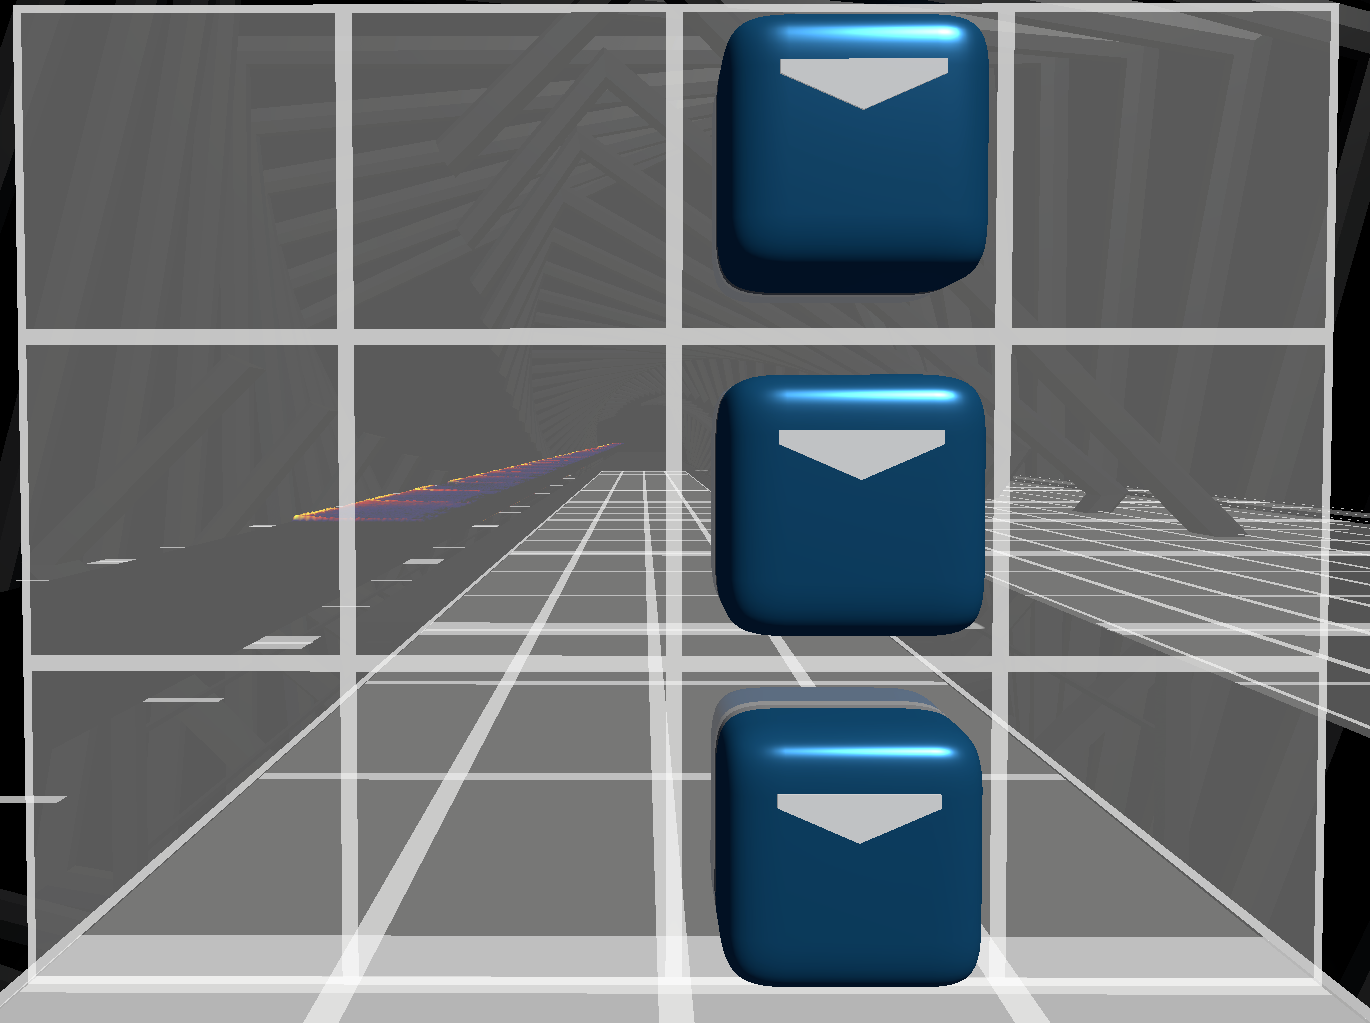 | Very intense sounds. Very strong emphasis. |
NOTE
The expression "hit type" is not standard at the time of writing. Though most or all mappers know the names of the typical hit types and their precise meaning, there is no agreed upon word for the abstract concept.
While not set in stone, mappers/players typically understand order of intensity to be:
Single < 2 note slider/chain < Stack < 3 note slider/chain < Window < Tower
Additionally, dot notes instead of arrows are often used to slightly decrease the feeling of intensity in a hit, even if it has very little gameplay difference. There are also hits that do not explicitly fall into any of these hit types. There is nothing wrong with using them if you feel they help you represent the song better.
Hit type is one of the most basic ways to provide emphasis. It is generally good practice to be consistent with which instruments/types of sounds you represent with which hit type.
Hit type is also relevant for difficulty and sensation of speed. With larger swings:
- The saber needs to move a larger distance, forcing faster swings.
- The angle of the swing is enforced more strictly.
 |
|---|
| Larger swings enforce angles more strictly if all notes are hit, especially when playing for accuracy. |
- The timing of the swing is stricter, as the player will need to move the saber a longer distance in order to cut through all the notes within the same time window.
As a result, larger swings are more physically intense, which is a big reason why hit type is used for emphasis. From a gameplay perspective, however, abusing large swings can make the map unnecessarily tiring to play and introduce artificial difficulty.
Parity
The most important aspect about parity is covered in the basic mapping page. In short, keep it.
TIP
Adapting your creative vision to keep parity consistently is almost always better than breaking parity for the sake of representation or identity.
Keeping parity affects the choice of patterns, but it does not strictly limit the direction of the swings. Up swings can be forehand and down swings can be backhand - these are sometimes called palm-up swings because the palm is pointing upwards. This video demonstrates some more advanced concepts of parity: YouTube
You can and should also play around parity when mapping. By changing the handedness of patterns (e.g. swapping doubles for stacks and vice versa, or swapping left and right hand), you can make a certain hit have the exact parity that you want. This is a powerful tool, both for representation and gameplay purposes.
As described at the beginning of this page, controlling parity this way usually has other downsides and constraints that will make it tricky, but the payoff can be worth it.
Forehand and backhand hits are not interchangeable, they are inherently asymmetric.
Comfortable angles and positions are different for forehand and backhand hits. Backhand hits tend to be more comfortable in the outer lanes and forehand hits more comfortable in the inner lanes.
Palm-out backhand hits are a lot more difficult to play than palm-out forehand hits, whereas palm-up backhand hits can be easier than palm-up forehand hits. This relates to swing curvature, described in the section on momentum.
Perhaps more importantly, forehand hits are more comfortable to put emphasis on and typically carry more initiative in rotations and positioning. Since it is easier for the player to follow the movements of the map if you use forehand hits to communicate the key swings for those motions.
TIP
It's easier to establish rotations and postures on forehand swings than on backhand swings.
As an example, entering a lean is much more natural on a forehand swing than on a backhand swing, whereas exiting a lean is more natural on a backhand swing than a forehand swing.
 |  |
|---|---|
| Starting a lean on a forehand is quite natural | Starting a lean on a backhand may feel forceful and challenging |
Unlike keeping parity, these aren't rules that you must follow. Instead, they're notions that you can use to set up your patterns and achieve the exact feeling you're looking for.
Rotations
Rotations are changes in the angle of the note direction between subsequent hits for the same hand.
Rotation angle naturally assumes parity - that is, subsequent hits with opposite parity on the same hand will have no rotation when the arrows are 180 degrees apart, and have a 180 degree rotation when the arrows are the same direction. Rotations also have a direction (clockwise or counter-clockwise).
| Rotation Examples | |
|---|---|
 | No (0 degree) rotation (forehand to backhand) |
 | 45 degrees clockwise (forehand to backhand) |
 | 45 degrees counter-clockwise (forehand to backhand) |
 | 45 degrees clockwise (forehand to backhand), different starting angle |
 | 45 degrees clockwise (forehand to backhand), different positioning. Positioning does not change the rotation measure, but it changes how the pattern plays. |
 | 45 degrees clockwise (backhand to forehand) |
 | 135 degrees clockwise (forehand to backhand) |
 | 180 degrees clockwise (forehand to backhand) |
 | 270 degrees clockwise (forehand to backhand). If this were backhand to forehand, it would only be a 90 degree rotation. Parity matters as it drastically changes how it is played. |
Rotations are one of the most important aspects that affect flow, and are closely related to leaning. Large rotations can also be a form of representation and provide some emphasis.
TIP
A map with good flow will keep rotations reasonable and consistent throughout, in both angle and direction, with harsher rotations happening for more emphasized swings and giving enough time to execute them.
The angle (degrees) of a rotation is not the only measure of its playability. The positioning of the notes, the speed of the swing, the starting angle, and the direction matter dramatically.
There is a particular relation between which hand is rotating, parity, and direction of the rotation that affects its intensity and feel. This is called swing curvature, which can be positive or negative.
Positive Swing Curvature
A positive curvature for the left hand is when the rotation is clockwise for a backhand to forehand rotation and counter-clockwise for a forehand to backhand rotation. The rotation direction is flipped for the right hand.
In other words, positive curvature can be boiled down to both wrists tracing )( shaped arcs. Generally, these swings tend to be smoother allowing for larger rotations without much setup.
| Left Hand | Right Hand |
|---|---|
 |  |
Negative Swing Curvature
A negative curvature for the left hand is when the rotation is counter-clockwise for a backhand to forehand rotation and clockwise for a forehand to backhand rotation. The rotation direction is flipped for the right hand.
In other words, negative curvature can be boiled down to both wrists tracing () shaped arcs. These swings are often more taxing to execute, and those with a backhand hit or large rotations are especially harsh on the player without proper setup.
| Left Hand | Right Hand |
|---|---|
 |  |
Examples
| Example | Swing Type | Notes |
|---|---|---|
 | 90° positive | Fluid. |
 | 90° negative | Mildly harsh. |
 | 45° negative | Fluid, thanks to short rotation and forehand hit. |
 | 135° negative | (Starting forehand) Fluid, thanks to momentum. |
 | 90° negative | Very harsh. |
 | 90° negative | (Starting forehand) Same as previous swing. Technical but more feasible thanks to proper setup. |
Take a look at https://allpoland.github.io/ArcViewer/?id=327f6&t=30. In this section, the larger rotations are always done on positive curvature. For example:
- 90 degree transition on left hand on beats 108-109.
- 135 degree transition on right hand on beats 110-112.
- 135 degree transition on right hand on beats 116-118.
By contrast, all rotations on negative curvature are at most 45 degrees in this section. While larger rotations on negative curvature are very possible, this choice allows this section to play really smoothly with fast, snappy swings, despite having large rotations.
While the awareness of swing curvature is valuable when figuring out why some rotations may feel better than others, it should not be taken as a hard rule as negative curvature swings can feel more natural than positive curvature swings on specific setups.
It is by setting expectations and through map context that you can use both swing curvatures to their full potential while preserving good flow.
Swing Speed
Swing speed describes the amount of time between swings on the same hand and is the easiest and most relevant way to measure a map's speed. It will normally have a close relation with the BPM of the song, but depends on other factors. Swing speed does not relate to the actual speed that the saber moves.
Saber speed varies between players, and is much more related to spacing and hit types.
Swing speed is usually measured using effective BPM (eBPM), which is the swing speed of a 1/4 precision stream at a given BPM. Effective BPM is measured for each hand separately, between each two swings on that hand. A hand will have eBPM equal to the song's BPM when it does one forehand and one backhand swing per beat.
The effective BPM of a section is the maximum effective BPM between both hands (so if one hand is fast, the map is fast, even if the other is slow).
Here are some examples of patterns and their effective BPM:
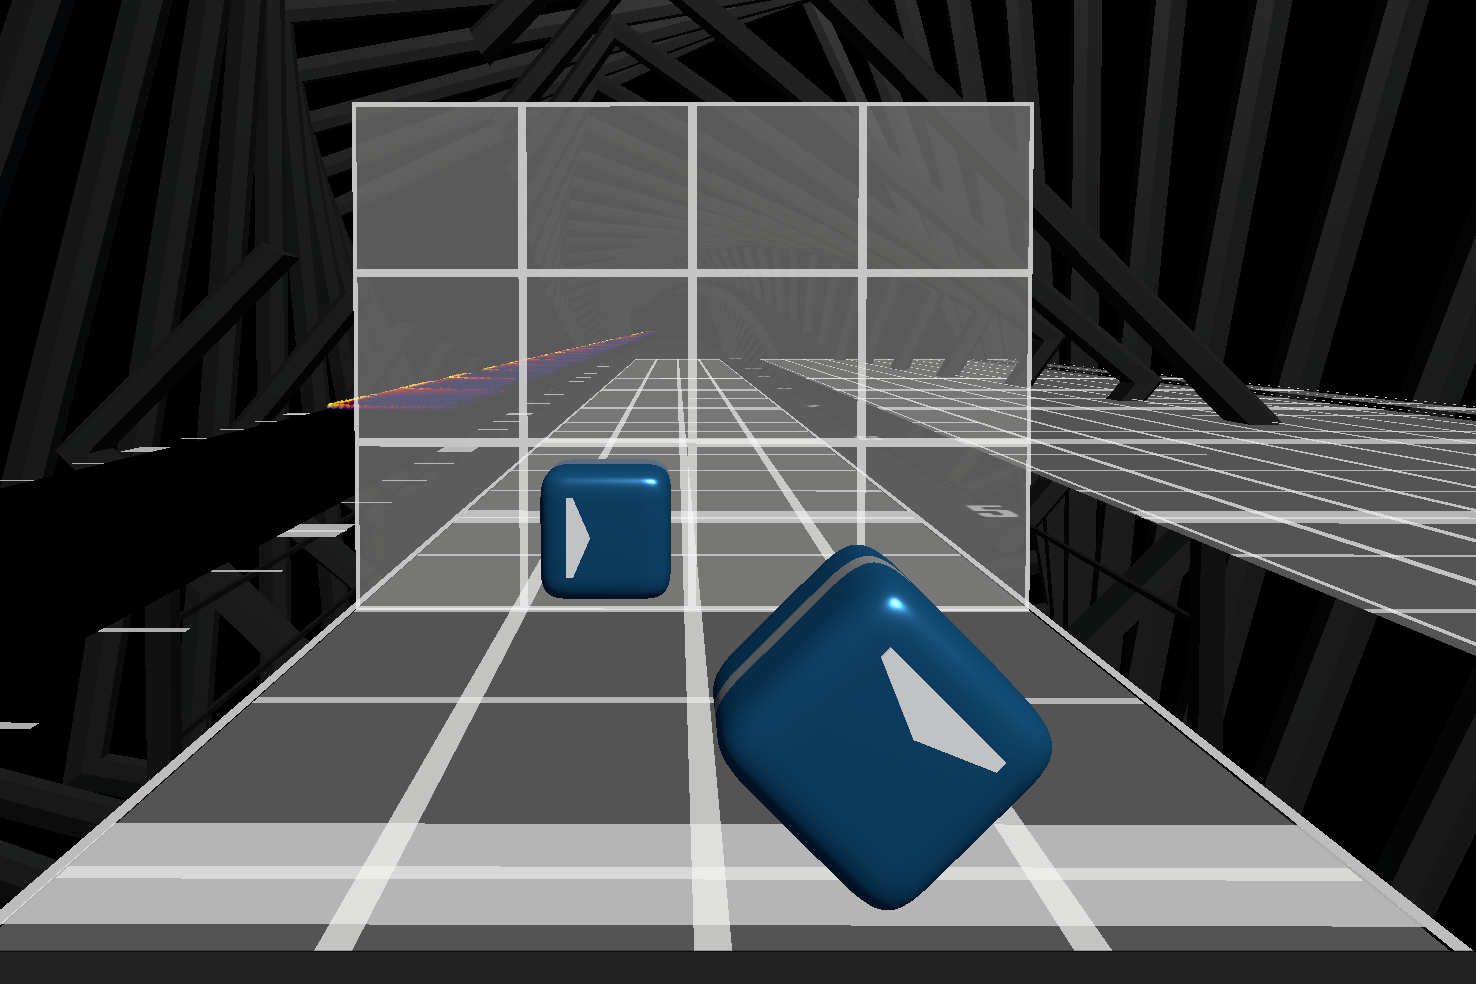
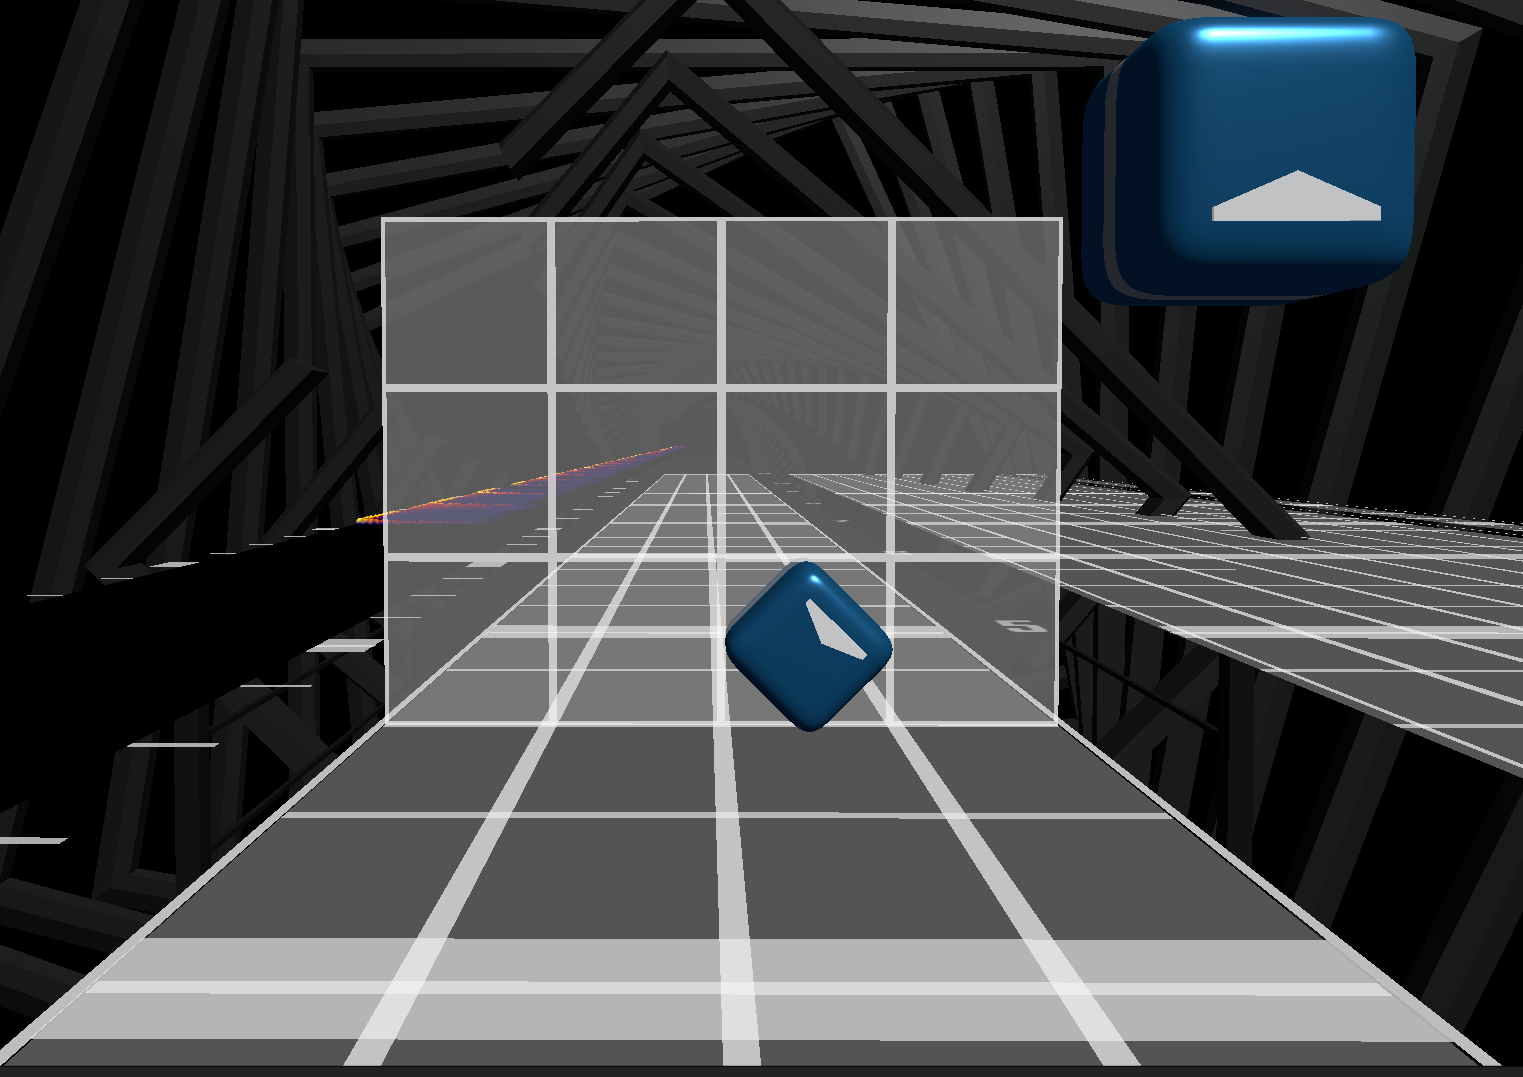
| Pattern | Example | Example (top view) | eBPM multiplier | eBPM at 120 BPM | Notes |
|---|---|---|---|---|---|
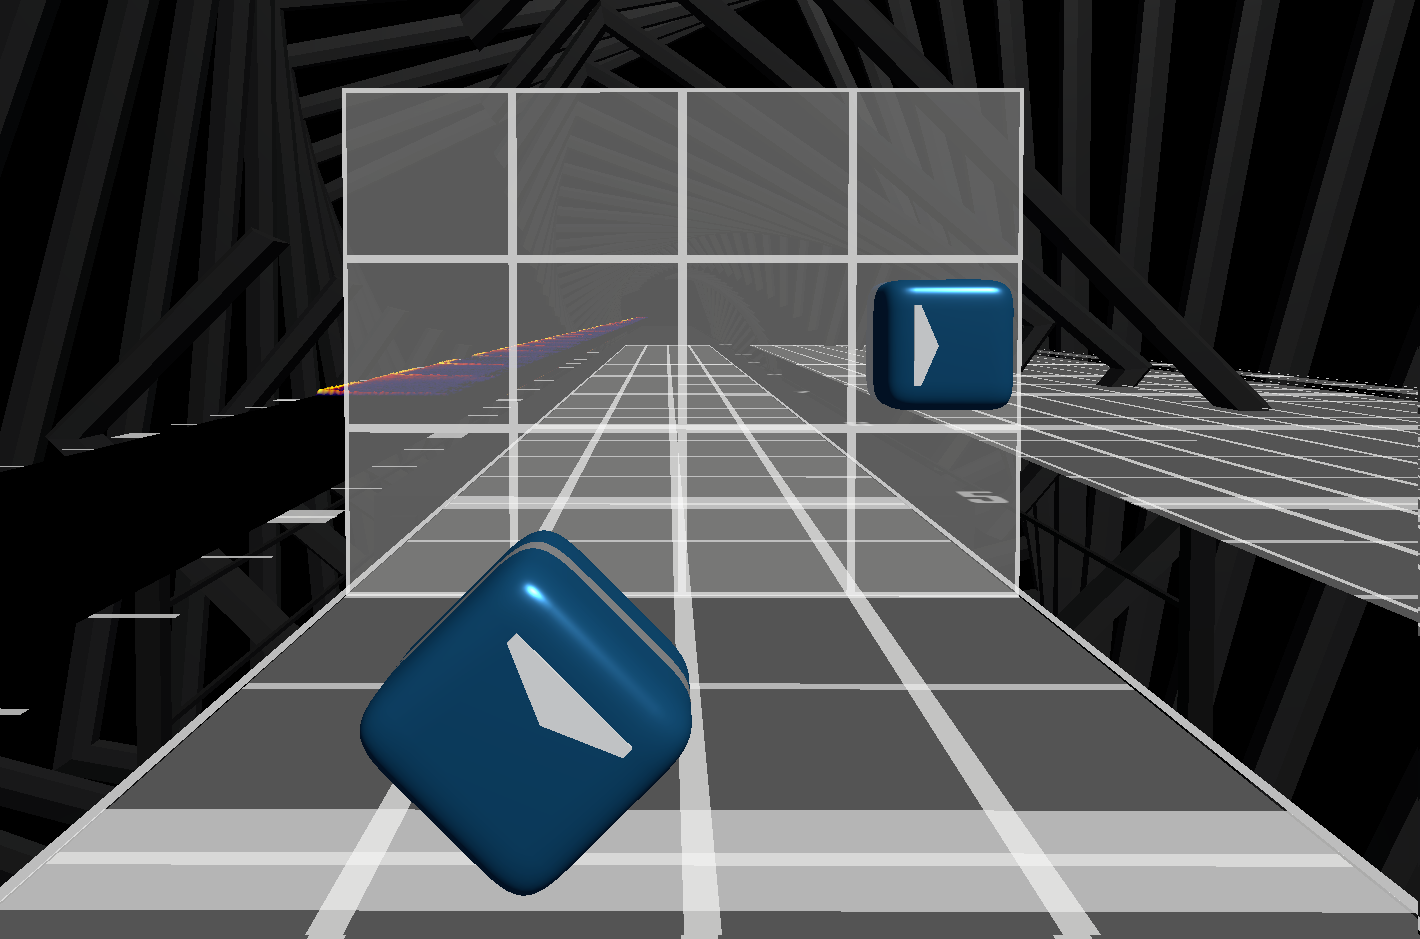
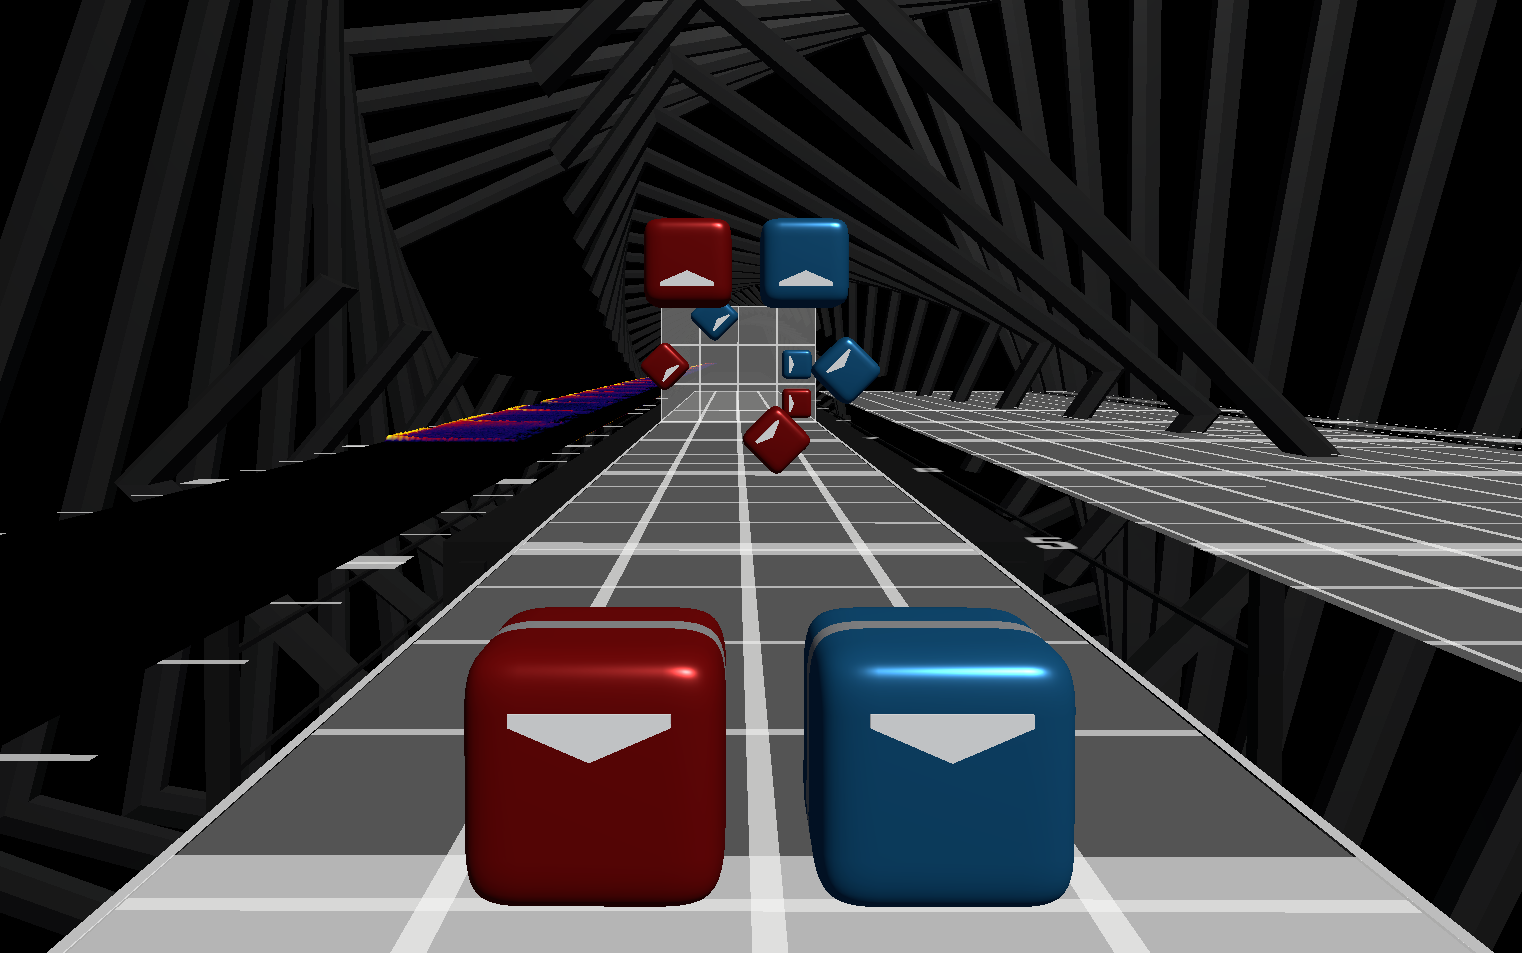
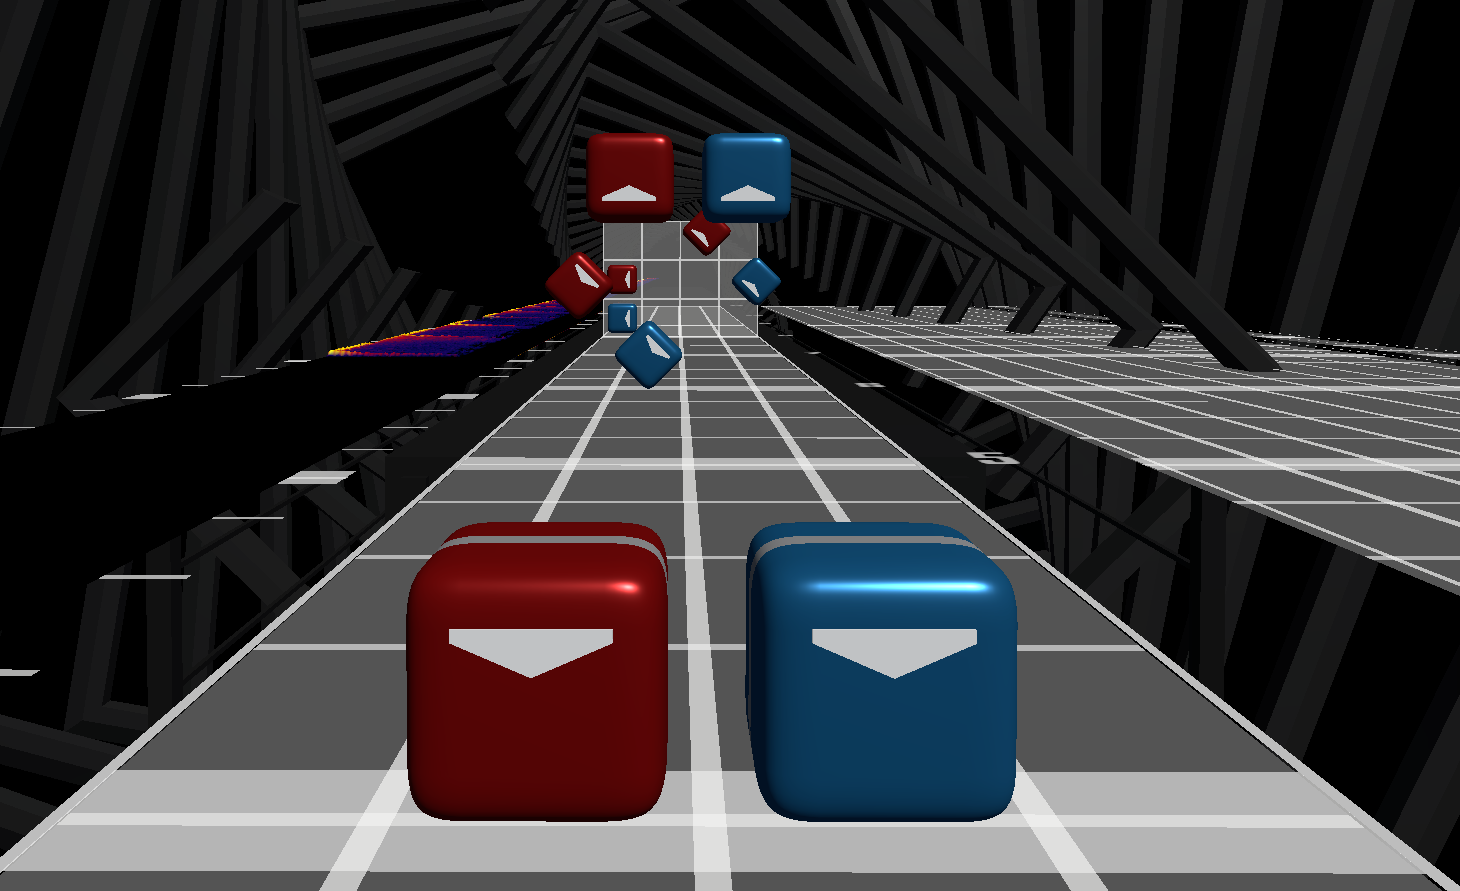
| Stream (1/4 precision) |  |  | 1 x BPM | 120 | Basis for eBPM |
| One-hand jumps (1/4 precision) | 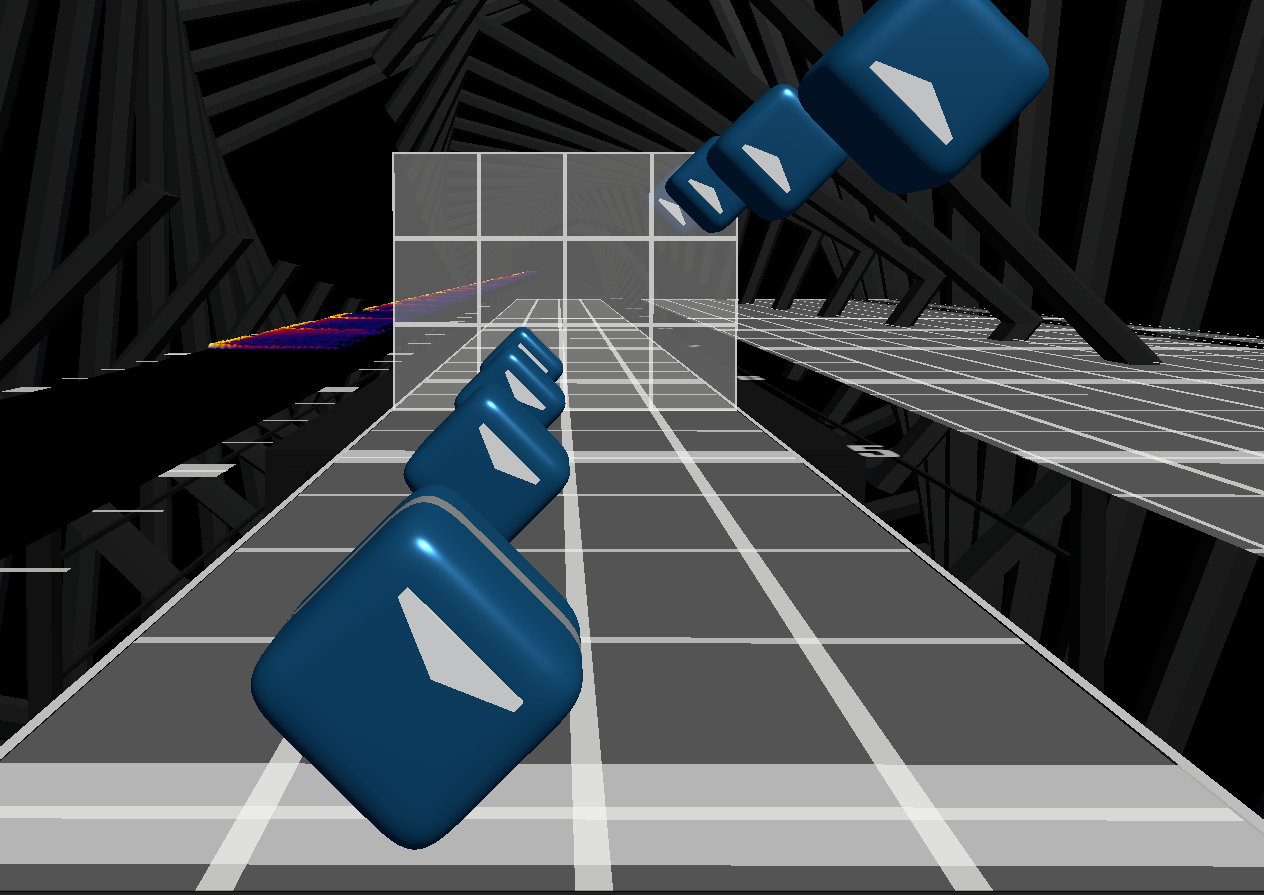 | 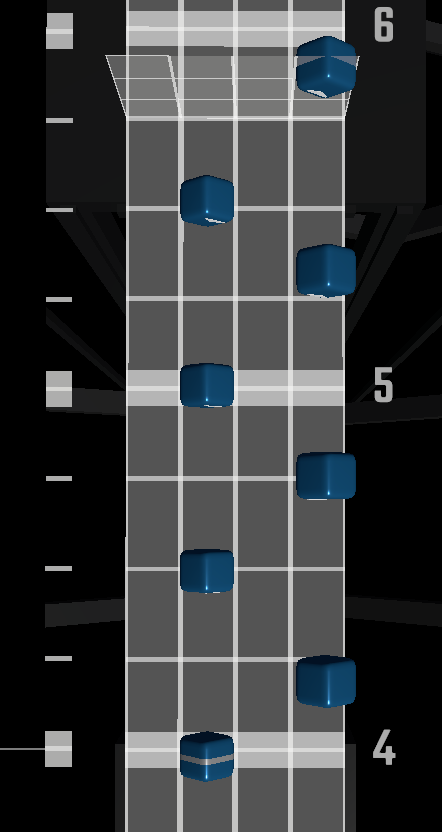 | 2 x BPM | 240 | The hand is doing double work. |
| 1/3 jumps | 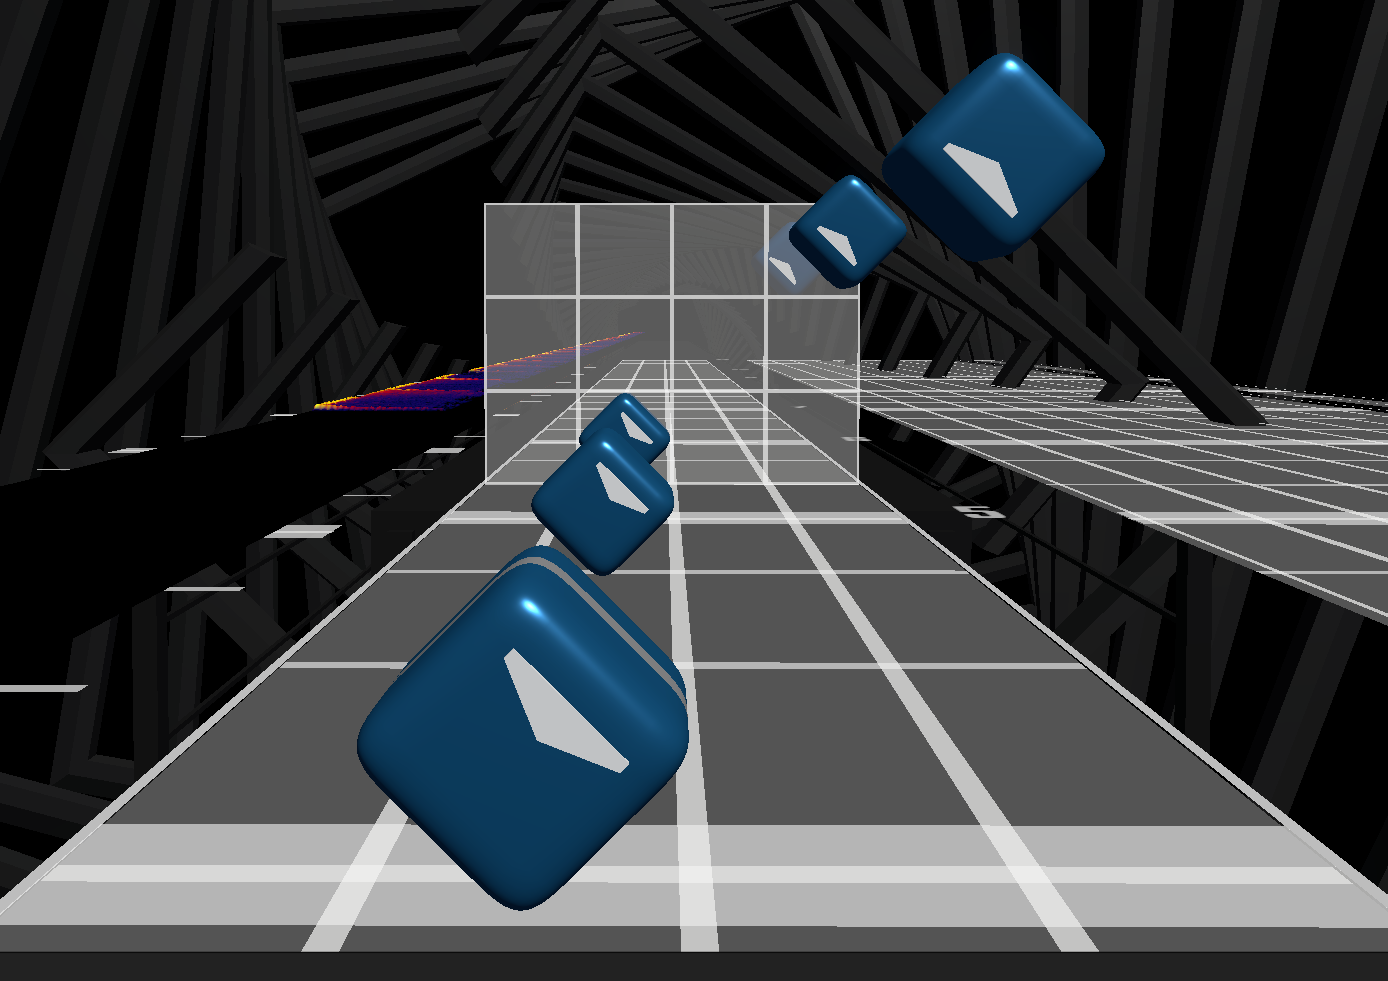 | 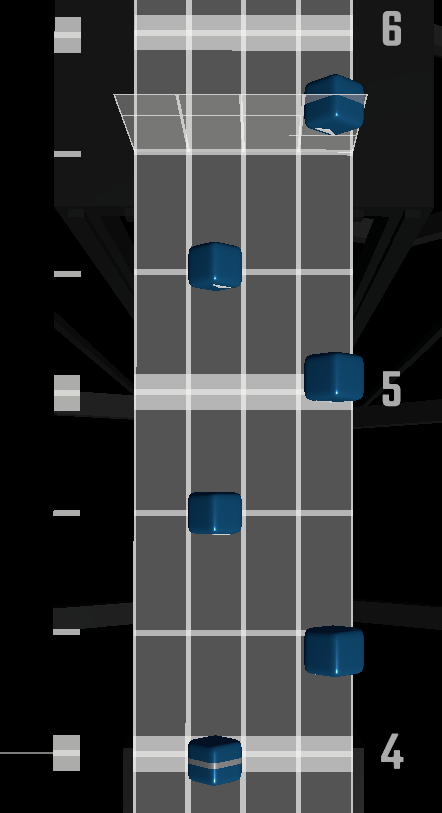 | 1.5 x BPM | 180 | Similar to regular jumps but slightly slower. |
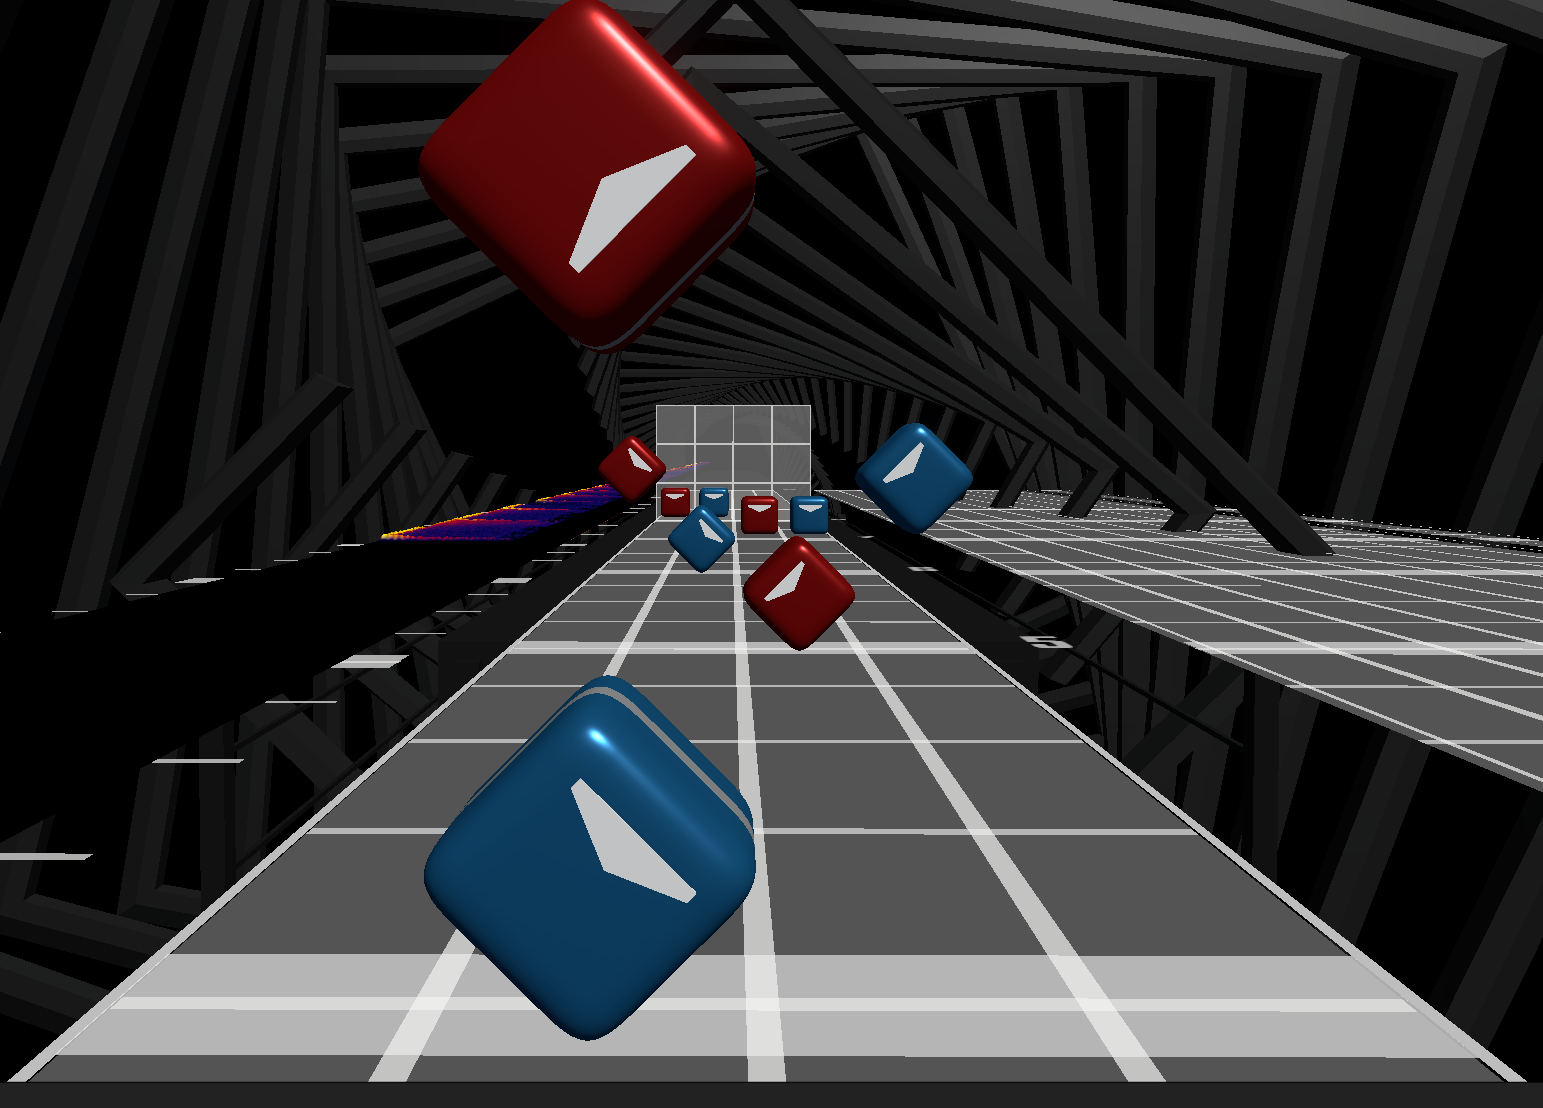
| Flick | 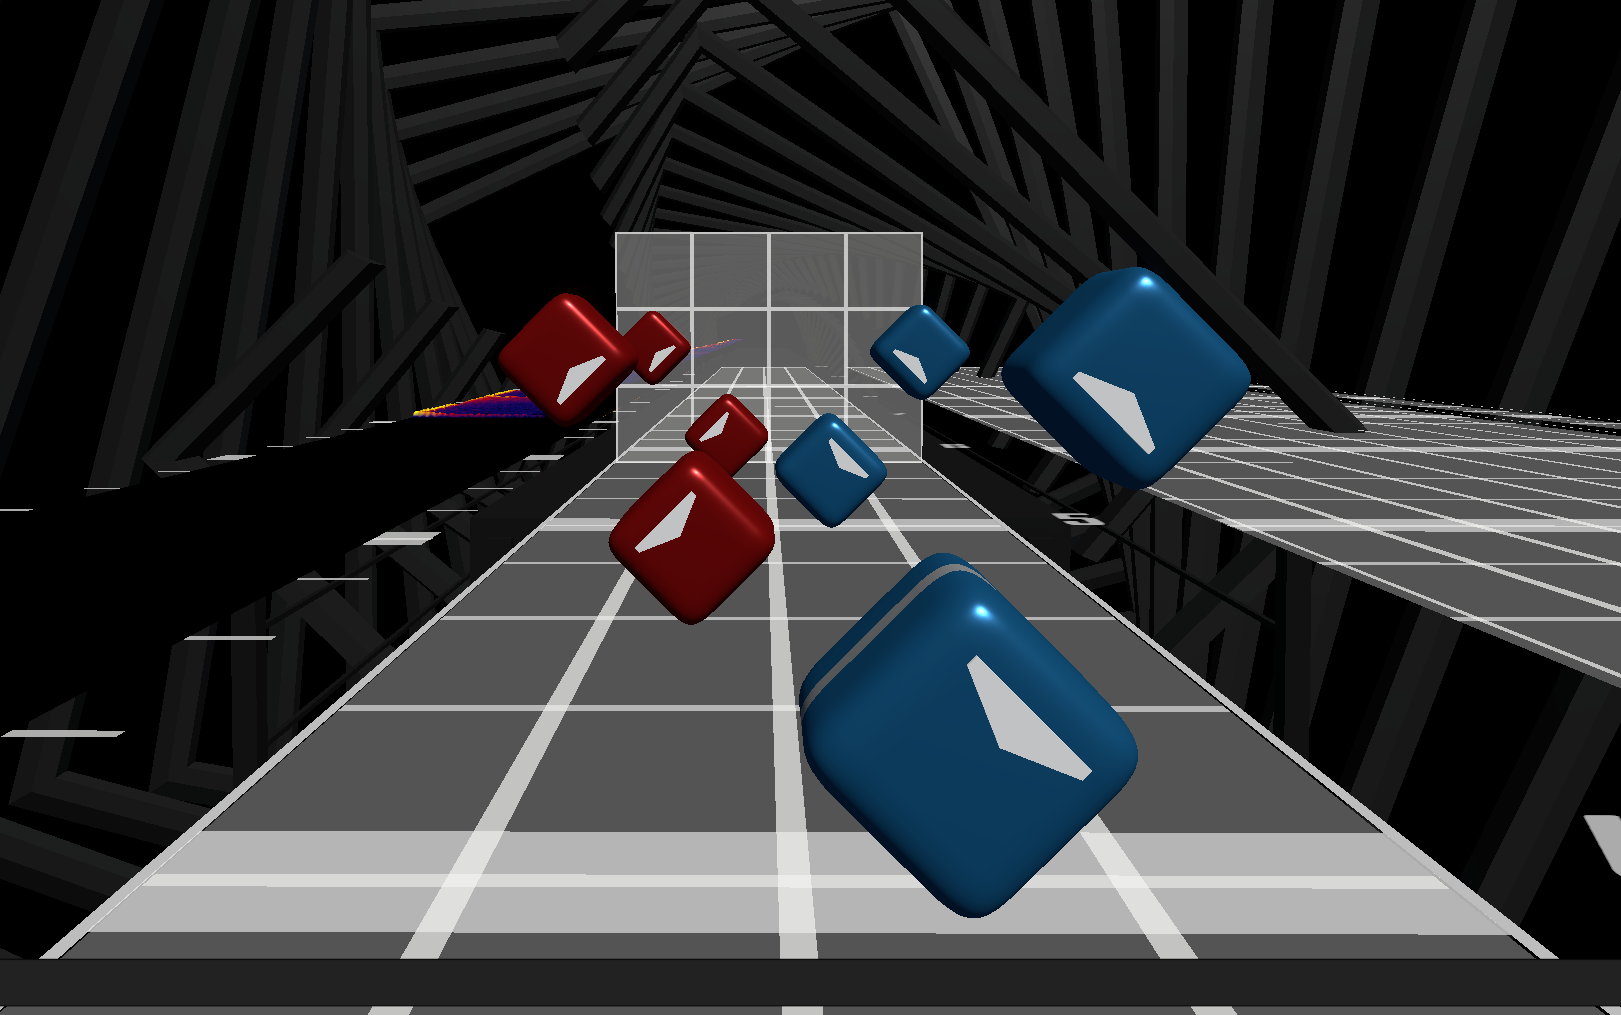 | 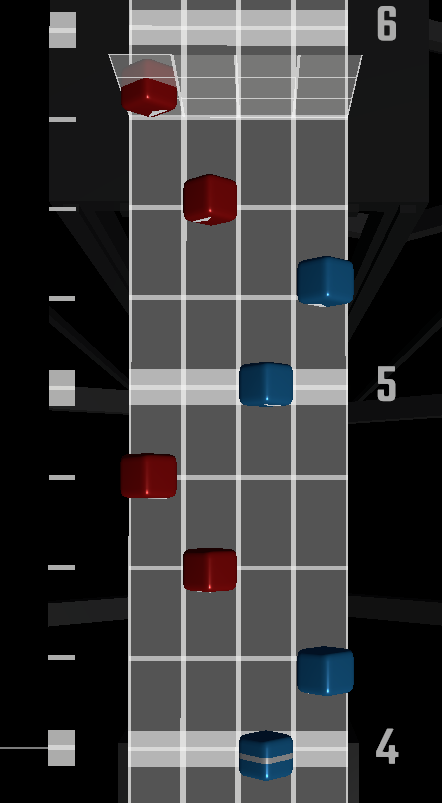 | 2 x BPM | 240 | While this spreads the effort across both hands, the speed of each flick is the same as jumps. |
| Gallop | 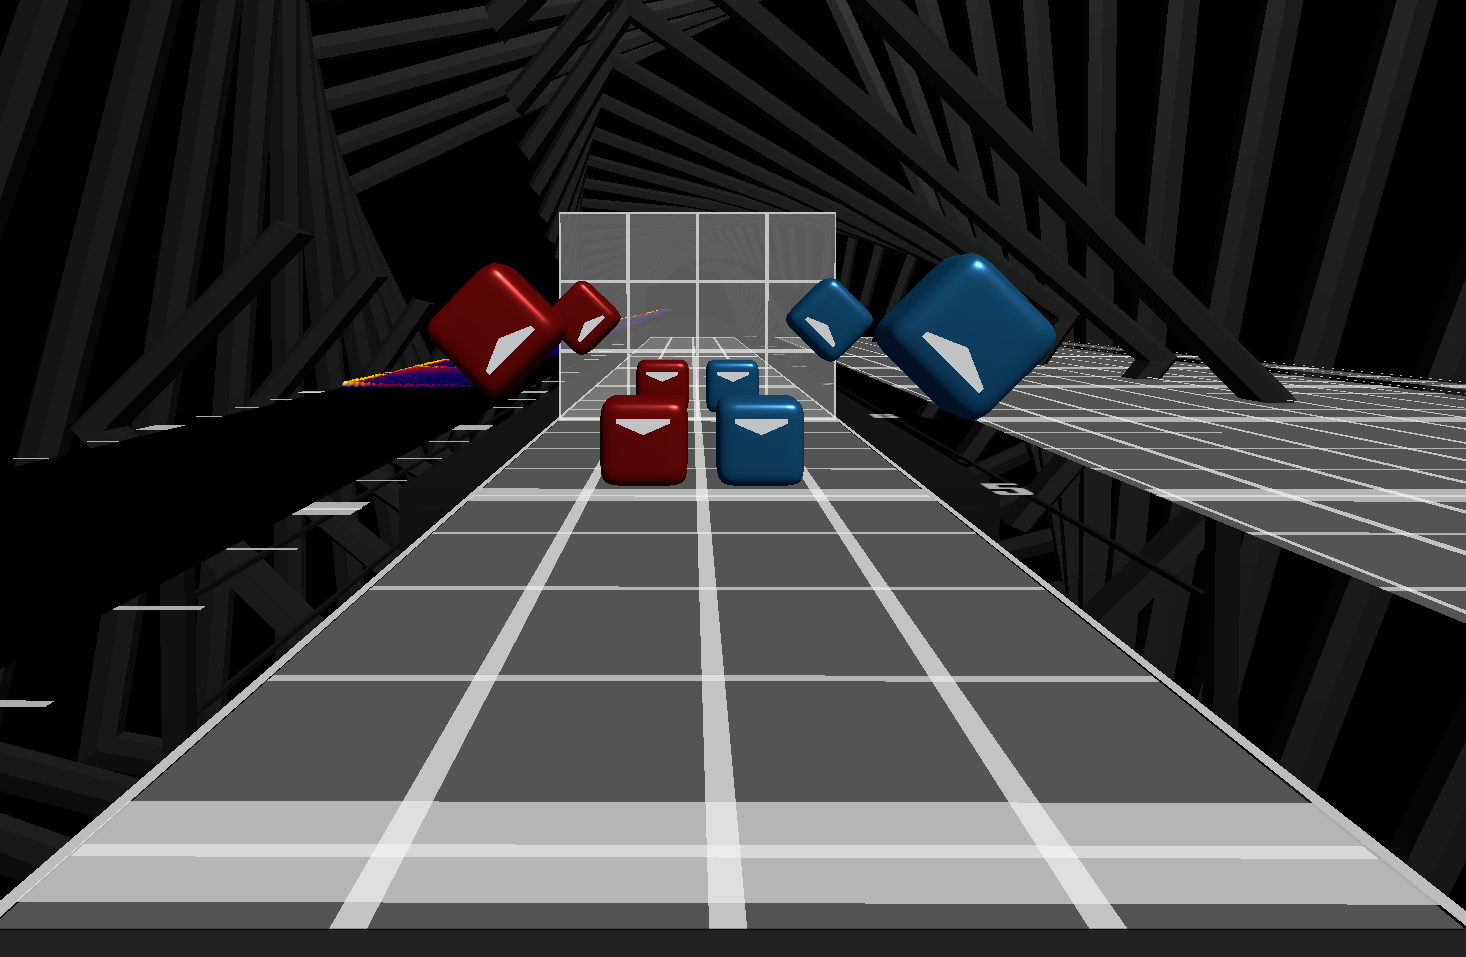 | 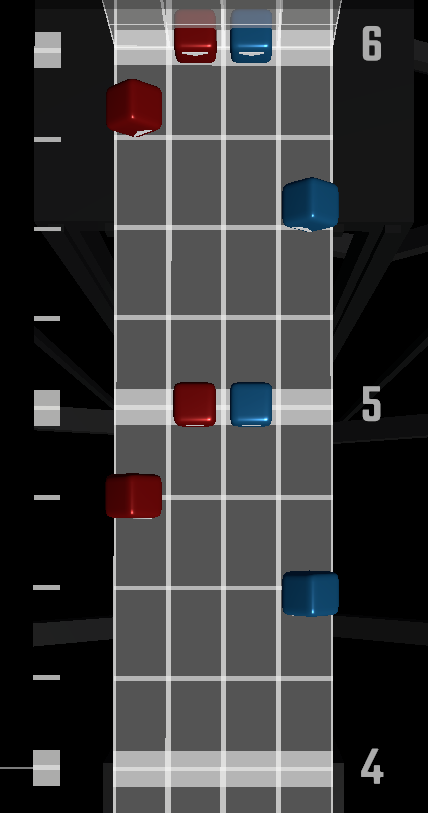 | 2 x BPM | 240 | A gallop is still a flick on one of the hands. It also makes one hand feel double the speed of the other, which is normally undesirable. |
| Half speed stream (1/2 precision) | 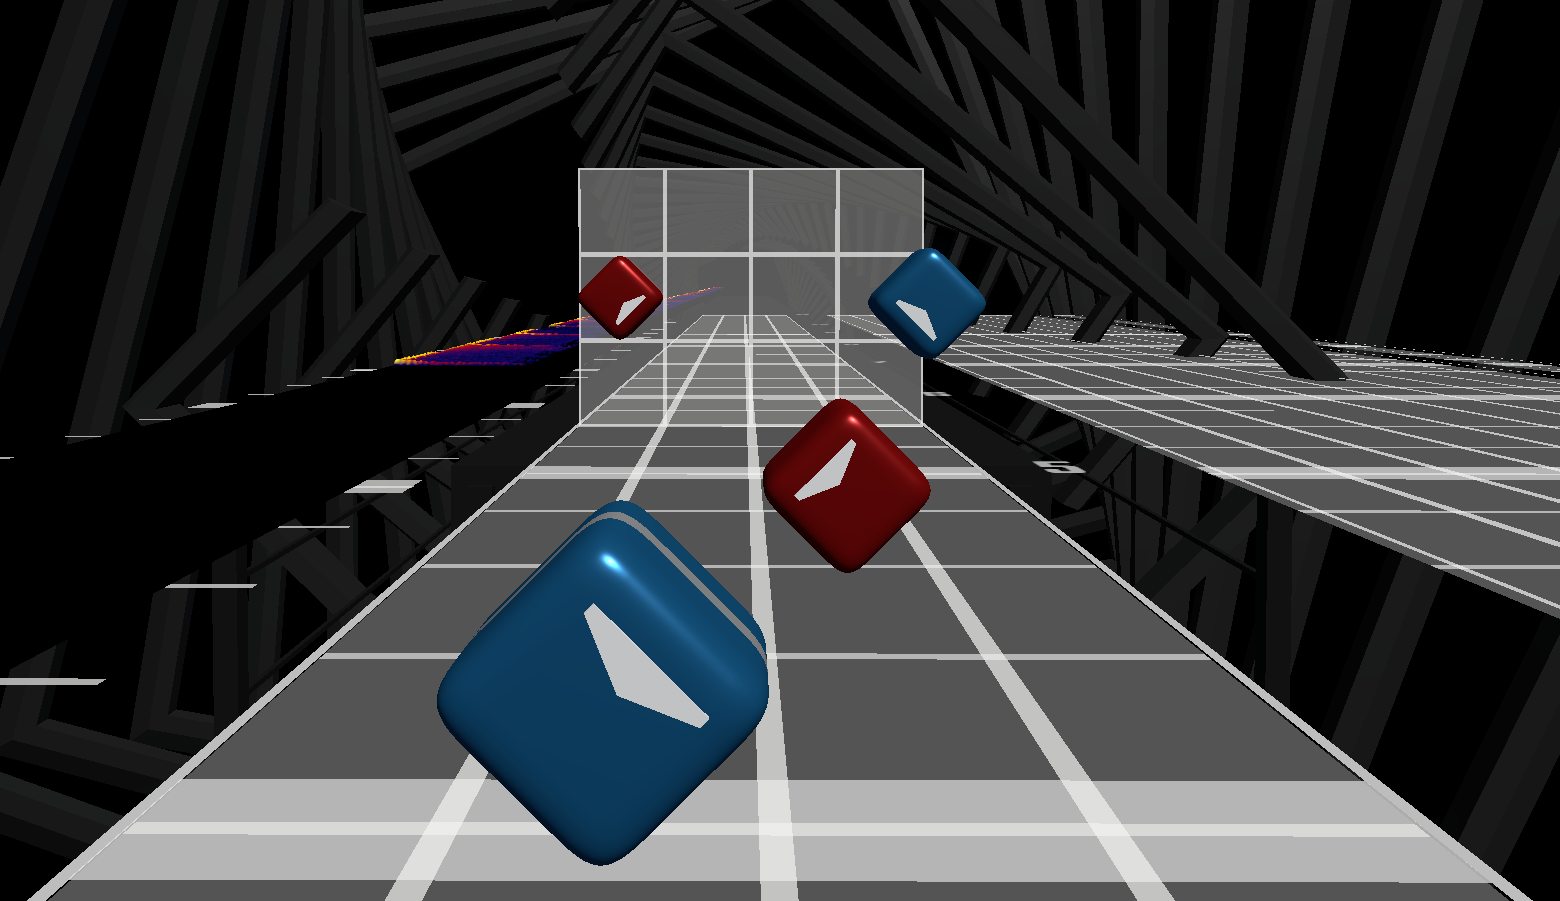 |  | 0.5 x BPM | 60 | Half the notes, half the speed. |
| 1/2 single hand | 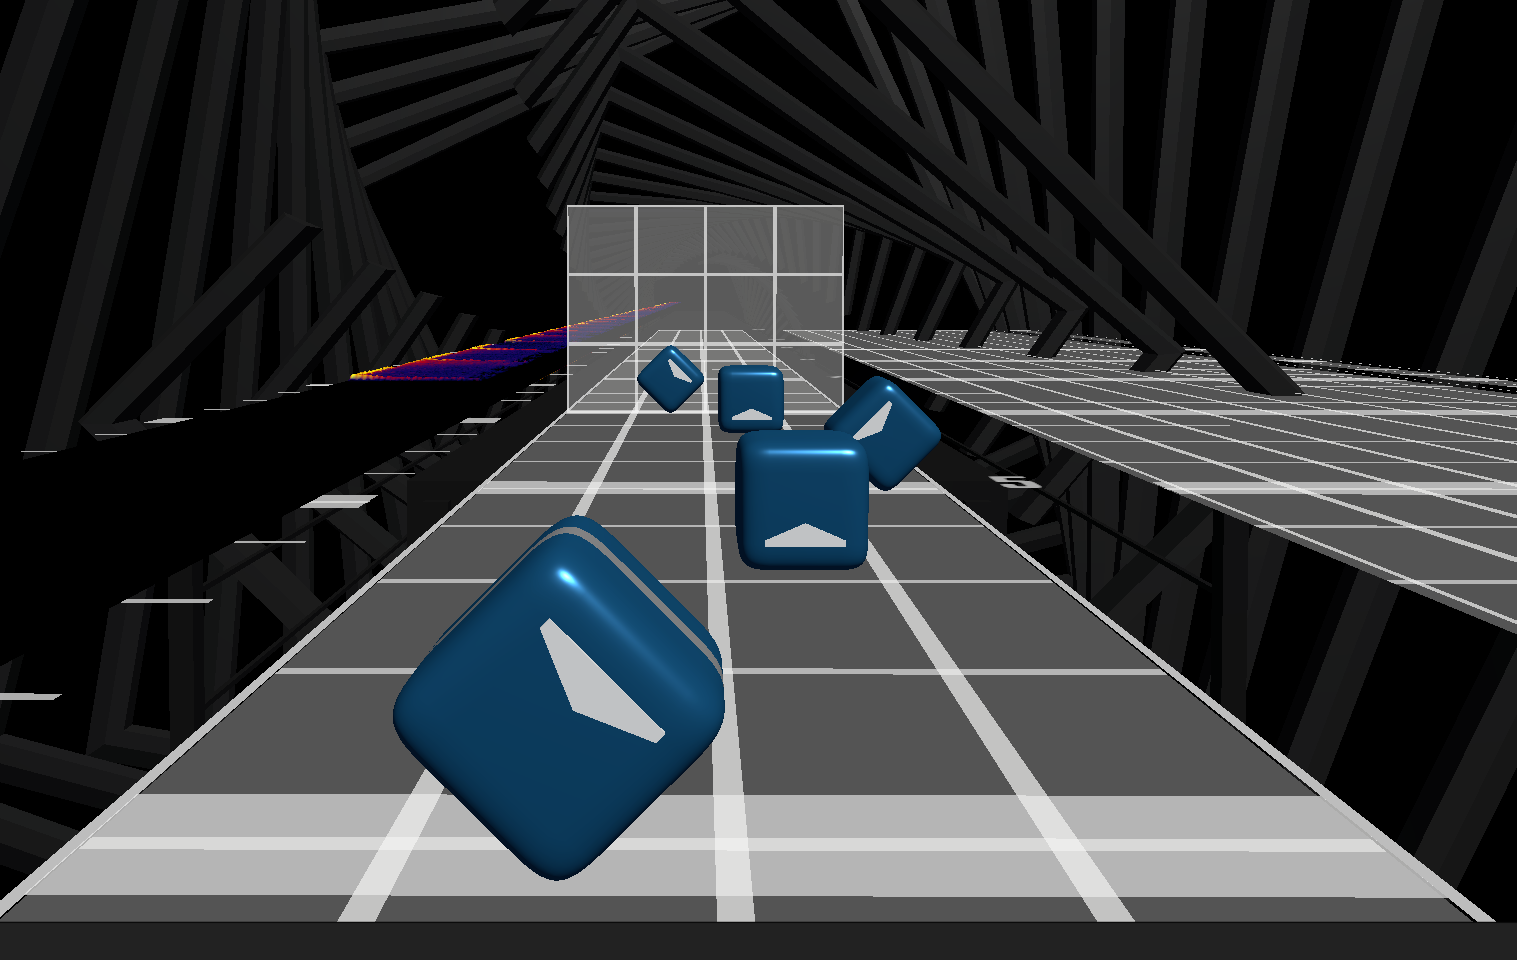 | 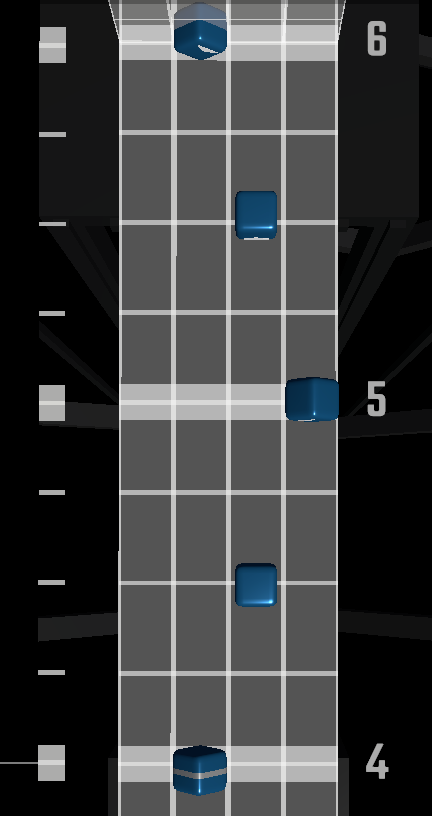 | 1 x BPM | 120 | In terms of speed, it is like a stream where we removed one hand. |
| Burst stream (1/8 precision) | 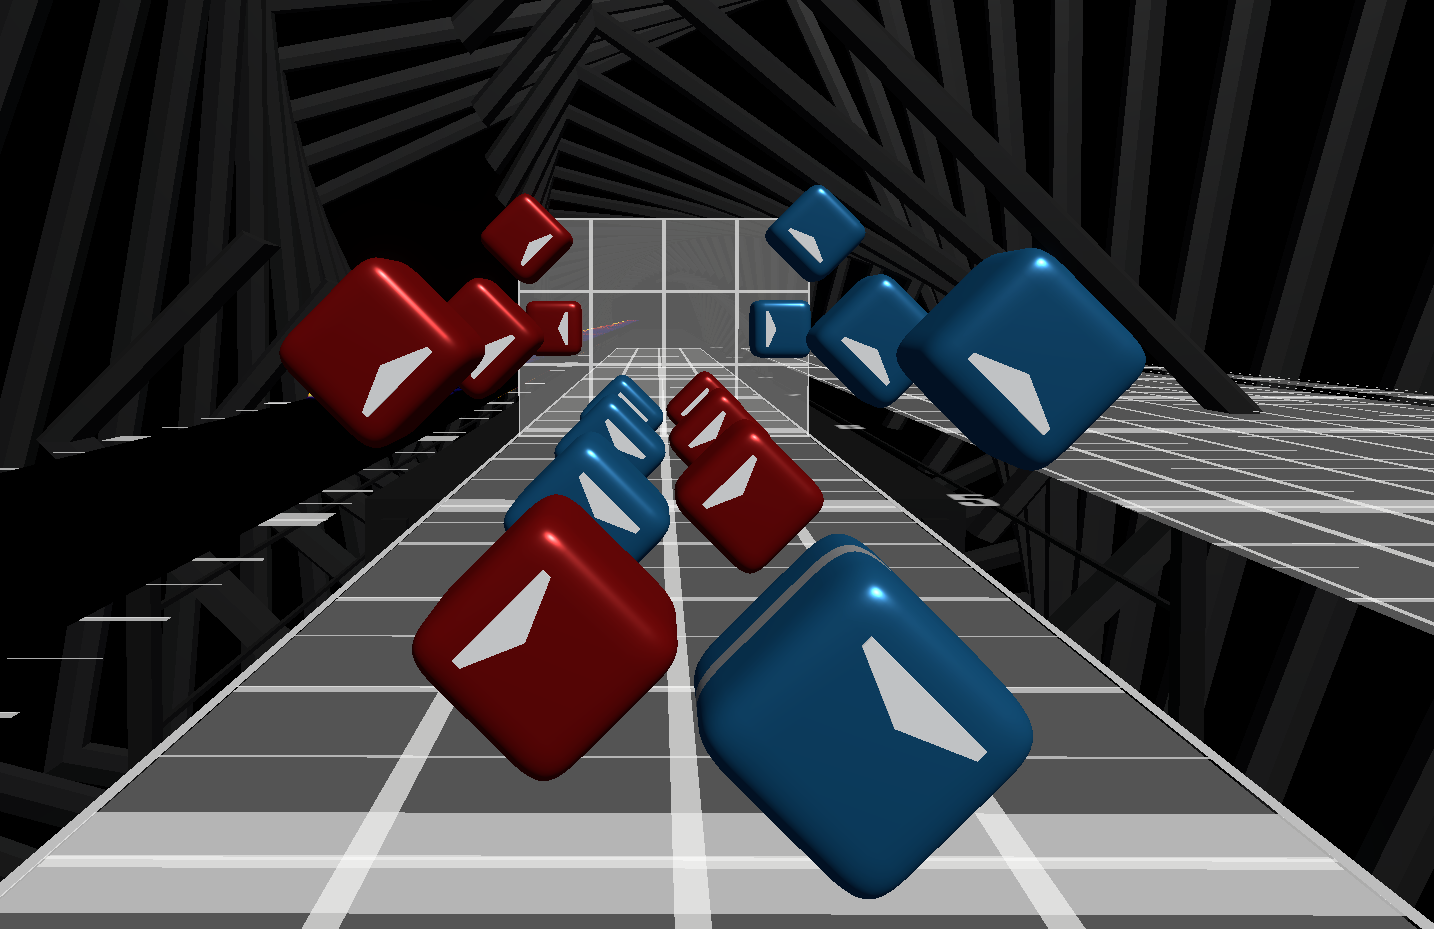 | 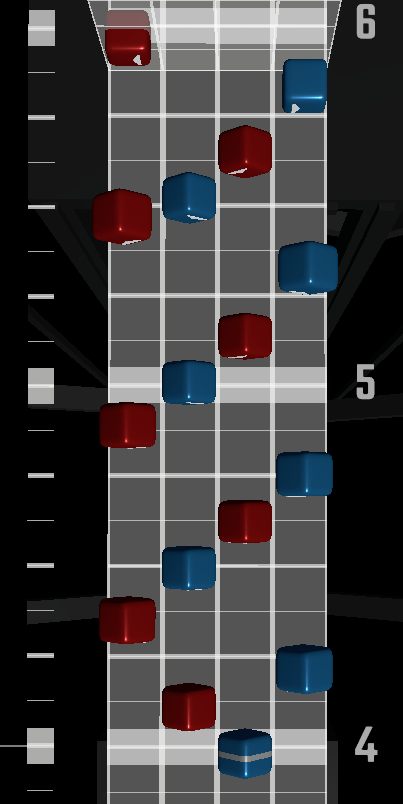 | 2 x BPM | 240 | Bursts can be nice to represent very short intense sections of the map with fast sounds, but they are often a difficulty spike. |
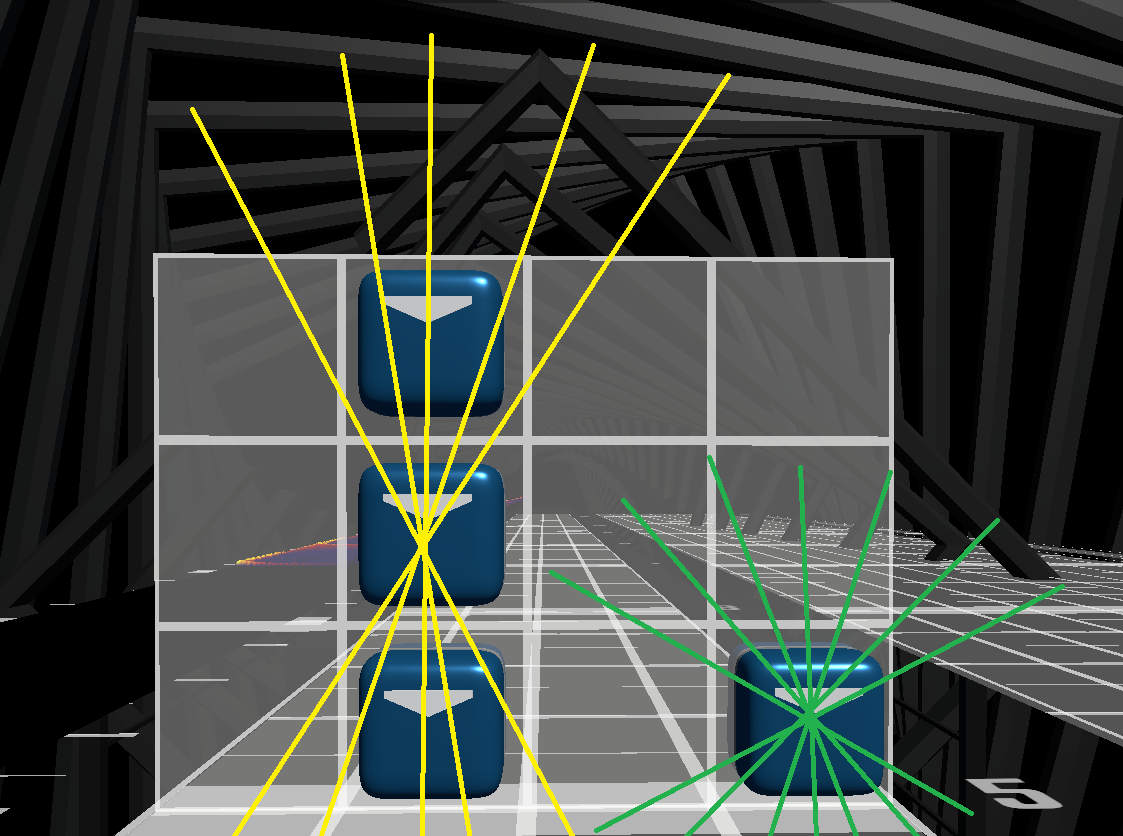
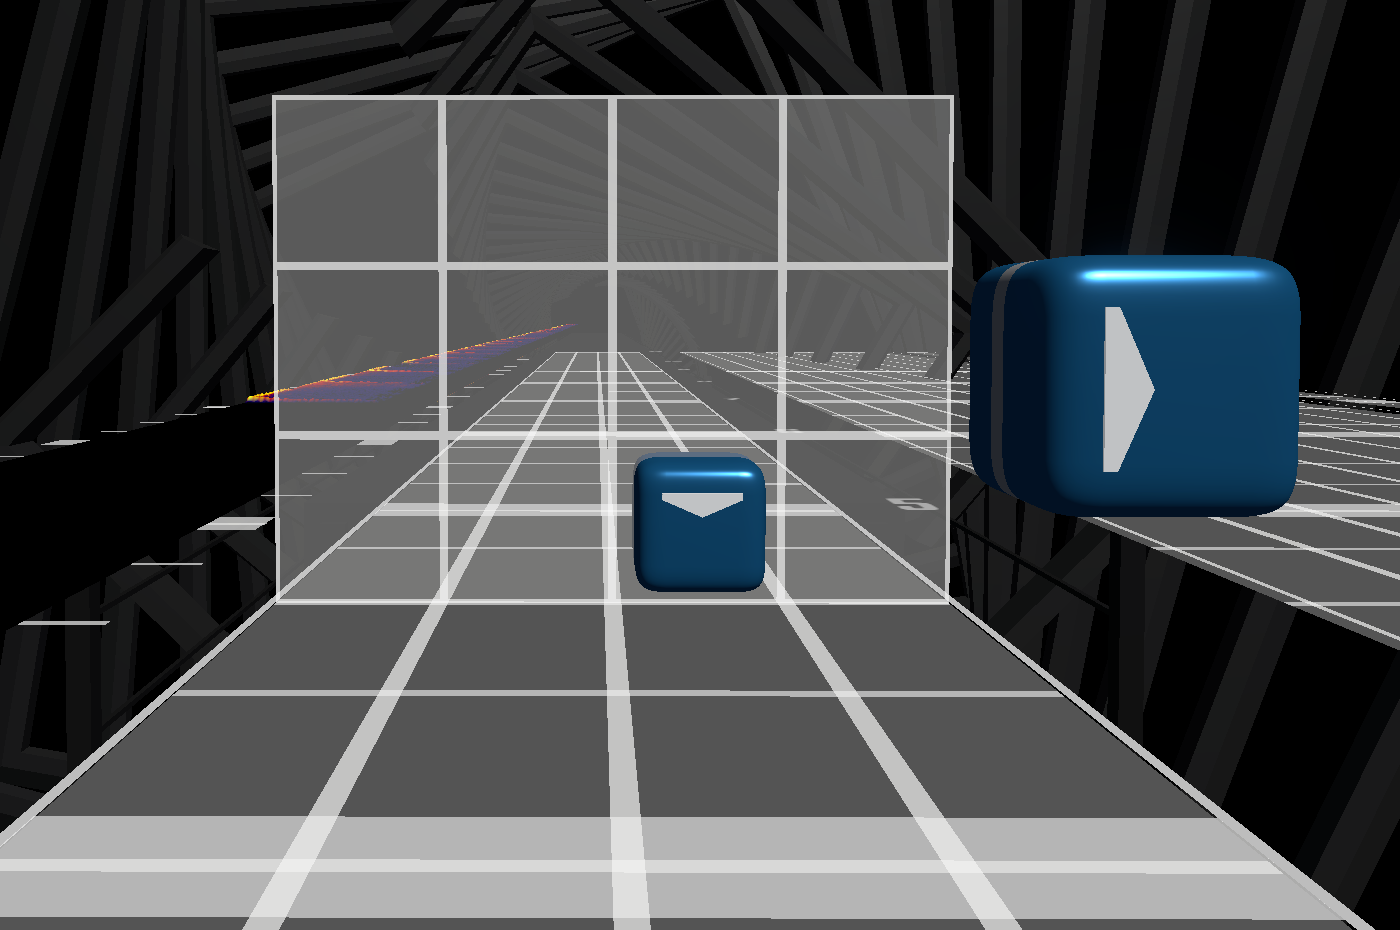
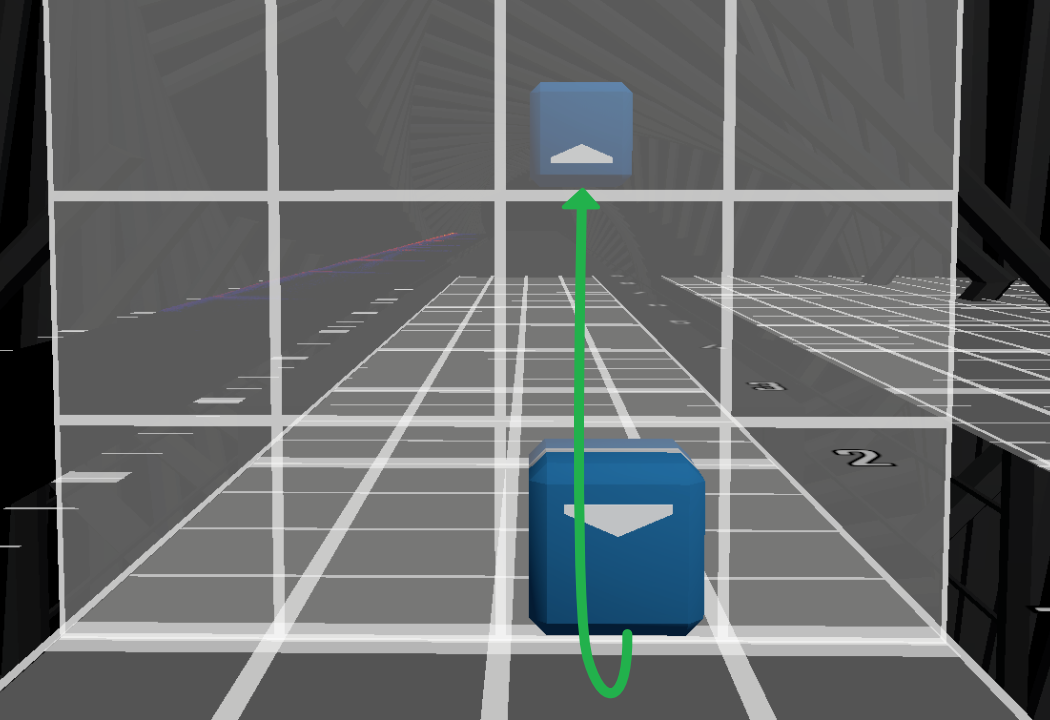
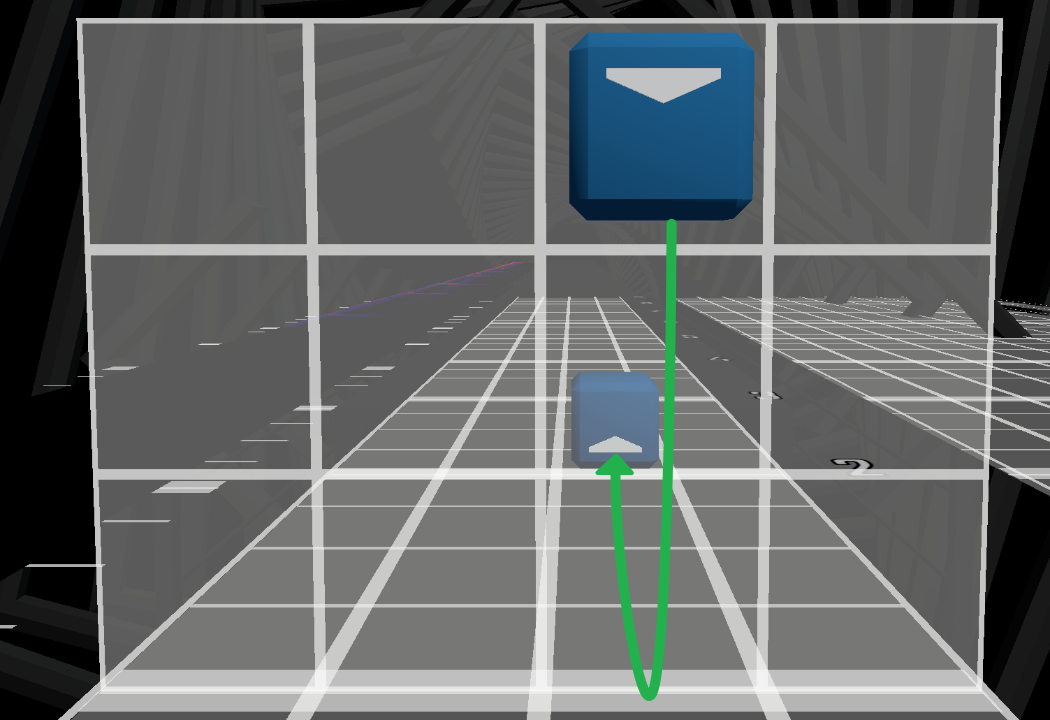
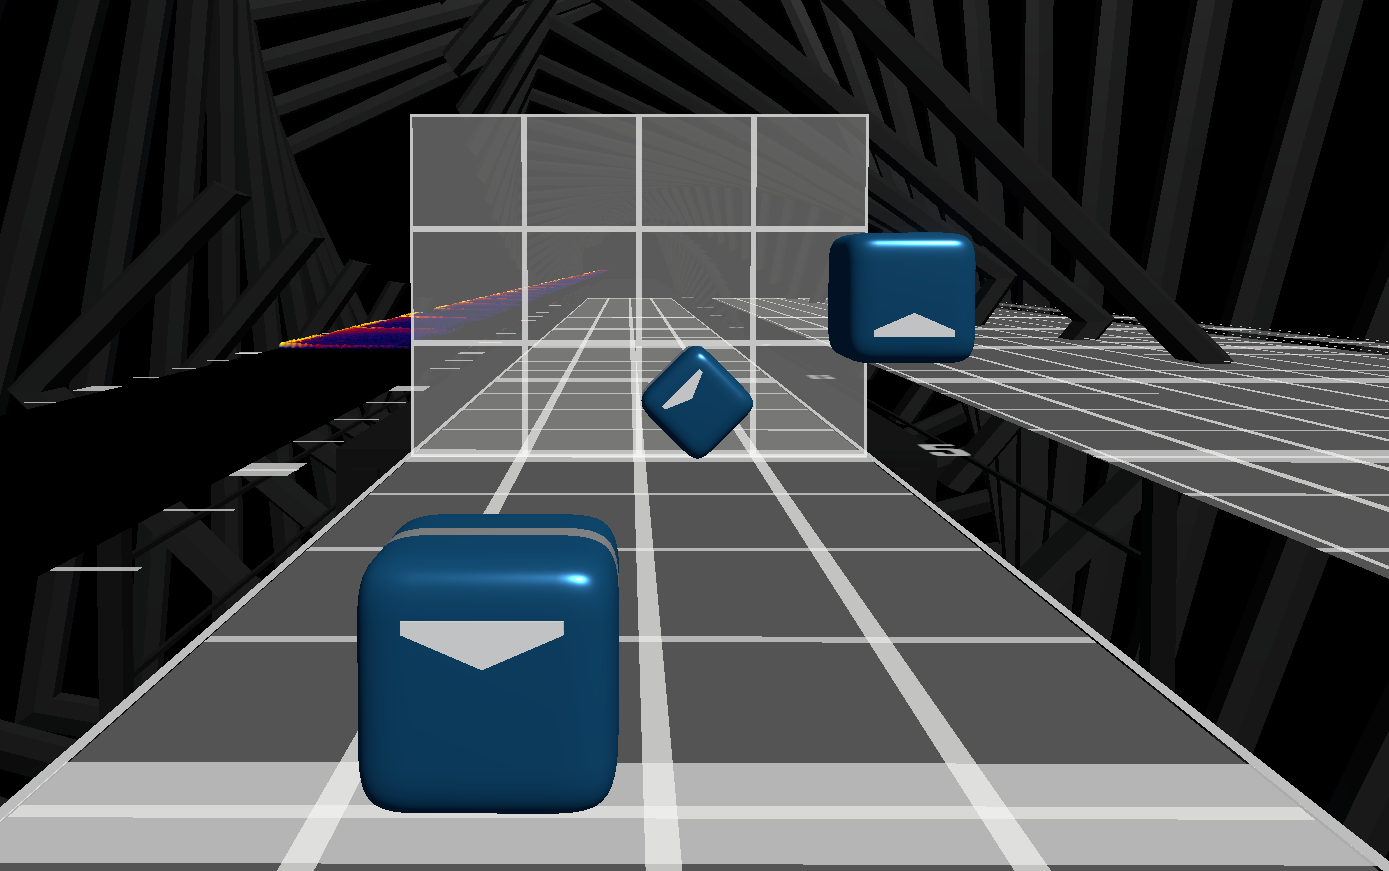
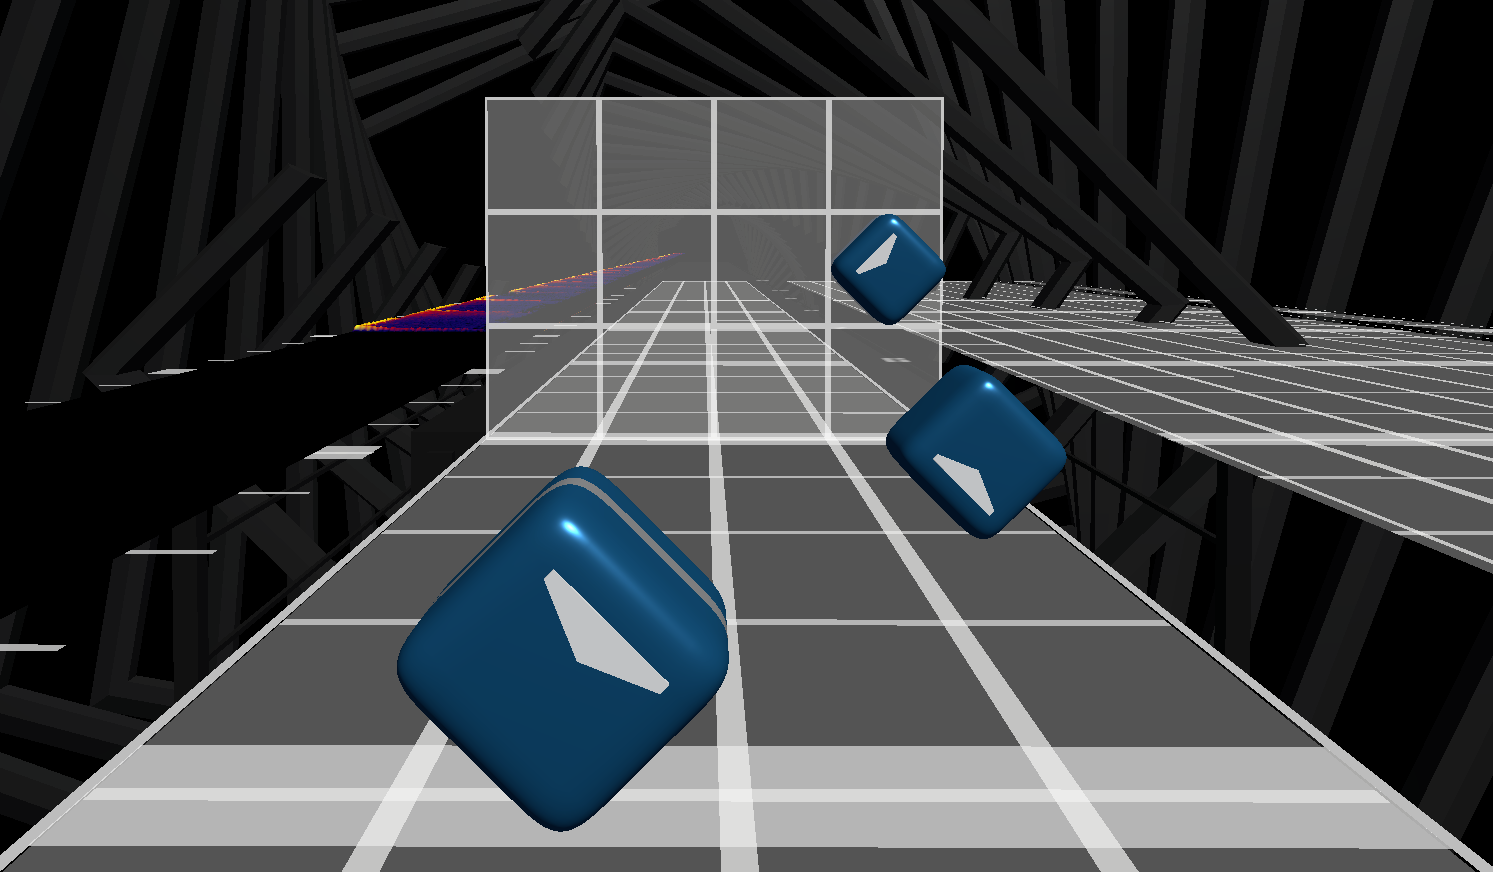
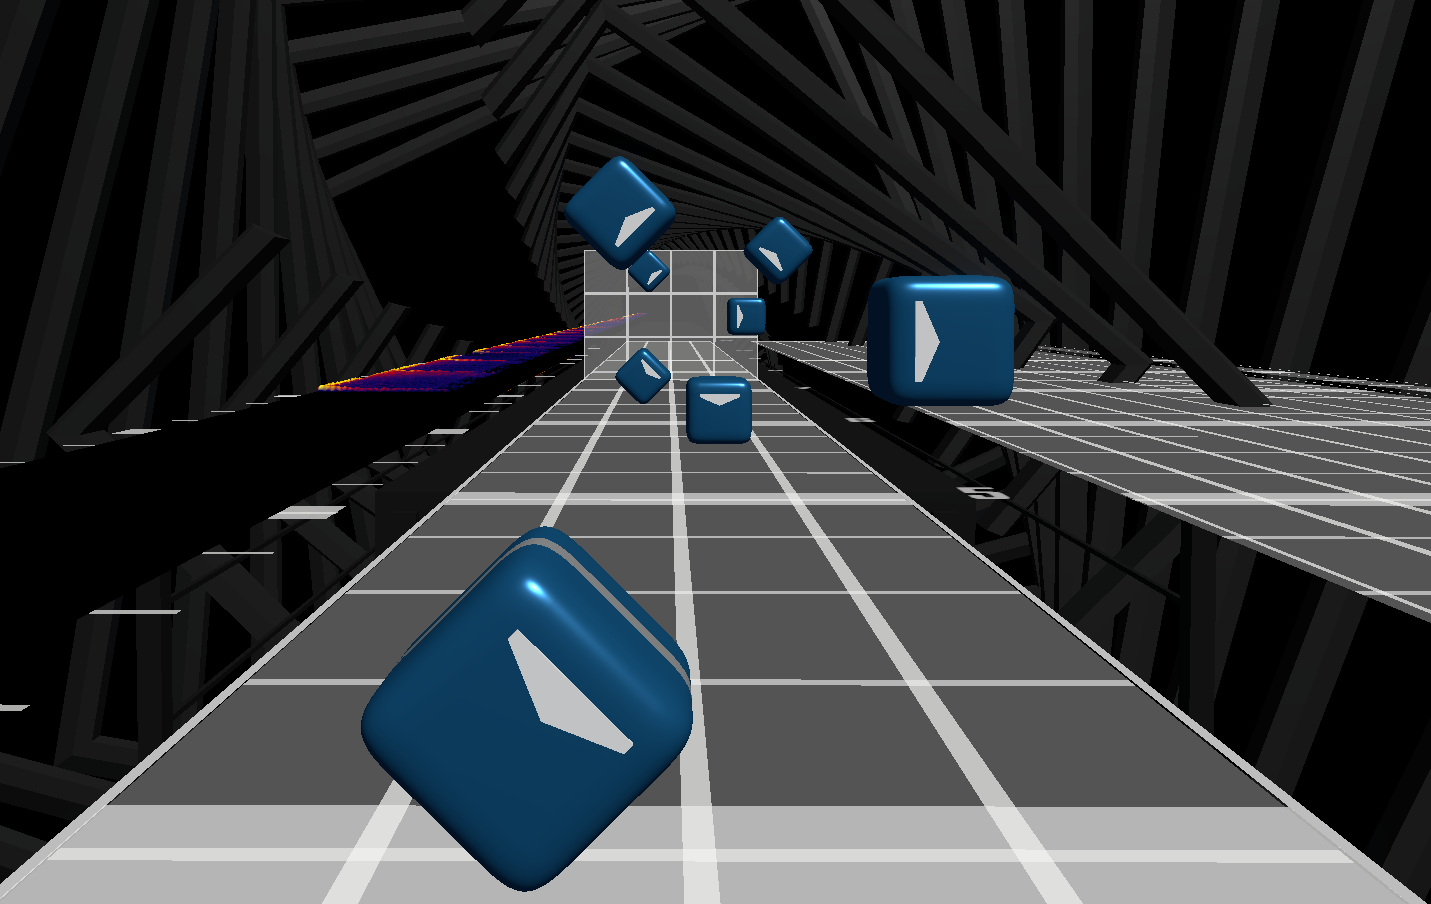
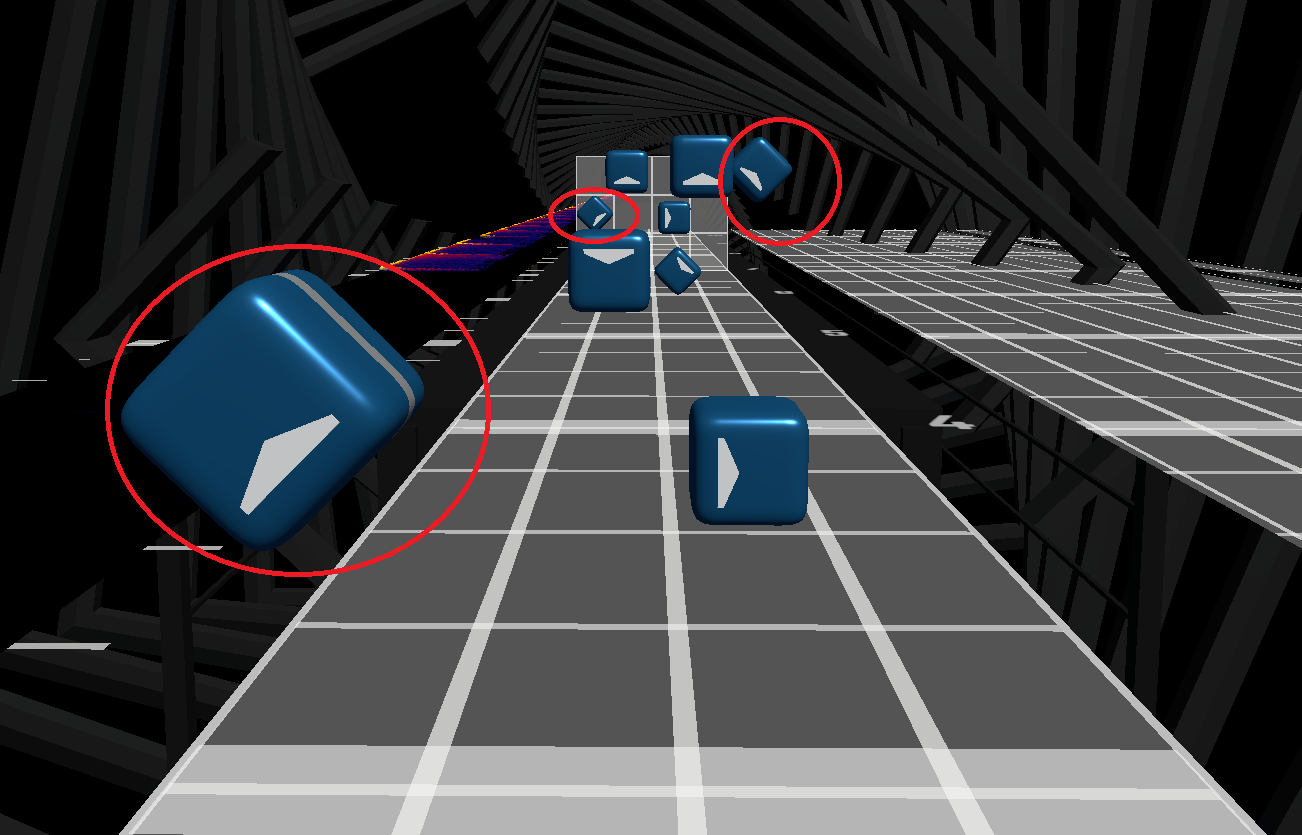
| Bomb resets (1 beat) | 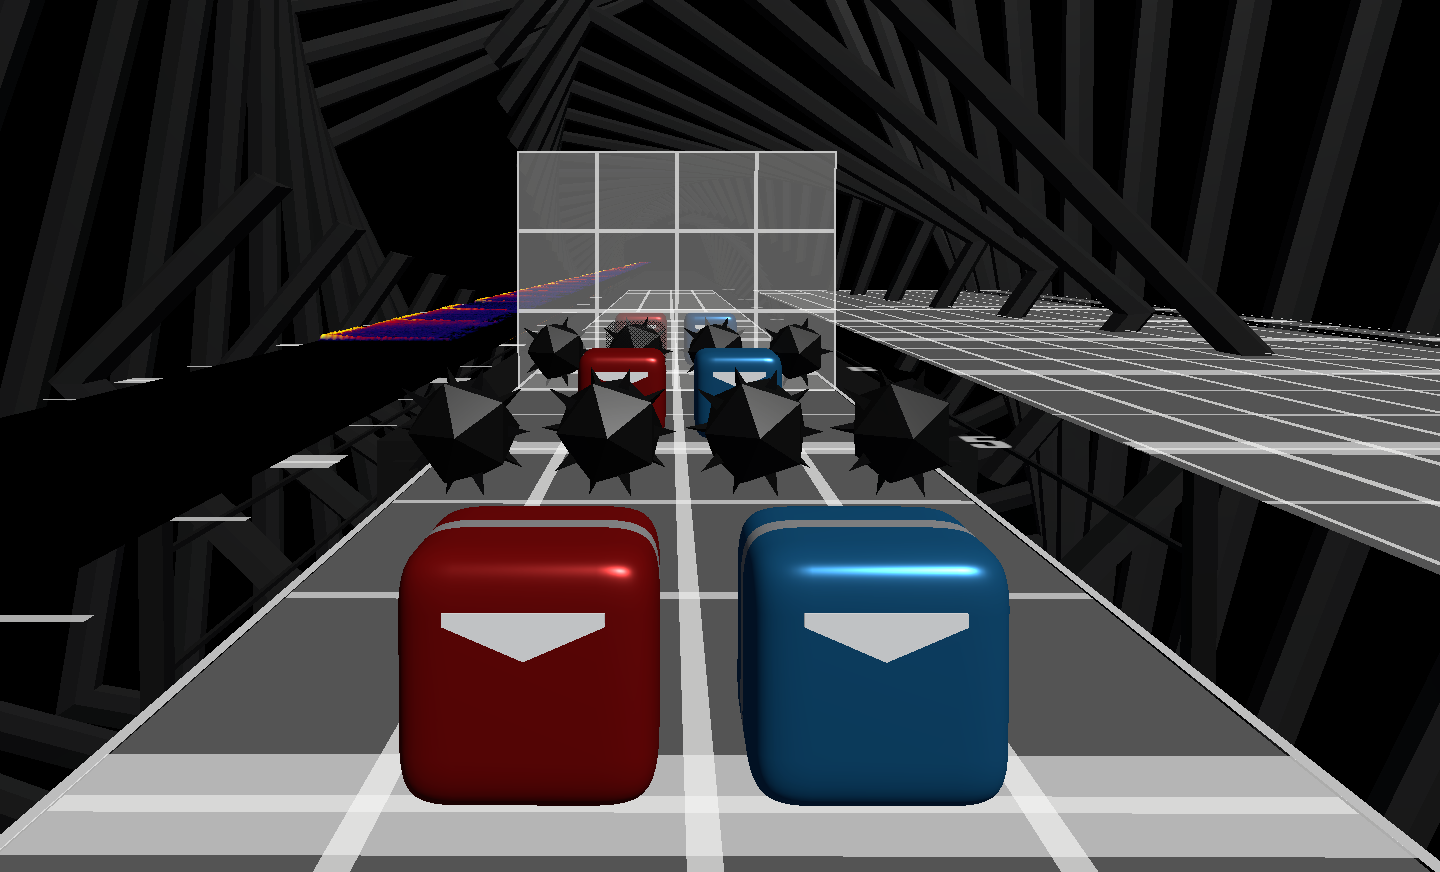 | 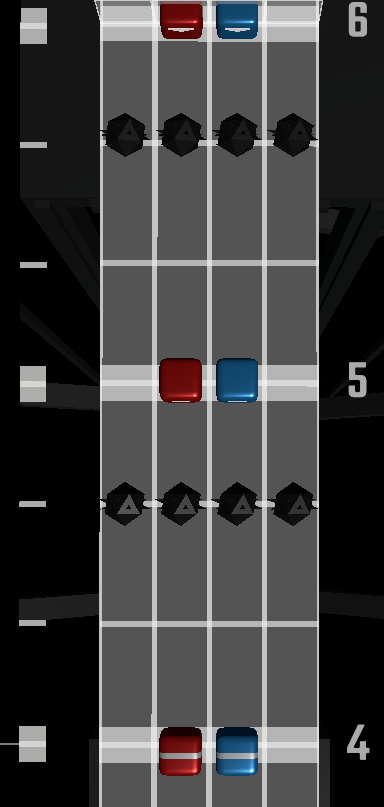 | 1 x BPM | 120 | Bomb resets have a movement associated with them, which we count as a swing for measuring eBPM. |
In most maps, patterns where eBPM matches the song's BPM should be the base speed for the map, with higher eBPM patterns reserved for more intense sections.
For example, if a whole section has 4 sounds per beat consistently, mapping it all to one hand might be overemphasizing it. Consider a using a stream, adding jumps or flicks, or other similar patterns to emphasize specific notes instead.
If a section only has sounds every half beat but still feels like standard intensity, consider mapping doubles to avoid it feeling undermapped as a half speed stream will feel very slow.
TIP
Use patterns with eBPM = BPM as a basis for speed, and go over or below that for emphasis.
While swing speed is mostly dictated by the speed of the song, there are some general ranges for what swing speeds players will consider fast / slow. The following is an approximation:
| eBPM Range | Feeling of Speed |
|---|---|
| 0 - 60 | Extremely slow. Ambient. Easy to get high accuracy score. |
| 60 - 100 | Slow. Floaty. Slow dancing. |
| 100 - 150 | Medium-slow speed. A majority of songs lie in this range. Dancey. The body moves most naturally at this speed. |
| 150 - 200 | Moderately fast and intense. Most Expert+ players can handle this, but can be tiring over prolonged periods. |
| 200 - 300 | Midspeed. Speed becomes challenging, but many players are comfortable within this range. Complex patterns are increasingly difficult to play. |
| 300 - 400 | Speed mapping. Speed is one of the main challenges. Many players cannot play this fast. Very difficult to play complex patterns. |
| 400+ | Extreme speed. Even the best players will struggle and quickly tire in this range. |
Spacing
Spacing describes the relative distance of notes, especially those of the same hand.
At basic mapping levels, it is easy to let vision and parity determine the positioning of notes in the grid, as they present major constraints. Because of this, spacing is one of the most overlooked fundamental concepts in mapping, and the hardest to learn for newer mappers.
This section focuses on the general distance between subsequent swings. While Hand repositioning discusses how note positioning affects the way the player moves their arms and hands in more detail. These concepts are also fundamental for momentum mapping.
Spacing is relevant for gameplay reasons in various ways. Most importantly, larger spacing requires faster and more intense swings, even with the same swing speed. Even with pure wrist swings (which are not possible or desirable most of the time), larger spacing requires more precise timing.
Very small spacing (like inline notes) can also be challenging to read, time, and score high on. Normally, one lane/row (horizontally, vertically, or diagonally) is the least intense swing distance. Two lanes/rows (e.g. bottom row to top row) is standard but more intense. Three or more lanes/rows is reserved for the most extreme swings.
TIP
Be aware of how large the swings in your map are, and how they are influenced by spacing.
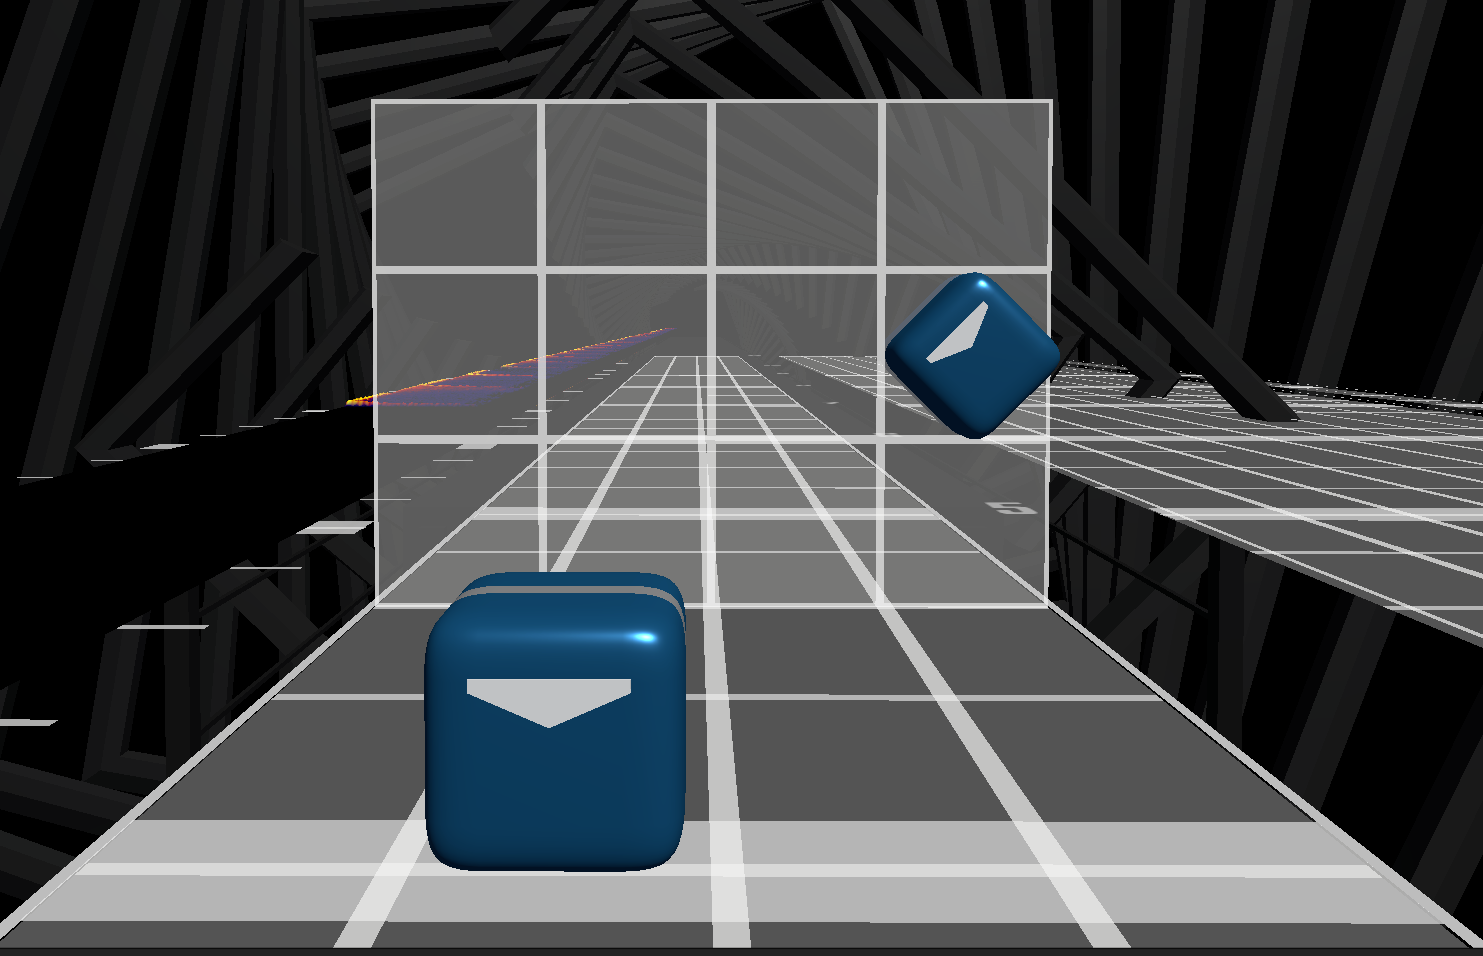
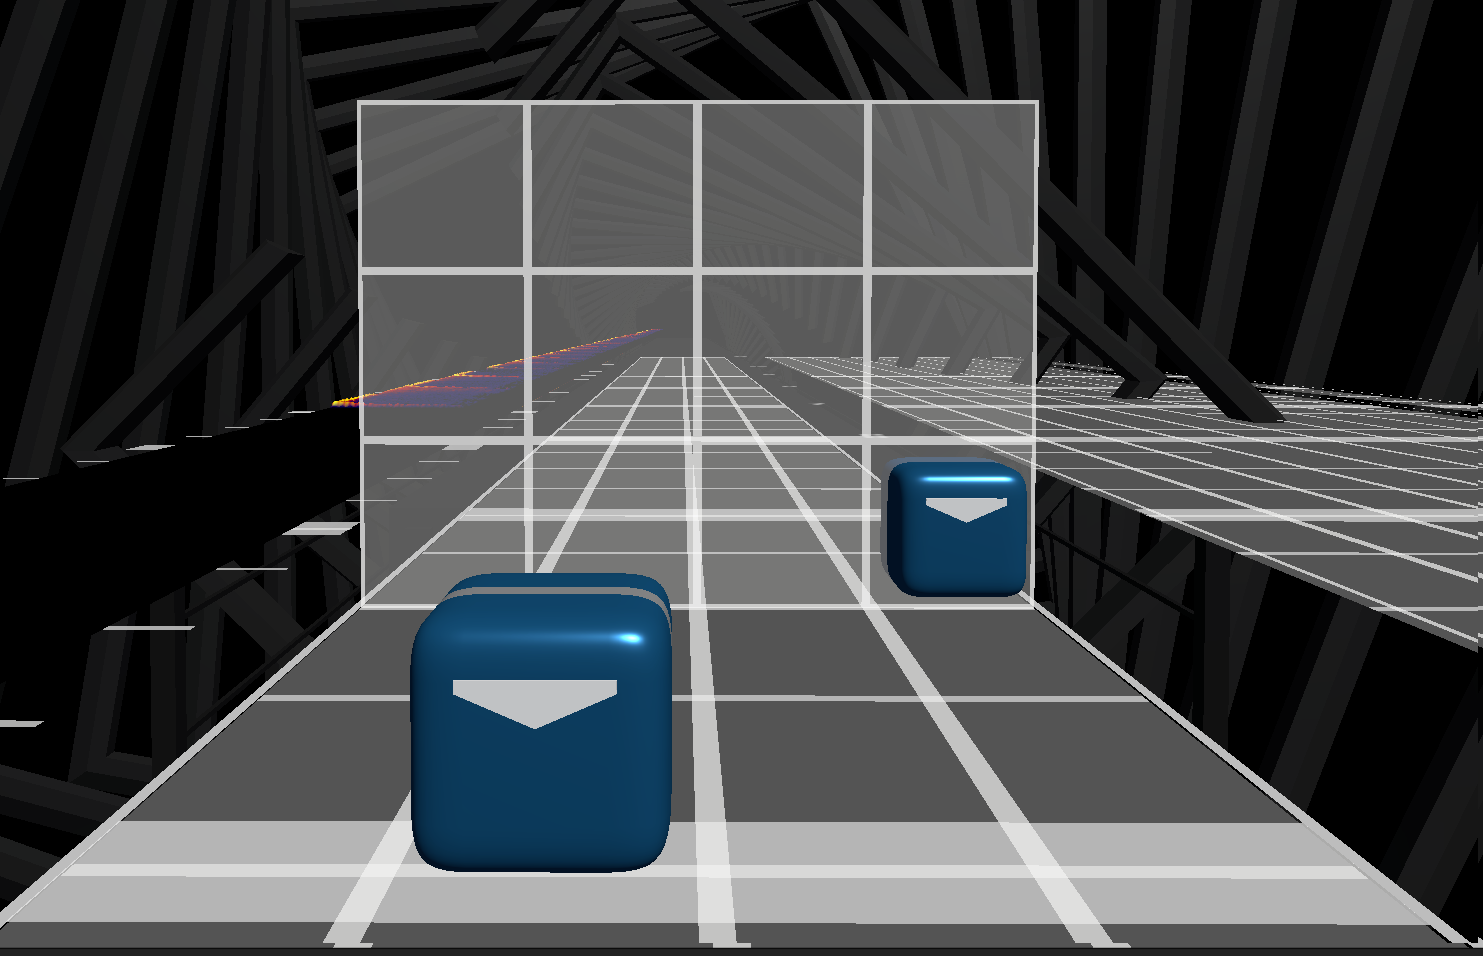
| Swing Distance | Example | Gameplay Properties |
|---|---|---|
| 0 (Inline) | 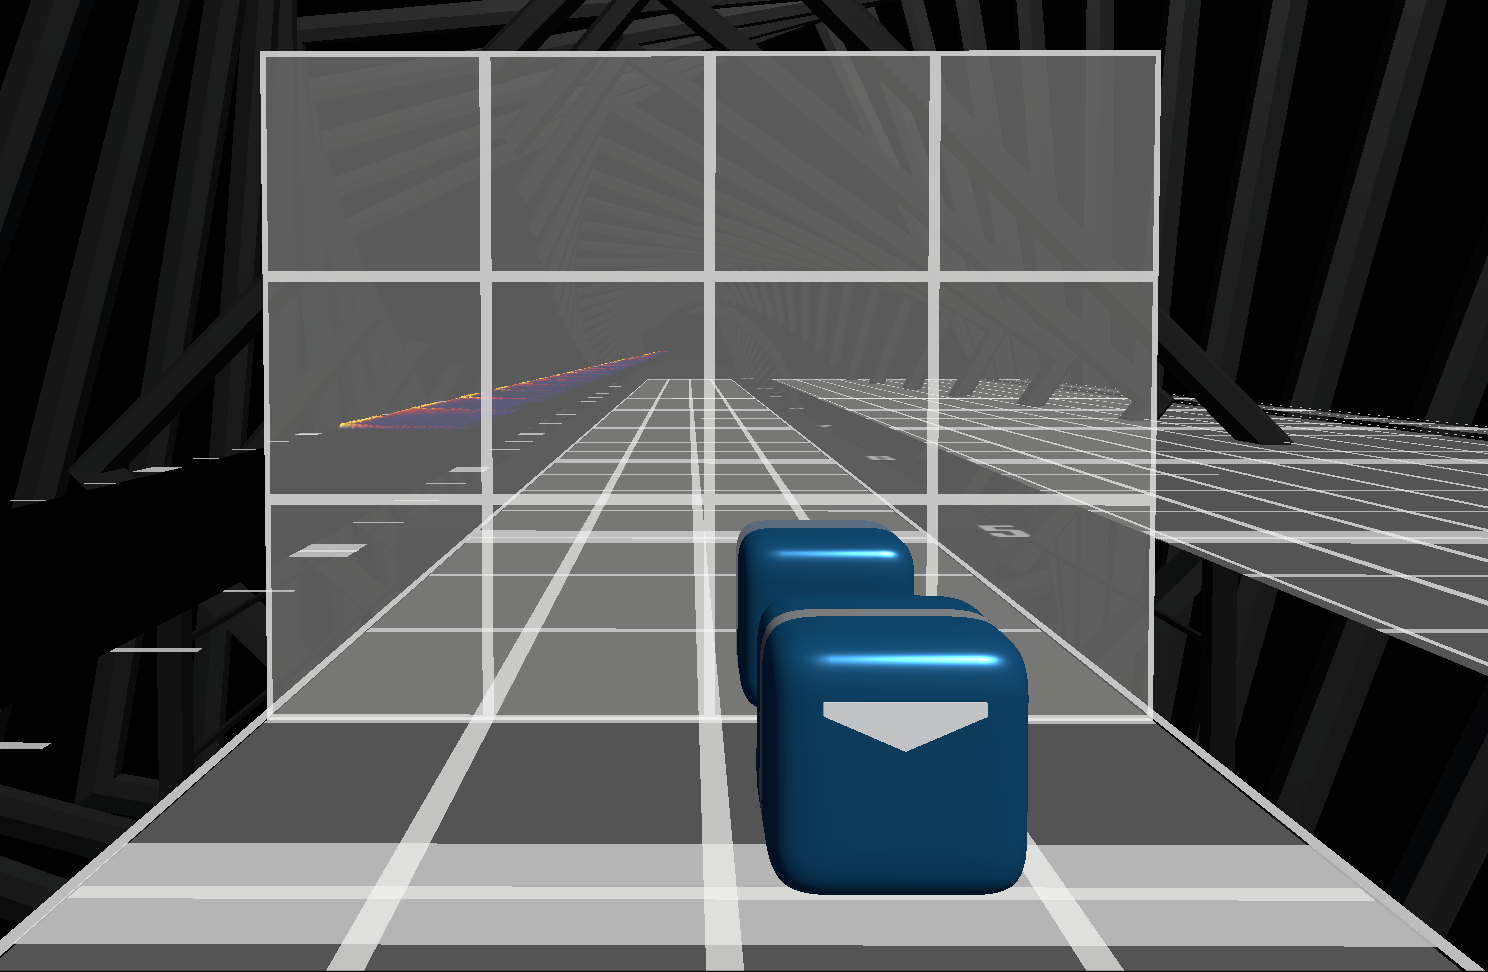 | Low physical effort. Harder to read, time, and score. |
| 1 | 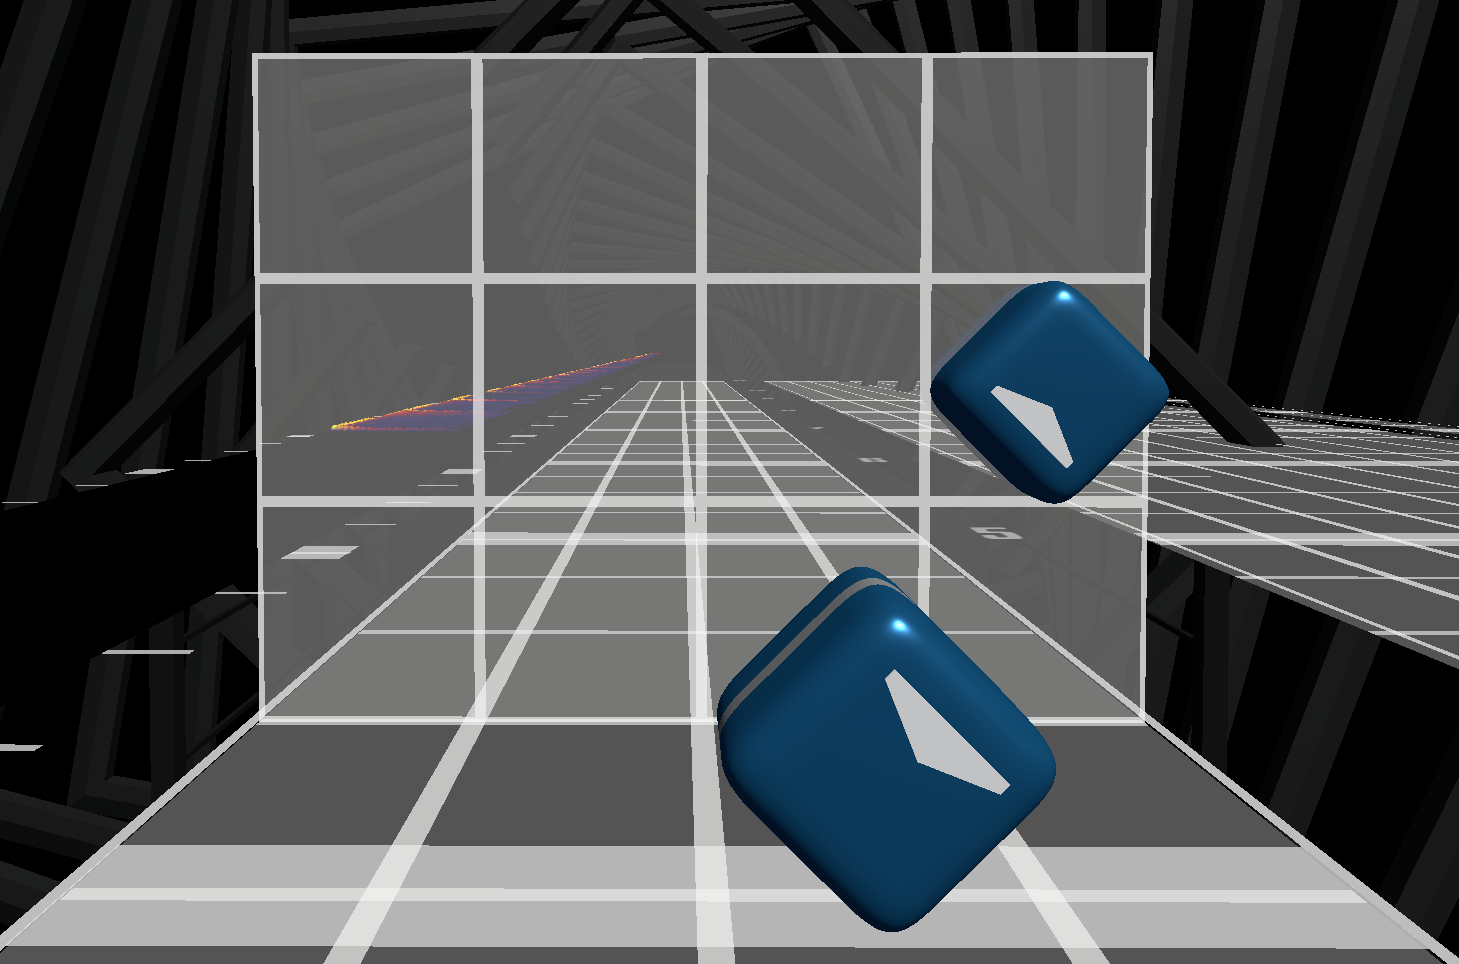 | Low physical effort. Easy to read and score. Low emphasis. |
| 2 ("Jumps") | 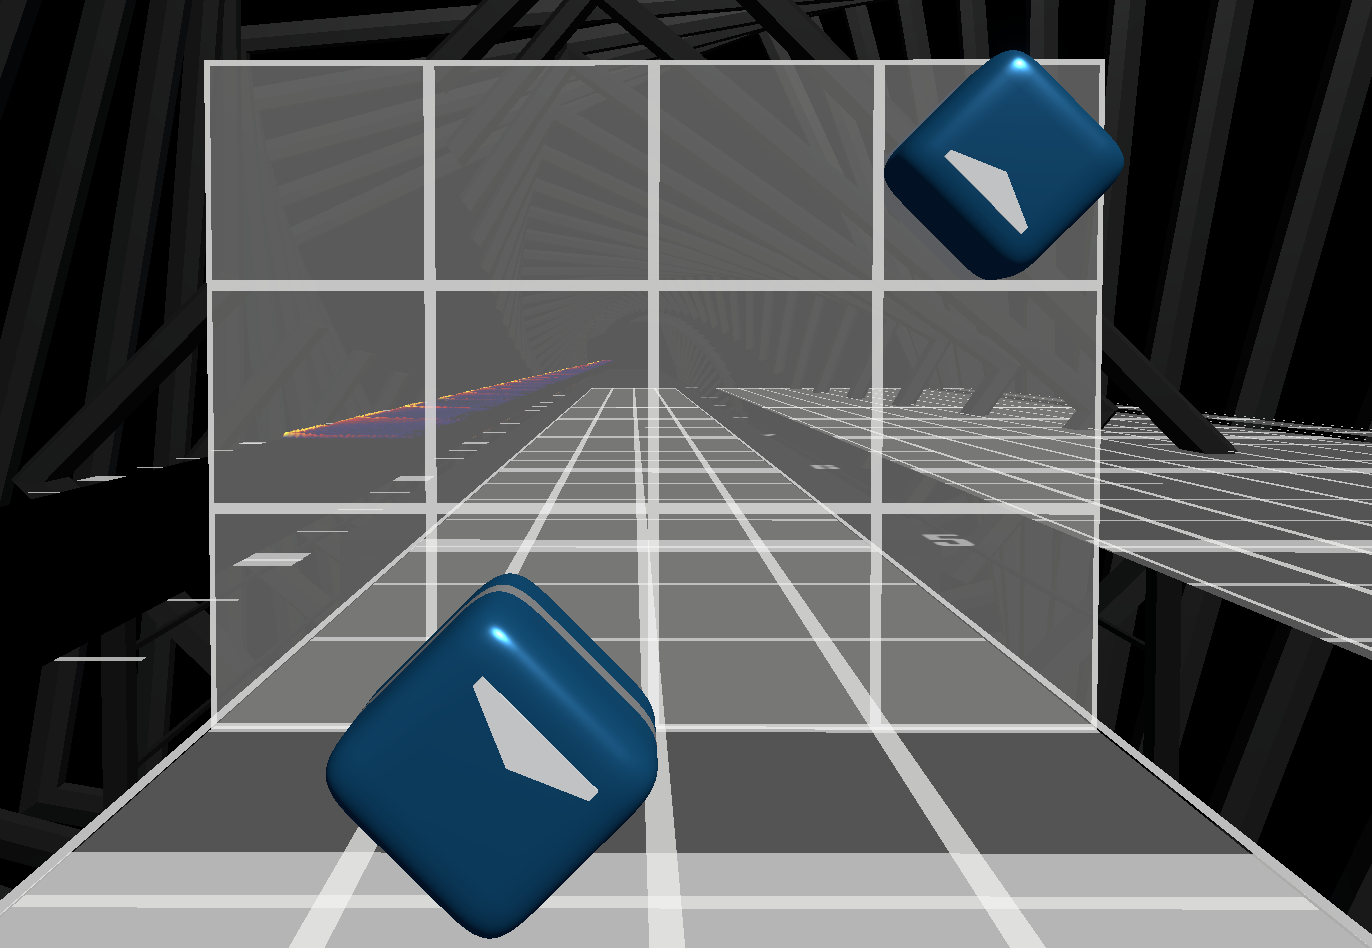 | Moderate physical effort. Medium emphasis. |
| 3+ | 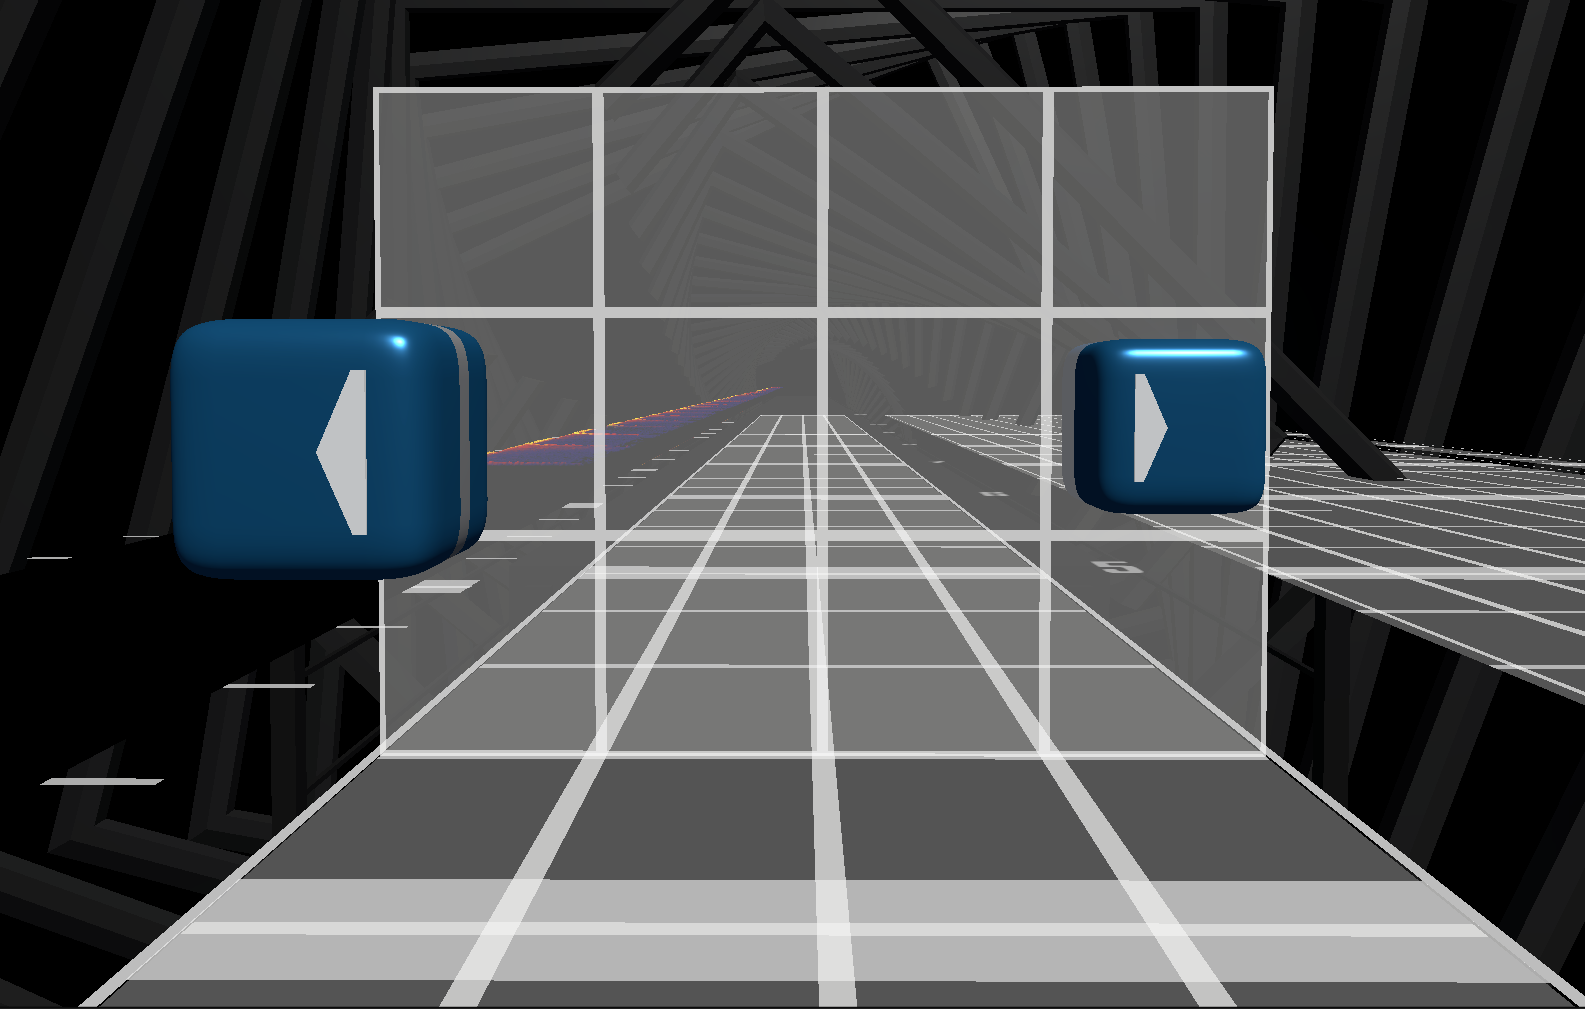 | Very large swings, usually requires arm movement. Big emphasis. |
Spacing also affects readability in multiple ways. When notes are too cramped, it is more difficult to tell them apart and read their relative timing and direction. When notes are on all sides of the playspace with little order, it divides the focus of the player and slows down reading.
When used correctly, spacing can be the best way to make important variations in your patterns more obvious. For example, increasing the spacing during an unexpected pause in rhythm can make the pause more readable.
TIP
Use spacing to help the player follow your mapping, and as a tool for emphasis.
Spacing can also be a great way to introduce representation and emphasis, in more and less obvious ways, by simply adding variation with a purpose.
Read more...
GalaxyMaster has published some thoughts on spacing.
Hand Repositioning
For most Beat Saber players in most maps, wrist movement is the most important aspect of note swinging, but it is aided to a degree by arm movement.
Even when swinging purely from the wrist, arm movement still plays a major role in repositioning the hand, which is the base position where swings happen.
While the hands will not be brought all the way to the notes, nor move the full distance between subsequent notes, the arm will need to work to reposition the hand to bring it in line for the swing. This is needed to make swings more comfortable, and allow swinging at the right angles.
TIP
Even with pure wrist swings, hand repositioning still requires arm movement.
While repositioning is relevant for most patterns, some require more repositioning than others. Since it requires arm movement, repositioning is harder to do faster, and involves more momentum (arms are heavy). Hand repositioning can be used to communicate sway or simply to add variety in representation to the map.
A perfect example of repositioning is arm circles. In their simplest form, arm circles are large horizontal repositioning of the hand while swinging vertically.
| Arm Circles |
|---|
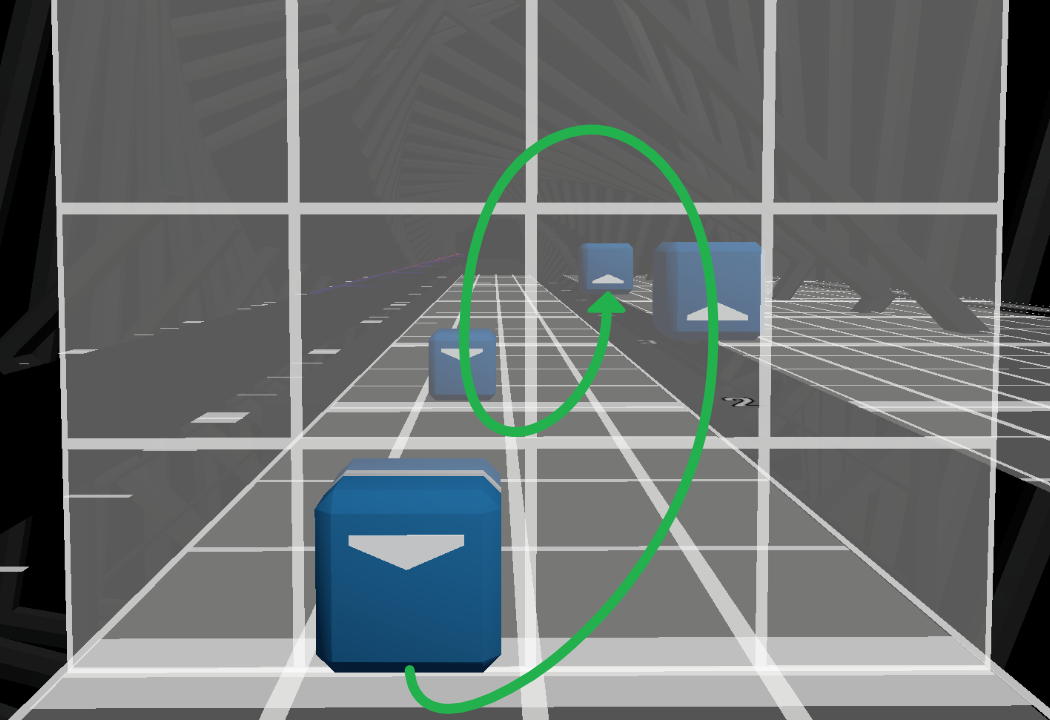 |
| The hand repositions horizontally (left and right) using arm movement, while the wrist swings up and down. |
Another pattern where hand positioning plays a large role are inverts. An inverted note is one where the arrow points inwards from outside the grid, while a swing between two subsequent notes pointing at each other is called an invert or inversion.
Because of how Beat Saber scoring works, a player will aim for large pre-swing and post-swing angles. This is harder with inverts, because the player will need to reposition their hand in order to get enough pre-swing angle for the inverted note. This repositioning makes inverts more physically demanding and harder to time and score well on.
| Non-invert | Invert |
|---|---|
 |  |
| The hand stays mostly static while the wrist swings. | The hand moves down significantly to guarantee enough pre-swing angle on the second note. |
Hand positioning is critical in crossover patterns as well, especially in Dance or Tech maps that encourage lots of arm movement. Apart from the risk of hands colliding in a handclap when using arm to swing, crossover patterns may produce arm tangles, where one arm is on top of the other and the notes require the player to move the arms through each other.
There are two ways to handle arm tangles.
- The safest way to prevent arm tangles is to keep track of relative arm position (which arm is on top) in crossover patterns, and always resolve the hand on top first, by making it swing first after the crossover pattern, putting it away from the tangle.
| Safely Resolved Arm Tangle | Problematic Arm Tangle |
|---|---|
 |  |
| The right hand crosses on top, so it is resolved before the left hand moves. | The left hand will try to move through the right hand, which will create problems. |
TIP
The safest way to avoid arm tangles is to always resolve the top hand first.
- The most flexible way to prevent arm tangles is to only use crossover patterns that do not require the arms to actually cross. This can be done through safer patterns (less wide, less centered) or by encouraging exclusive wrist swinging with map context. This is more risky as the experience will vary between players, but it can work well if there is enough certainty that the target audience will not actually cross their arms. This is less likely to work on slower, dancier maps.
Example
In https://allpoland.github.io/ArcViewer/?id=3628f&t=59, the map frequently utilizes 3-wide patterns that move right and left.
Heavily encouraging hand repositioning for both hands and providing additional variety and representation to the map, while also keeping the swing distance limited, which helps cope with the speed of the map.
Read more...
This incomplete glossary by Kansas contains definitions for some of the concepts explained here.
Full Body Motion
Apart from wrists and arms, many Beat Saber maps include moving the torso through swaying, leaning, crouching, and similar movements. This is more typical of fitness and dance maps.
For the purposes of this section, it is assumed that the players' feet don't ever leave the ground or move around. Maps requiring feet play are very uncommon and outside the consideration of this page.
Most full body motions require more regularity and predictability than arm and wrist motions.
Leaning
Leaning involves rotating the upper body so as to change the horizontal line between the hands.
For anatomical reasons, leaning is most necessary and comfortable when there are palm-out hits involved. These are hits where the palm is facing outwards towards the right for the right hand or the left for the left hand.
TIP
Leans are mostly defined by palm-out swings.
| Leaning | |
|---|---|
 | (Starting forehands). The palm-out hits on the right hand incentivize/force a lean to the left (counter-clockwise). |
 | (Starting forehands). The palm-out hits on the left hand incentivize/force a lean to the right (clockwise). |
 | (Starting forehand right and backhand left). All hits are palm-in. Even with large rotations, leaning is not generally required. |
While leans do closely relate to dodge walls, their relation is not straightforward. The relation between leaning, swaying, and dodge walls is discussed in the dodge walls section.
For various reasons discussed in the sections on parity and rotations, it is generally more comfortable to start / increase lean on forehand swings. While backhand palm-out swings are playable and acceptable, they are more natural after the lean has already been established through forehand swings.
Similarly, it is generally more natural to come out of leans (sometimes called unleaning) on backhand swings.
TIP
It is normally most natural to start leans on forehand swings, and come out of them on backhand swings.
When both hands are going palm-out at the same time it will produce a tense posture since the body cannot lean in both directions simultaneously. While this can be a legitimate pattern, the mapper should be aware of the physical intensity and emphasis it carries by creating a lot of tension on the player's shoulders.
As described before, leaning benefits from regularity and predictability. This relates to what is sometimes called lean parity, which has two principles:
- Holding a lean for a long time, known as sustained leans, tends to be uncomfortable.
- After finishing a lean, the player will naturally want to lean in the opposite direction. Chaining multiple same-direction leans is physically unnatural.
The reasons behind this are explained in more detail on the section on momentum and tension.
Bad Practice
Avoid excessive sustained leans. Keep in mind they are physically demanding and use them only for specific reasons.
Example
https://allpoland.github.io/ArcViewer/?id=2c25a has impeccable lean management. As an exercise, slowly go through the map and note all palm-out hits, their parity, and how they contribute to leaning in each direction; as well as the lean parity (how long leans are sustained, and the variation between both lean directions).
Swaying
Swaying refers to side to side body motion, performed by shifting the weight between both legs without rotating the body.
There is no clear cut way of communicating or encouraging sway as there is for lean, but it is usually done through three interconnected tools:
- Vertical swings on the sides, or more generally, swings where the arrows are not pointing away from the center of the play area, encouraging body repositioning.
- Dodge walls. Differentiating or combining lean and sway is complicated and is covered in a later section.
- Regularity. While leaning can have more irregular timing, as long as lean parity is preserved, swaying benefits greatly from regular side to side timing.
| Sway |
|---|
 |
| The vertical notes on the sides (not center-focused), the dodge walls, and the regularity of the movement, work together to encourage sway. |
Sway can be achieved without dodge walls or without notes, but regularity of the movement is much more important.
TIP
If you want to encourage sway, keep your side to side motion regular.
The frequency of sway is also physically limited. Normally, players will struggle to move from one side to the other in less than ~500ms (half a second). Faster sway will feel unnatural and bothering.
Example
https://allpoland.github.io/ArcViewer/?id=3071e&t=0 establishes a very regular sway motion from the beginning of the map. From 0:15 onwards, it introduces dodge walls to accentuate it. The motion becomes more complex from 0:30 onwards by adding lean on top of the pre-existing sway.
Dodge Walls
Dodge walls are walls that cover one of the two middle lanes, and force the player's head to move to the opposite side.
At a basic level, dodge walls enforce very little head motion on their own, and are normally used as an additional element to communicate intended motion or enhance the full body motion in the map.
The relation between dodge walls, leaning, and swaying can be a bit paradoxical to the point where ambiguity can lead to players feeling like they are being led into a wall. This is summarized by the following simplified patterns:
| Dodge Walls | |
|---|---|
 | Simple Sway motion. The pattern and the wall encourage the player to shift the weight to the right. |
 | Simple Lean motion. The pattern encourages leaning clockwise, which works well with the dodge wall putting the player's head out of harm's way through the rotation. |
 | Hard Dodge motion. This pattern requires much more violent motion, with the player needing to unnaturally put the head out of the way while hitting the notes. This will be problematic if it fights an established lean or sway pattern. |
 | Sway Lean motion / anti-lean wall. This pattern can be played well, but it requires a simultaneous counter-clockwise lean motion and a heavy sway motion to the right to avoid hitting the wall. If the sway motion is not established, this will unfairly push the player's head into the wall. |
Bad Practice
Make sure that your established body motion will not push players into a dodge wall.
In terms of representation, dodge walls should normally be associated with a sound, and it is common to also have notes associated to the same sound.
Regardless of this choice, since the motion associated to a dodge wall happens before the wall, the wall should be placed after the sound, so that the motion coincides with the sound. Typically, 1/4 or 1/2 beats later is suggested.
TIP
Dodge walls should always appear after the sound they are associated with.
Also note that dodge walls have relevant effects on vision.
Crouching
Crouching or squatting is achieved by the adequately named crouch, squat, or duck walls which involve the player significantly lowering their head. This is a very physically demanding motion that has a range of secondary effects, and is generally used in dancy and fitness maps.
While the wall itself is the fundamental trigger of a crouch, there are a series of aspects that can make it easier or more comfortable to play.
Having enough time to perform the crouch motion is the most important one. This involves:
- Seeing the wall in time. For this, adjusting the jump settings of maps with crouch walls can be important.
- Avoiding motions that counter the crouching motion shortly before the wall. (For example, top row backhand swings)
- Like dodge walls, crouch walls should appear after the motion they are related to. In fact, crouch walls will typically be placed at least 1/2 beat after their associated sound to allow enough time to perform the motion.
- The frequency of crouch walls should be quite low. Apart from being physically demanding, seeing a crouch wall, crouching, letting it end, and standing back up, takes time. Typically, there should be at least ~3 seconds between crouch walls, with anything below 2 seconds being extremely challenging to play.
While there are no hard rules on this, swings that point downwards will help encourage a crouch, especially if they are forehand swings.
| Crouch Wall Setup |
|---|
 |
| A standard crouch wall setup. The down swing helps the crouch, and the wall is 1/2 beat after the associated sound/motion. |
Sometimes, side walls can be used to slowly build the crouch, alerting players ahead of time that something is going to happen.
| Crouch Signposting |
|---|
 |
| Crouches can be signposted by having walls that slowly build into the crouch, bringing more visual attention from the player into it. |
Finally, establishing the expectation of a crouch by using it for regularly timed sounds, and/or using well established patterns of movement that lead into crouches, can turn crouch walls from a jump scare to a core element of the enjoyment of a map. This is discussed further in the section on map context.
Bad Practice
Do not randomly throw in crouch walls in your map as this will alienate players. Make sure they are contextualized, built into, and that the motion is helped. If crouch walls are not a core element of your map, consider whether you really need them.
Some other aspects of the map are changed during crouches. Firstly, extended crouches (crouches that last several seconds) can be okay but are fundamentally more noticeable to play and should be reserved for heavy fitness maps, and even in those cases their use should be limited.
Vision is significantly changed while crouching, with the position of the player moving about one whole row down. Therefore, the criteria of what counts as a vision block is modified before, during and after a crouch wall.
TIP
Crouching changes how vision blocks work due to the head moving.
Similarly, the arms have less space to move and tend to be more on the sides while crouching. Reach is reduced in all directions, but especially vertically upwards. As a result, it is not recommended to have top row swings right after a crouch wall ends.
TIP
Avoid using the top row right after a crouch wall ends.
Read more...
Irahi, a well known fitness mapper, wrote a document with some useful tips on mapping fitness.
Bombs
Bombs can be a really cool way to represent additional sounds, generate a feeling of tension, or produce secondary movements. However, they come with a lot of pitfalls and caveats. Good bomb usage requires very careful thought and being considerate with the player.
Unlike notes, bombs have very little information regarding what exact movement should be performed. Bombs should be placed with flow in mind just as much as notes are.
Bomb usage can be divided into three categories:
- Bombs not meant to interfere with the movement of the player. Cosmetic bombs.
- Bombs meant to prevent the player from doing a certain movement. Bomb holds.
- Bombs meant to make the player do a certain movement. Typically bomb resets.
These can be used in tandem, but the goal for each particular bomb should clearly be one of these three. In the majority of cases you also want the bombs to represent a particular sound.
TIP
Ambiguous bombs are inherently problematic. You should always have a clear idea of whether the bombs are meant to be purely cosmetic, prevent a movement, or produce a movement and communicate it clearly.
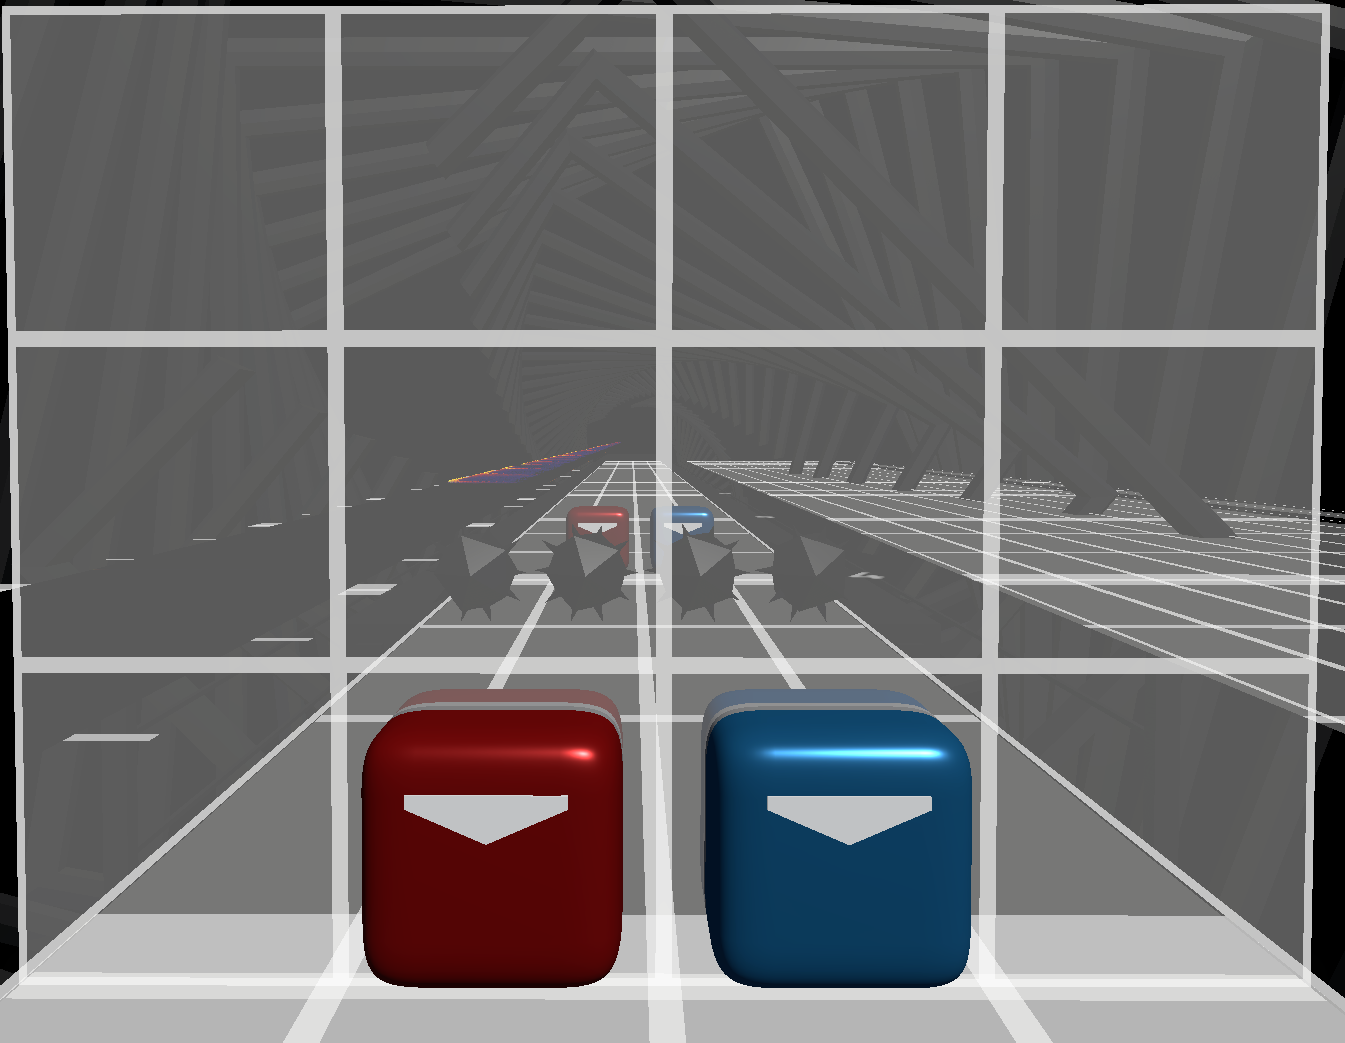
Cosmetic bombs are the easiest to understand. They are used for visual emphasis and should be completely out of the way of the sabers. For example, if one hand just did a forehand swing, you may want to avoid having cosmetic bombs in the whole of the bottom row.
WARNING
Sabers move involuntarily in between swings. In particular, they naturally will move towards a neutral position (down after a forehand, up after a backhand). Cosmetic bombs should account for this small movement and avoid being in the way.
| Problematic Cosmetic Bombs |
|---|
 |
| It might seem that the bombs are out of the left hand's way after this swing, but the saber will naturally move back to the left slowly, very likely hitting the bombs and making many players reset. The parity afterwards is ambiguous. |
Example
The bomb field at https://allpoland.github.io/ArcViewer/?id=2f77b&t=172 is quite aggressive, but it is entirely out of the sabers' paths and therefore it is almost impossible for the players to hit it.
However, this should be avoided in lower difficulties as bombs towards the face will terrify lower skill players.
It can be risky to have cosmetic bombs mapped simultaneously to notes as bombs are easy to hit on accident. This is because saber swings take up a lot more space than it seems, and vary between different players or even different swings by the same player.
When doing bomb spirals over a long period of time, consider pausing them (i.e. having no bombs) around the notes that require swinging.
WARNING
Any bombs present at the same time as a saber is swinging will be inherently risky. To be safe, leave approximately 1/4 beats before and after any note free of bombs.
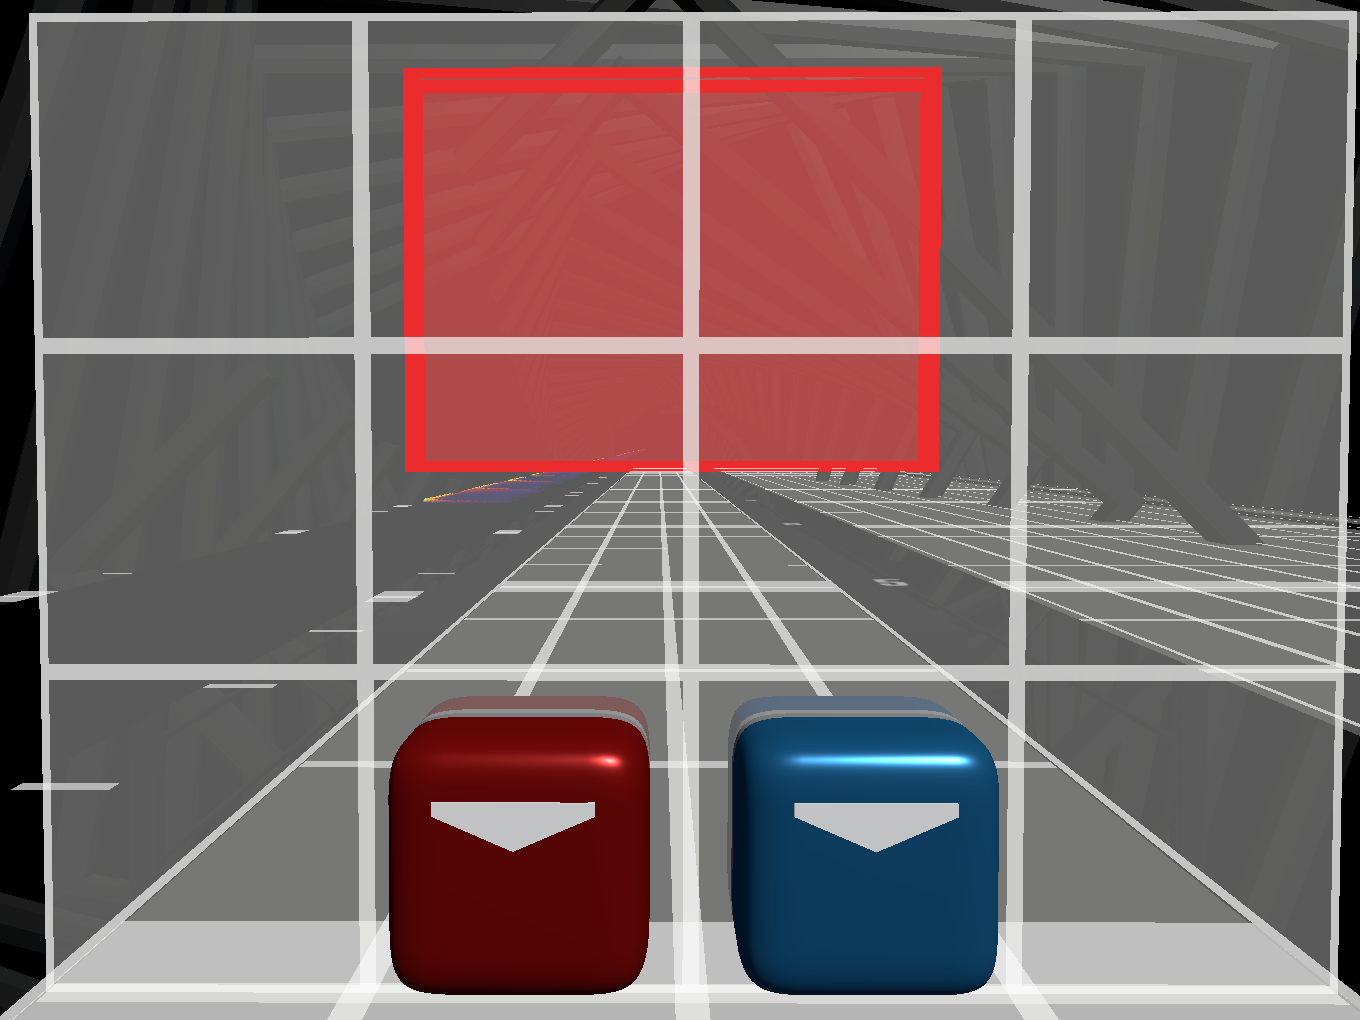
Bomb holds are meant to communicate to the player that they should not do a certain movement. Bomb holds work best when:
- They start very soon after the previous swing. This allows the player to read the bombs as part of the pattern and prevents them from resetting their sabers to a neutral position.
- They keep the area where the sabers are positioned after the swing safe from hitting a bomb.
- There are a lot of bombs, clearly indicating that the sabers cannot be moved back.
Example
In https://allpoland.github.io/ArcViewer/?id=34847&t=75 very large fields of precision placed bombs with Noodle Extensions are used to communicate that the posture should be held after the swings.
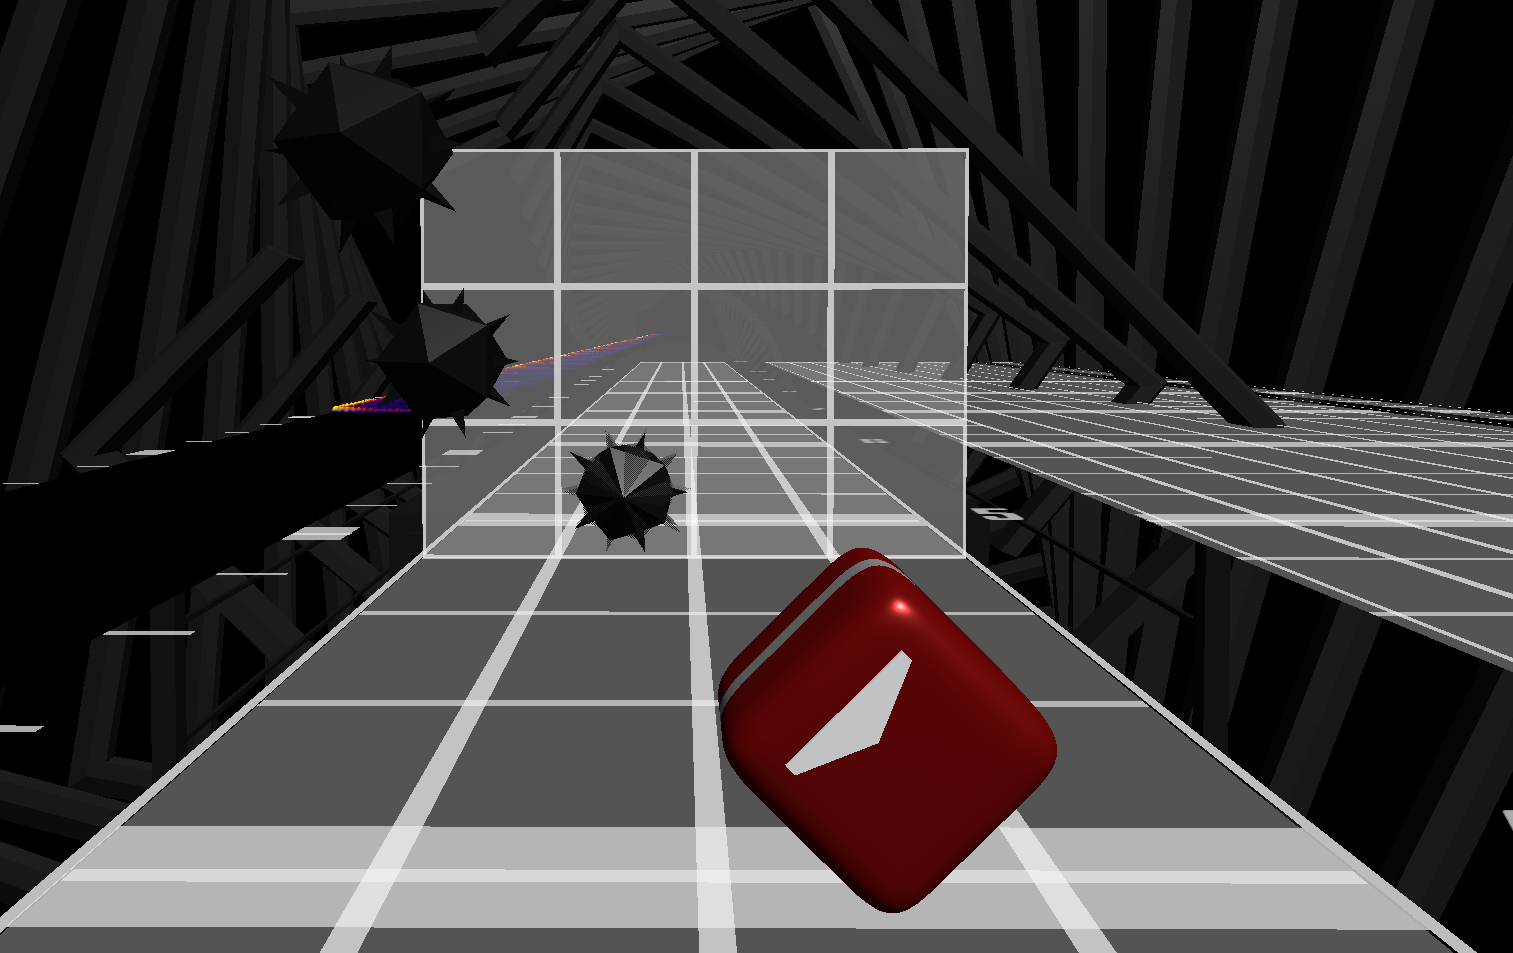
Bomb resets are meant to indicate an active movement and are the most common type of bombs. In many ways, the rules for making bomb resets work are the opposite of bomb holds:
- They should give some time after the previous swing for the player to read and perform the reset motion.
- They clearly cover the area where the sabers are right after the swing.
- They only cover the area where the sabers were, leaving the rest of the play area safe, giving flexibility on the positioning of the sabers after the reset.
As the name indicates, bomb resets will reset parity. Due to how bomb spawning works (starting on the bottom row), and the comfort of different movements, bomb resets work the best when they are placed after a forehand swing (bottom resets). While top resets can work, they are considerably more risky and will alienate a lot of players.
| Bomb Resets | |
|---|---|
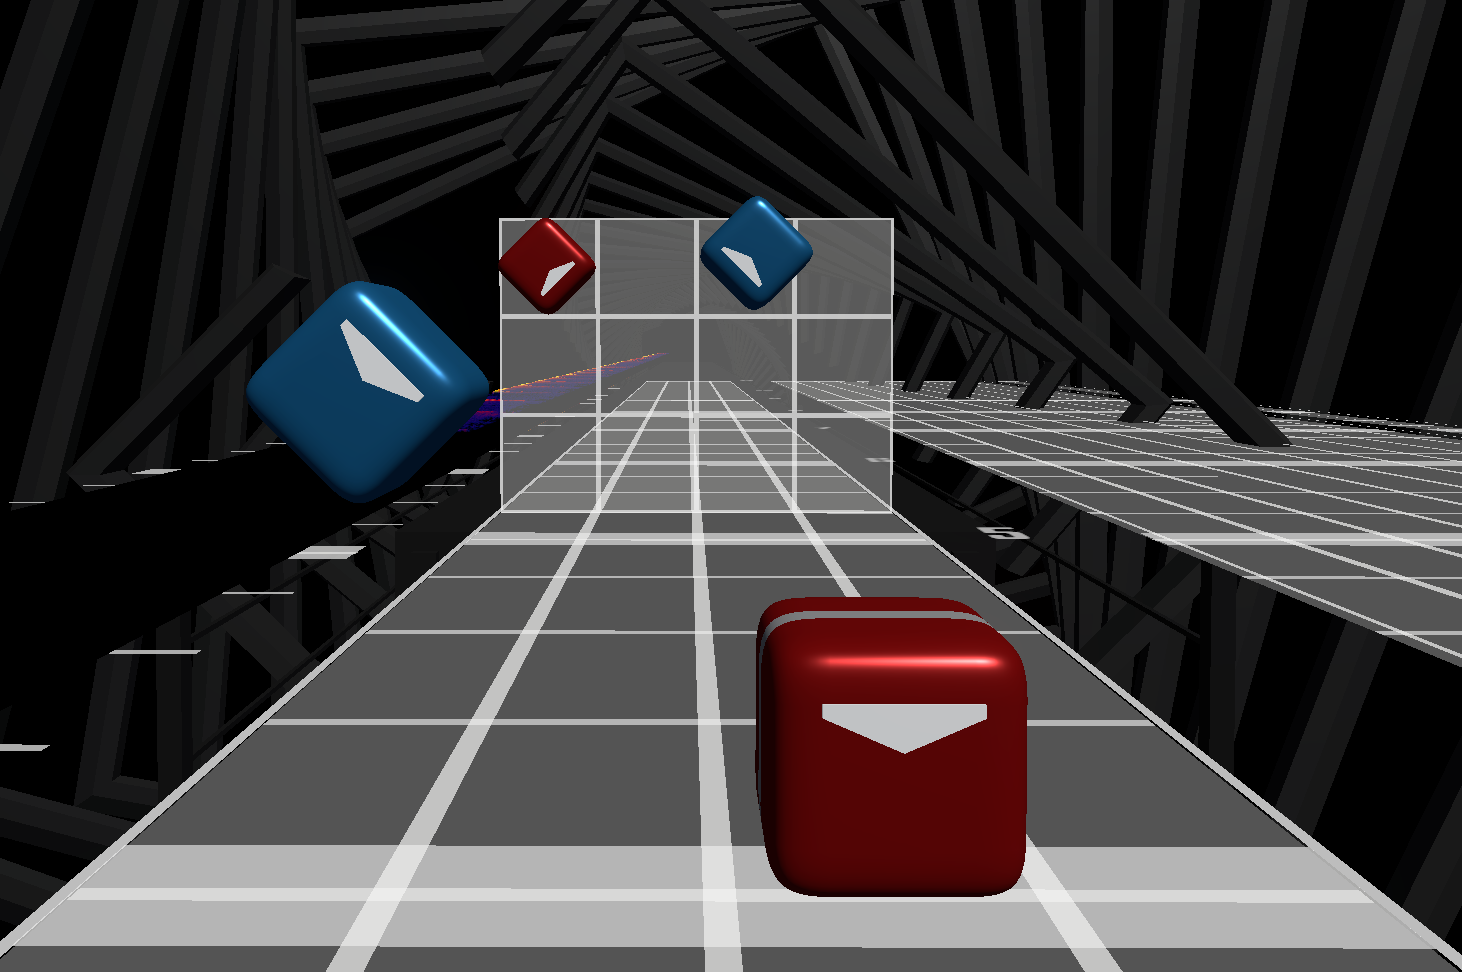
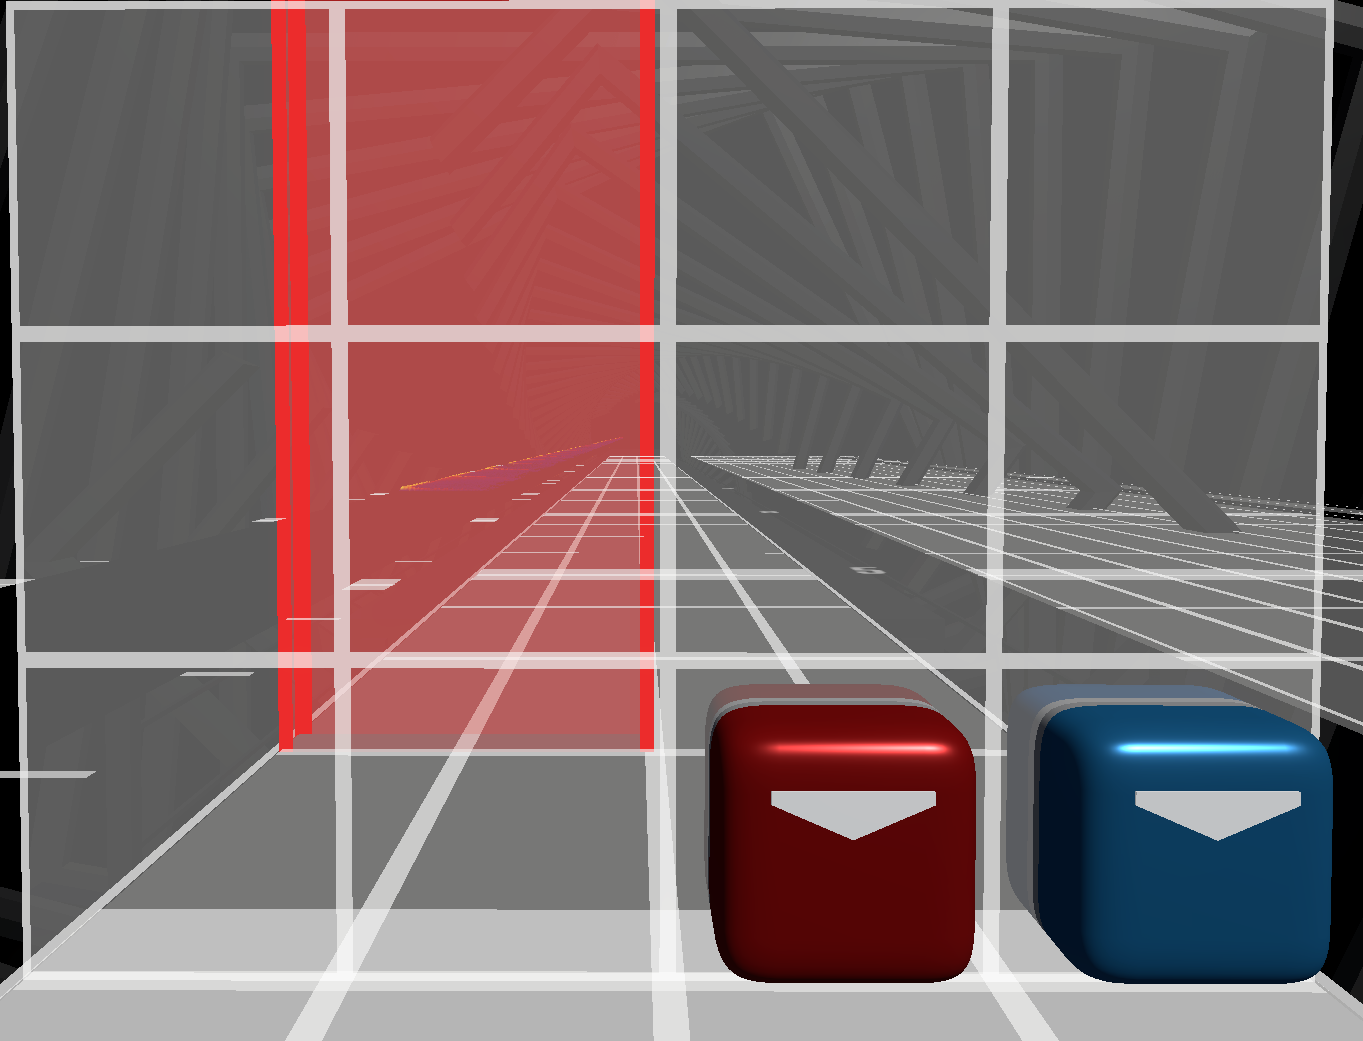
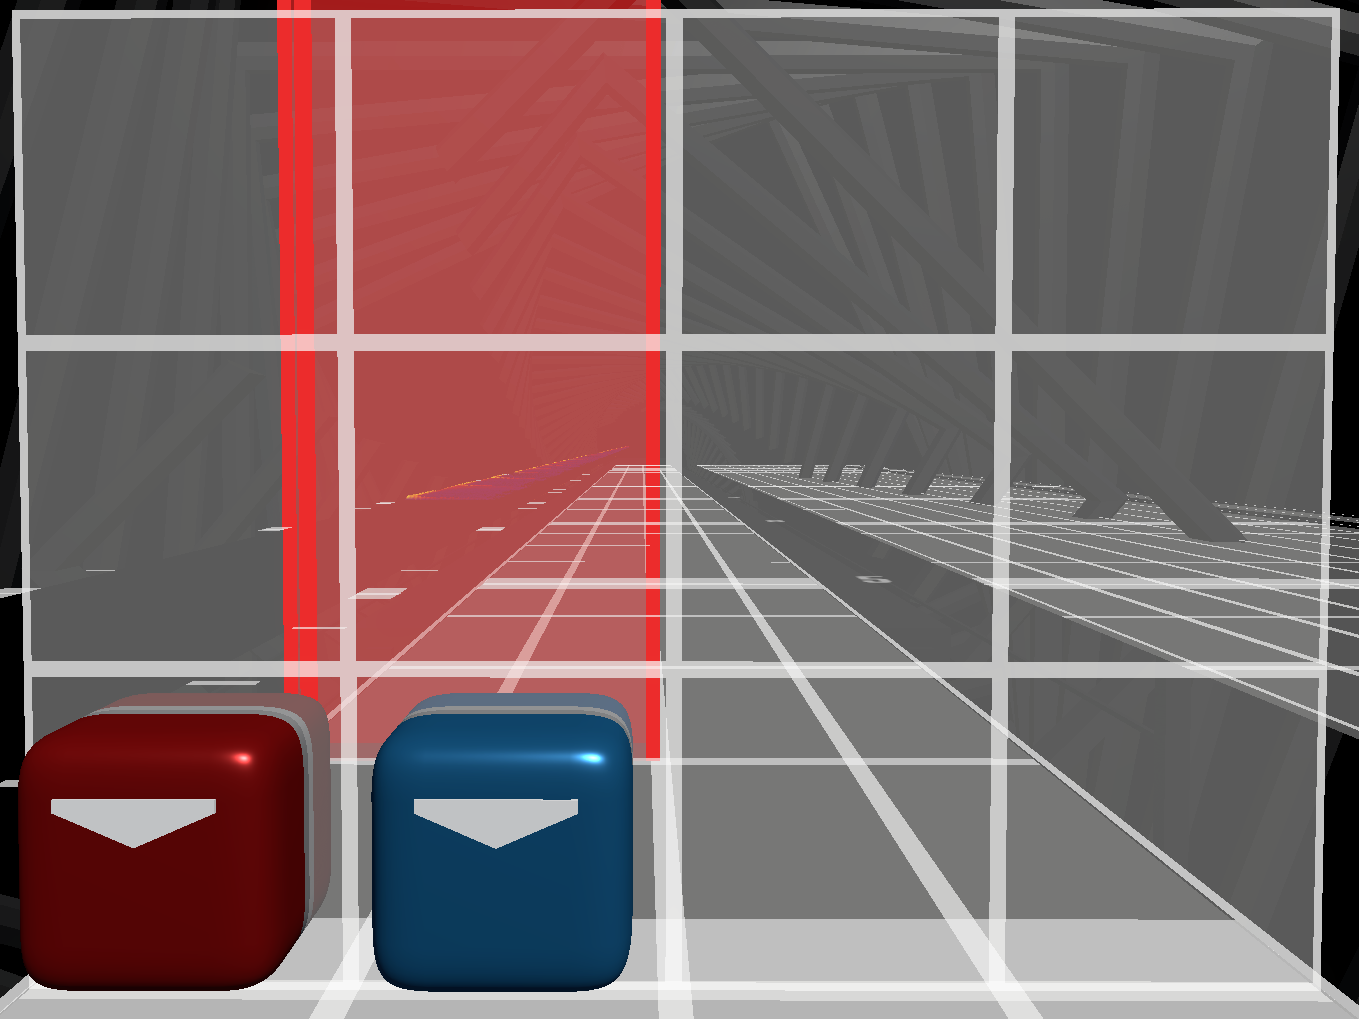
 | Bottom resets are easier to read (due to bomb spawning) and play (due to parity being asymmetric). |
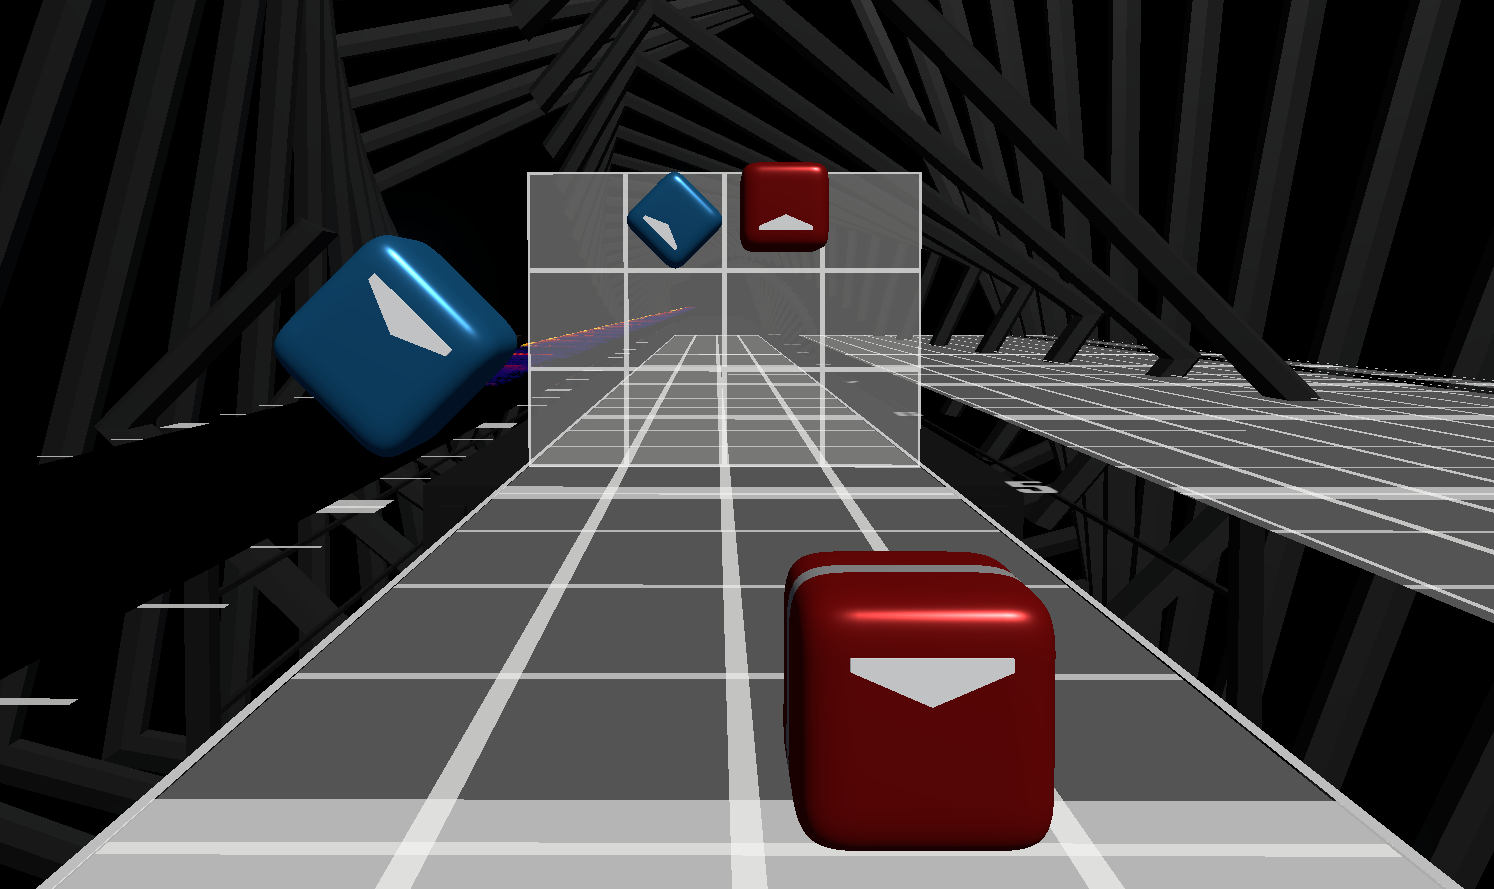
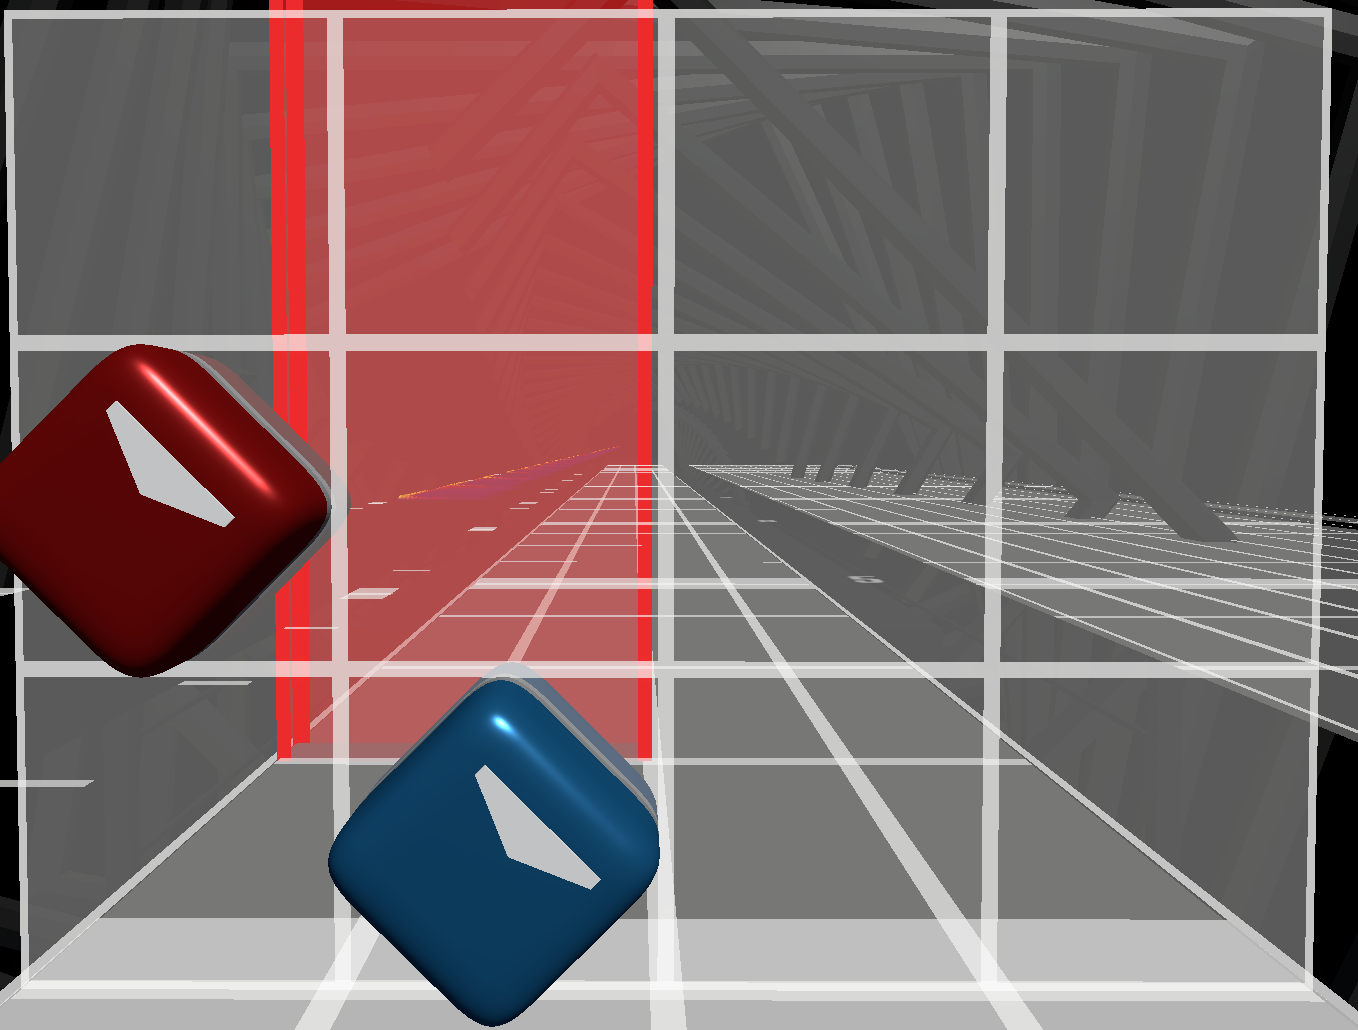
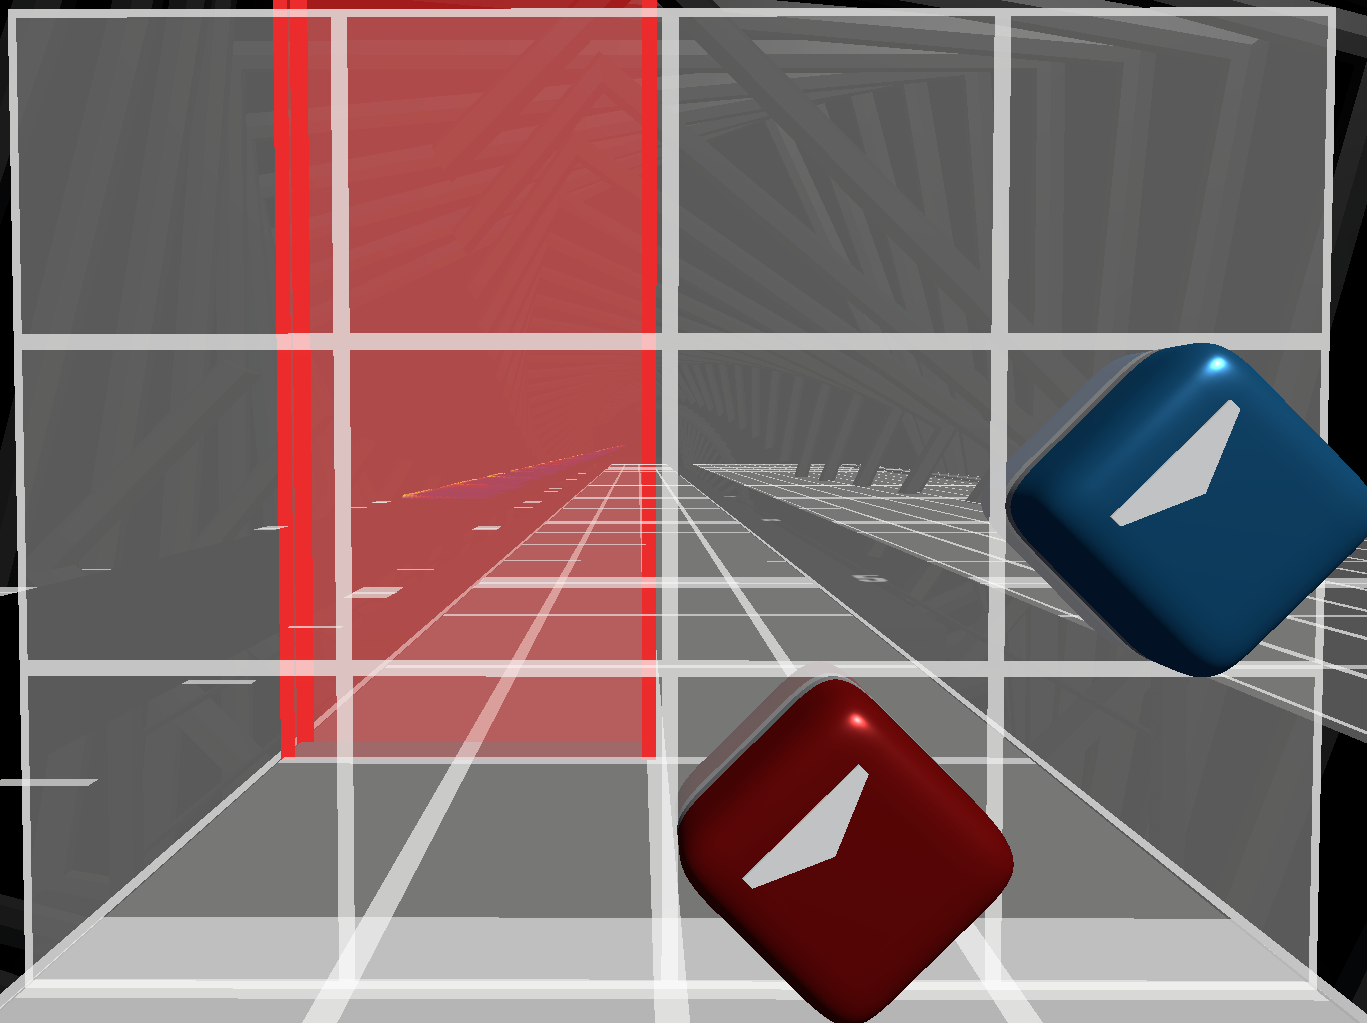
 | While top resets can work, they are considerably more difficult to read and play, and they will alienate many players. You should not use them lightly. |
WARNING
Top resets are a lot harder to read and play, and a lot of players dislike them.
Like with walls, the motion associated with bomb resets happens before the bombs, and therefore, bombs should be placed after the sound associated with them to make the motion happen at the same time as the sound.
If there is no specific sound associated with the reset, the bombs should be closer to the notes after than to the notes before.
Bad Practice
Do not place bomb resets at the middle point between the swings. They should always be closer to the next swing. 2/3 of the way from the previous notes is typically used.
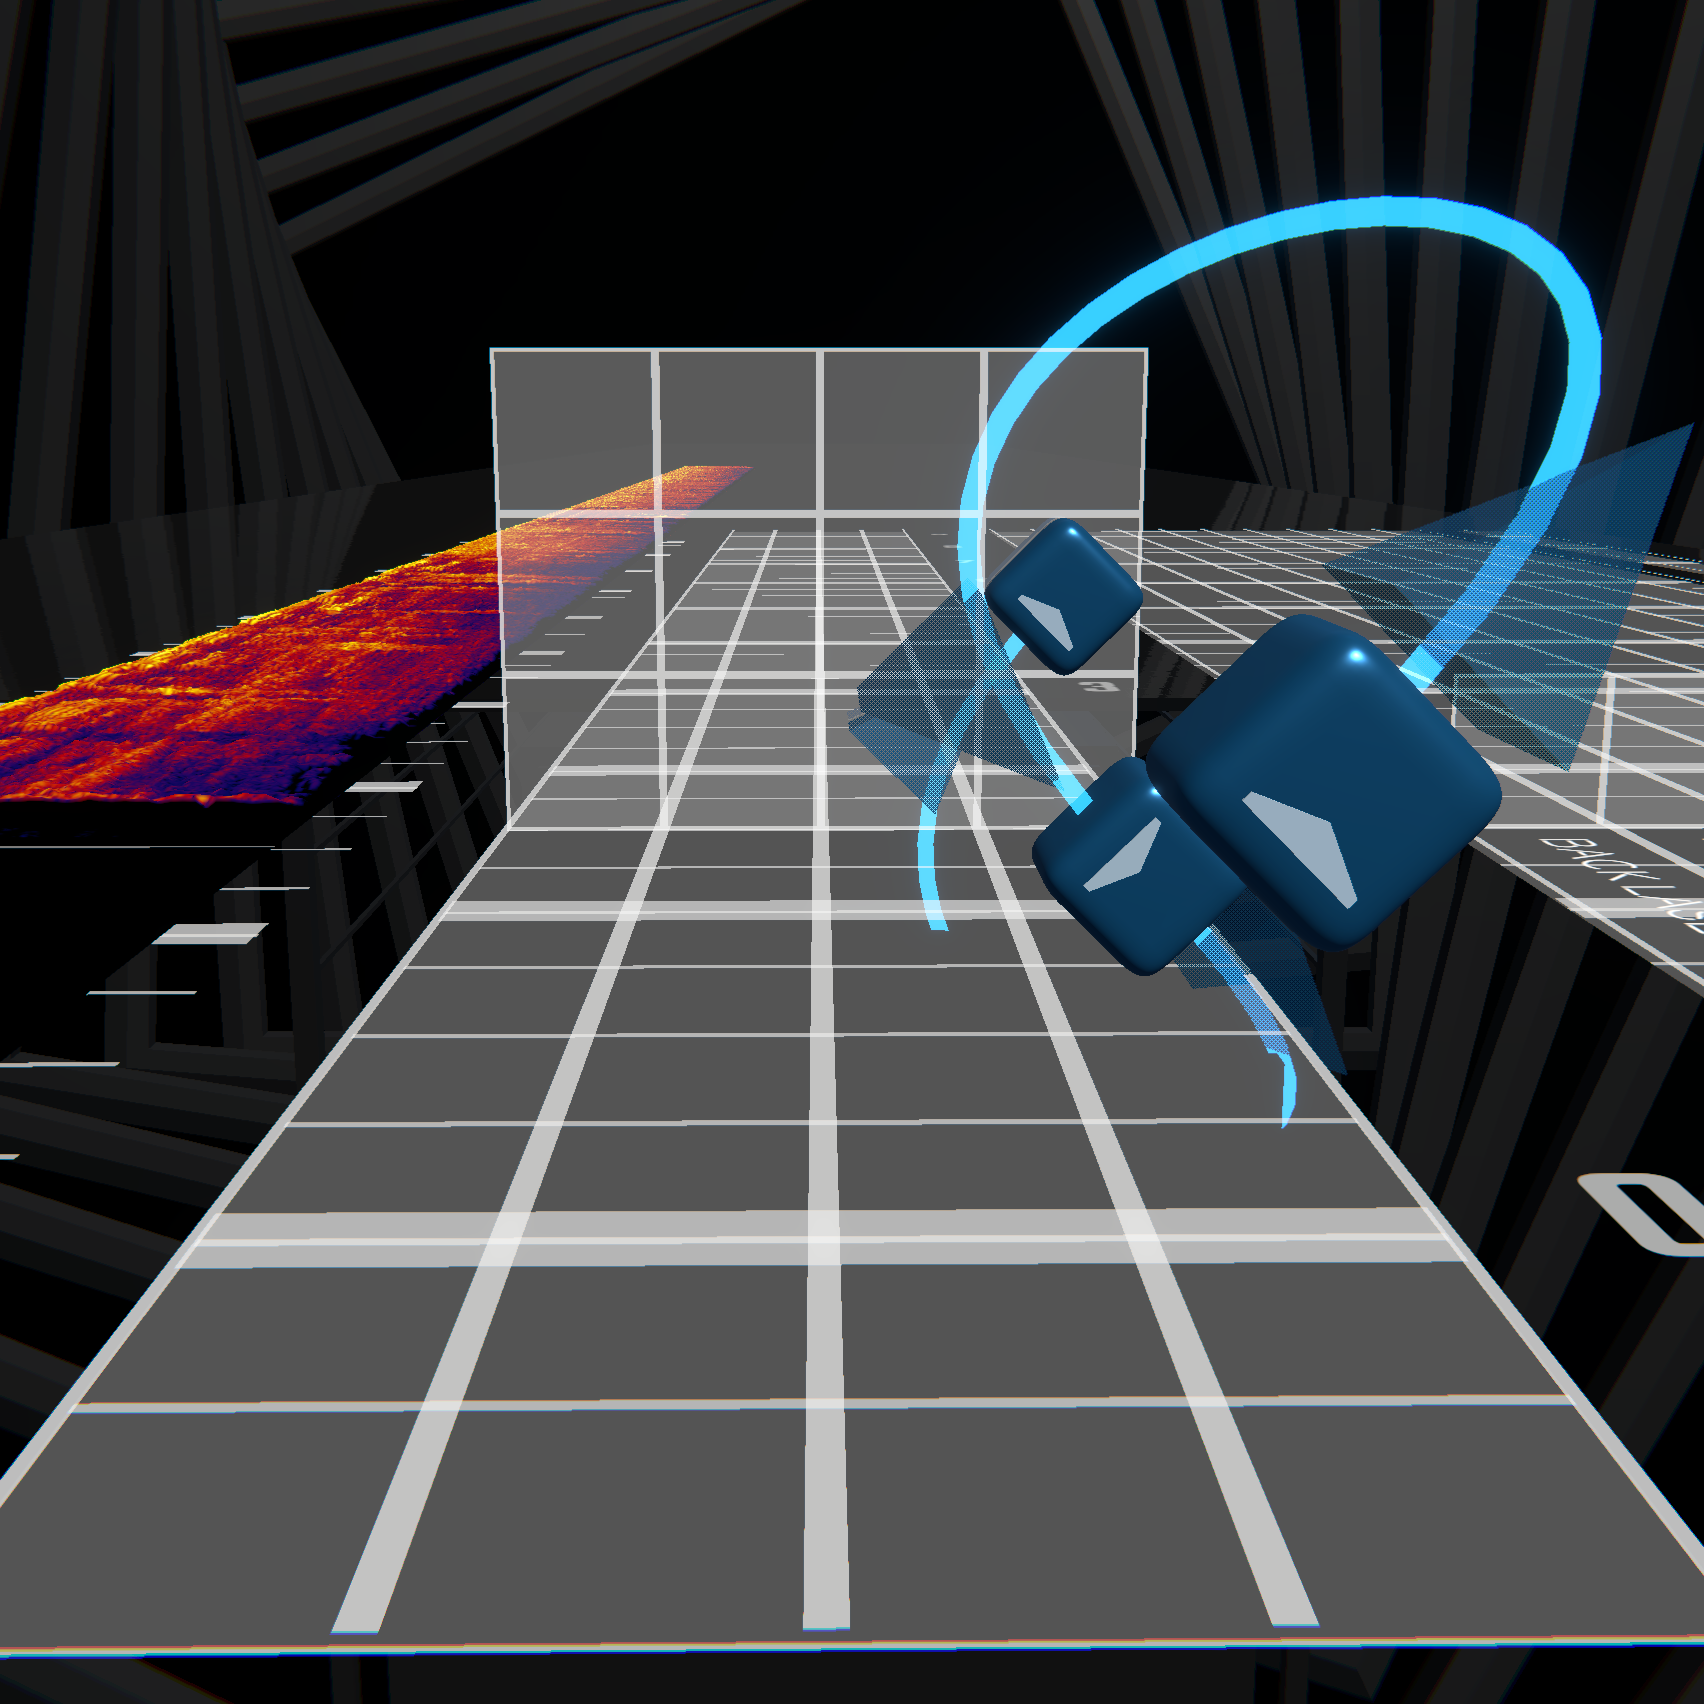
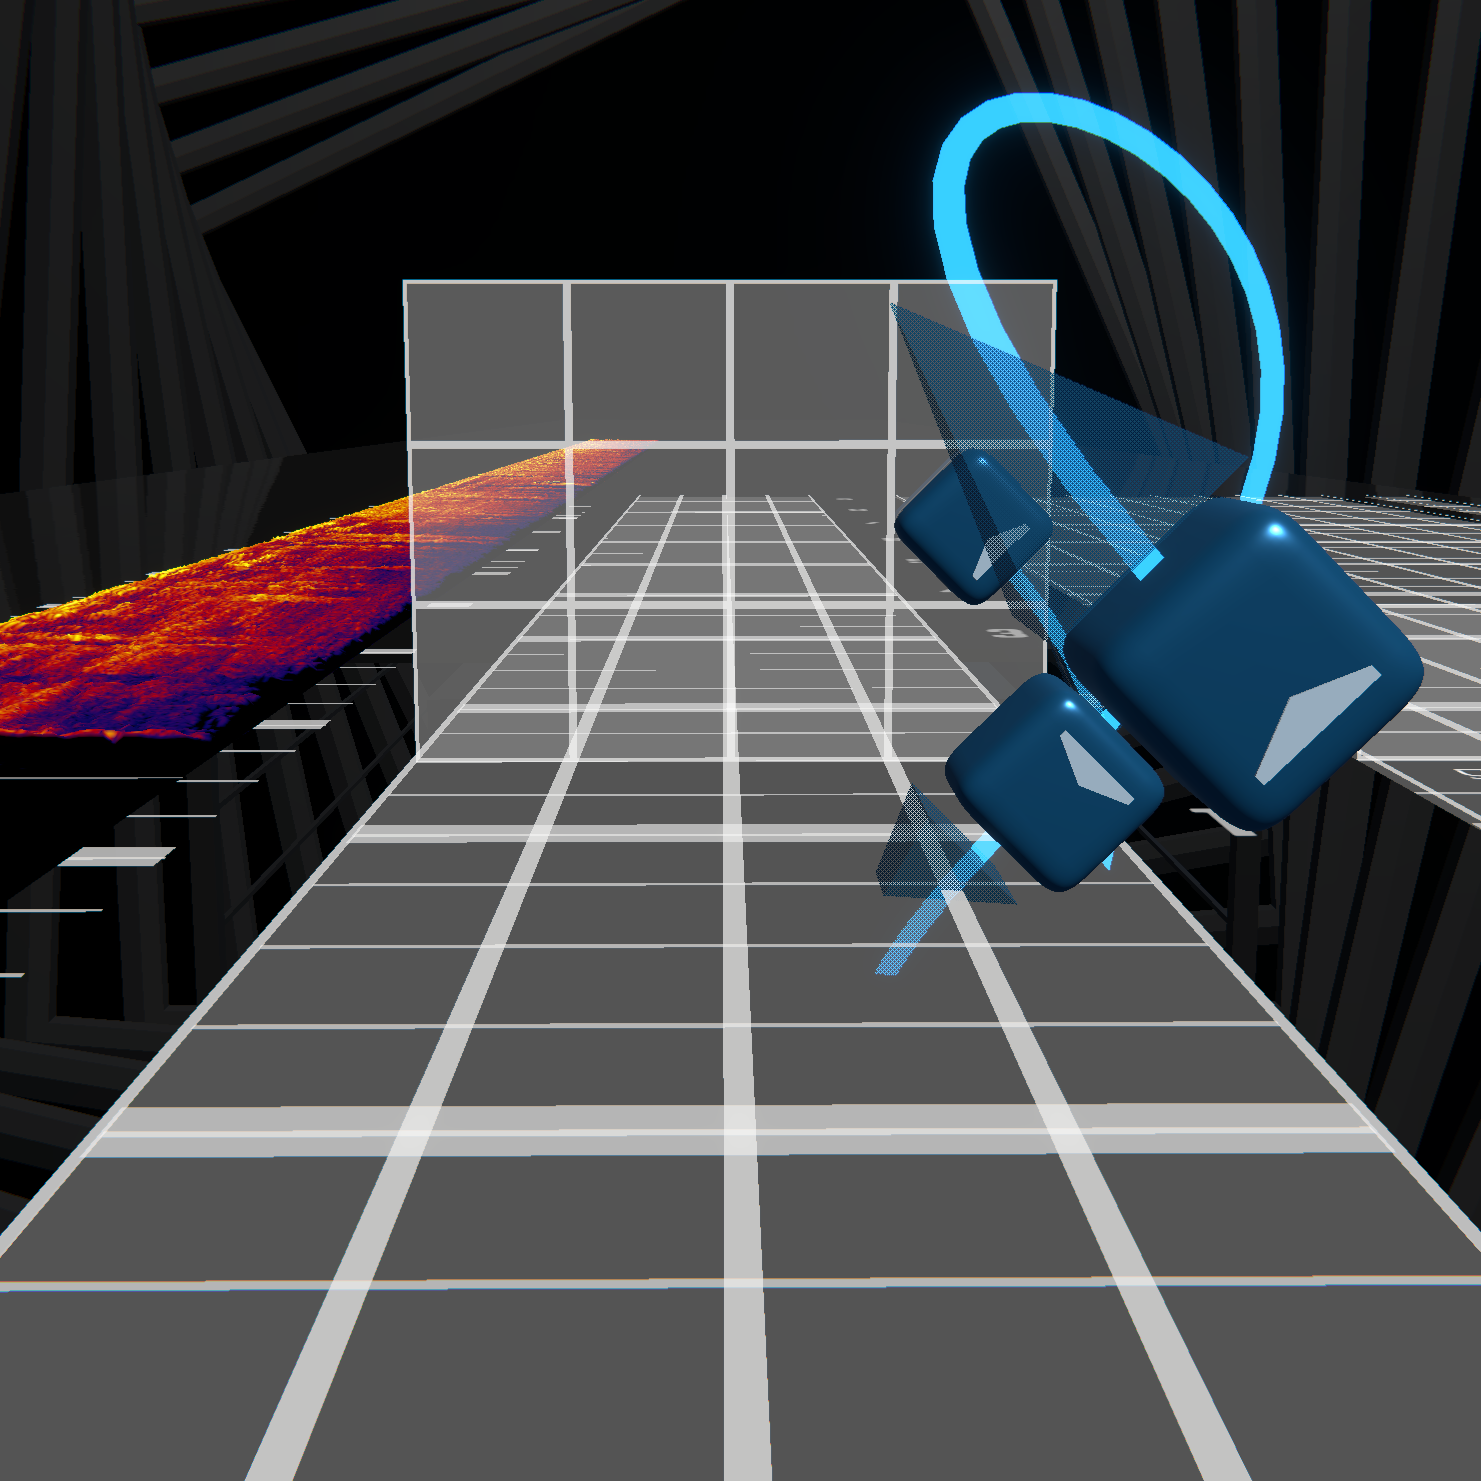
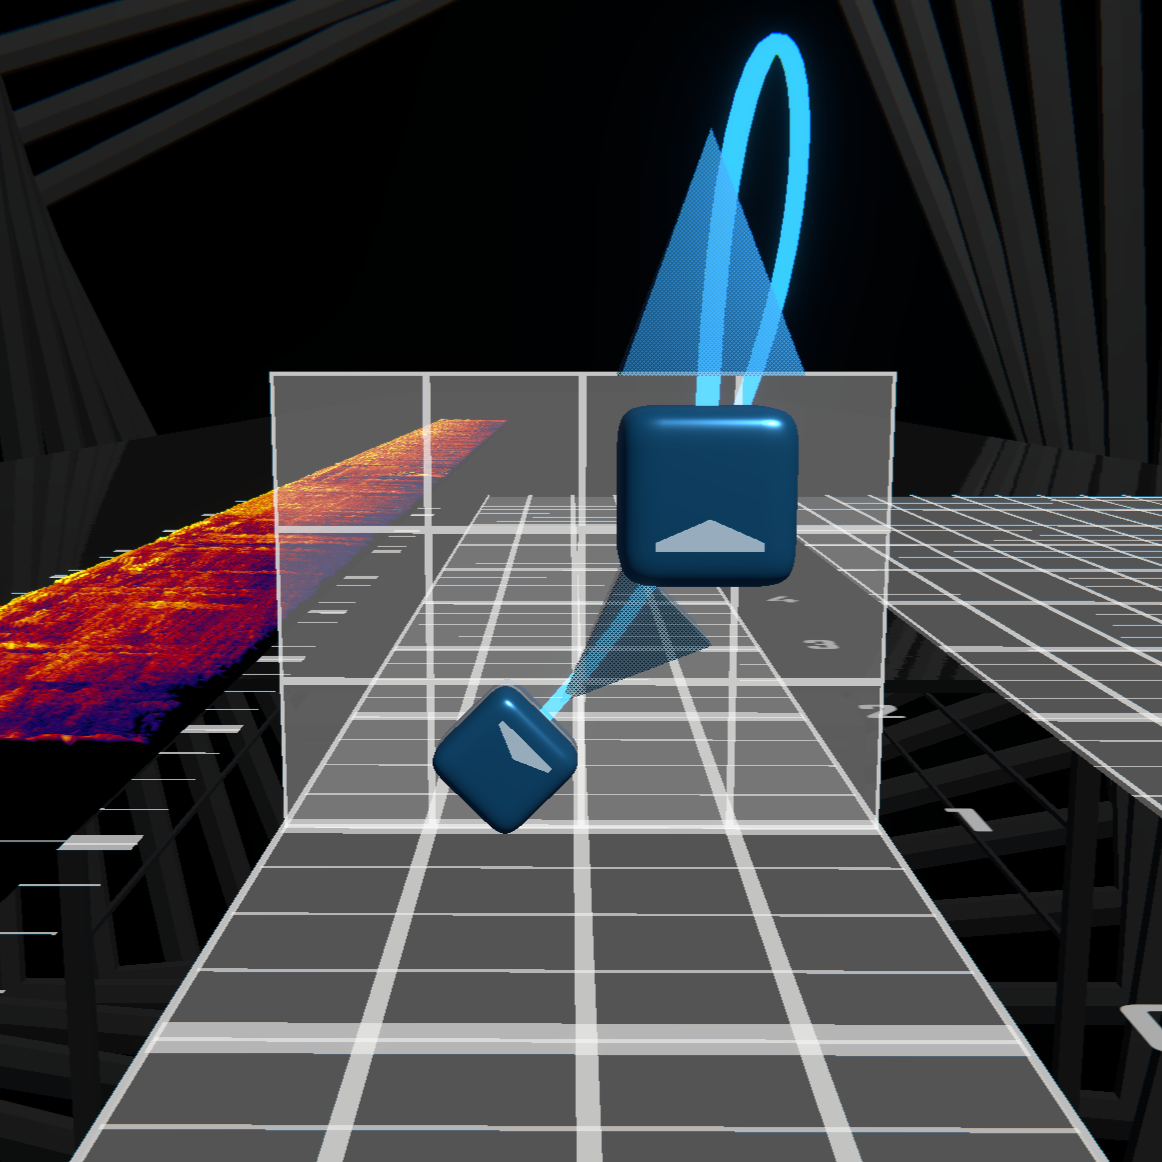
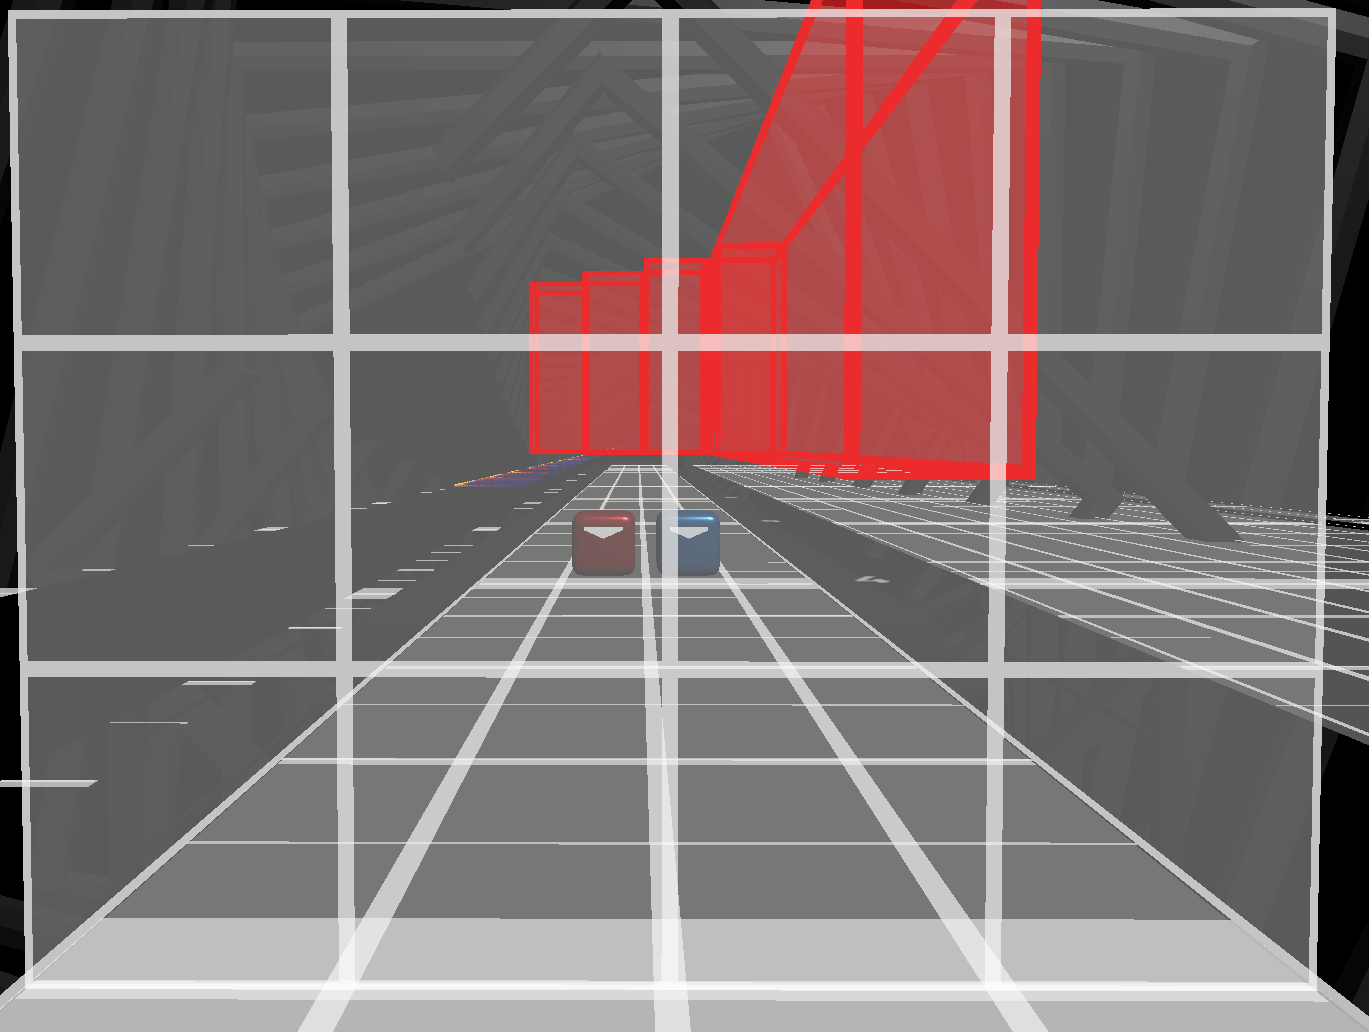
Bomb spirals are longer bomb fields that move through the play area and are used to communicate multiple things as time goes by. This can be flavorful and keep the player's attention on the bombs throughout, communicating the motions more clearly.
When a bomb spiral is used to slowly make the player move their sabers, you have to account for the fact that players will avoid the bombs using a minimal amount of movement. Therefore, spirals should conceptually be behind the sabers' current position and slowly move towards them, effectively pushing the sabers.
| Bomb Spiral |
|---|
 |
| The bomb spiral will effectively "chase" and "push" the sabers in a circular motion, the sabers being slightly ahead of the spiral. |
TIP
Think of a bomb spiral as "chasing" the sabers, always slightly behind them, "pushing" them.
WARNING
The parity after a bomb spiral can easily be ambiguous, as the movement they induce does not have strict parity. Try to make sure you communicate exactly what parity the player should have when a bomb spiral ends.
Example
The following map uses bombs throughout on the sections with the most complex flow. These are mostly bomb holds to prevent the player from resetting to a neutral posture, with slight hints of bomb spirals that help communicate what the next motion should be. They are also very flavorful, representing the growling sound.
You can see this used in different ways but for the same purpose in multiple sections of the map:
Cosmetic Walls
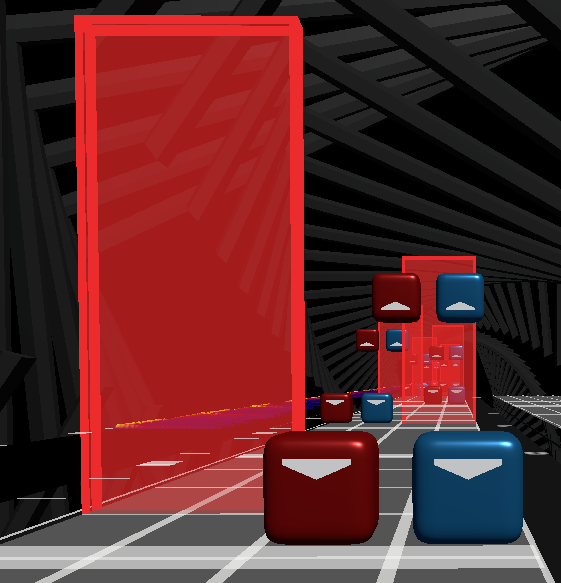
Cosmetic walls are one option for adding a visual element to the map close to the player. They narrow down the field to a smaller region, making notes feel closer together and faster approaching. They can also be used to represent sounds not mapped by notes, or even to flesh out quiet or slow drifting sections.
When making v3 maps, or using Mapping or Noodle Extensions, a large space of possibilities is opened up by allowing walls to be of almost any height, width, and location. v3 walls can extend horizontally as far as you wish, where extended mapping walls also enable unlimited height, precision placement, and more.
Examples
These are some maps that use vanilla v3 walls for cosmetic purposes:
Arcs
Arcs' main function is representation - used for long dragging sounds or sequences of sounds that feel linked.
They can also serve some minor gameplay functionality, helping readability by guiding the hands in between notes. However, they should not be used to try to map otherwise unreadable swings. This is dependent on the player and works best for slow transitions lasting several seconds.
Arcs also have a minor effect on scoring by giving a full score for the post-swing of the head note and the pre-swing of the tail note.
Bad Practice
While arcs can help readability, you should not rely on them to be the only thing communicating an otherwise unreadable motion.
Arcs do come with some downsides, as they can severely increase clutter and cause vision blocks for some players. Therefore, they should be reserved for select swings or parts of the song.
Arcs can be tweaked by adjusting the positions and angles for head and tail notes to make the path more suitable. Their head and tail multipliers should also be adjusted to make the curve size more adequate.
Bad Practice
Do not abuse arc usage. They will affect vision, create clutter, and blur out representation. Reserve them for select swings or parts.
TIP
Adjust head and tail multipliers for arcs to find the best aesthetics and readability.
Note that most environments will also introduce clamping, where large arcs get flattened to avoid intersecting with environment objects. This can be very aesthetically unpleasant for some people.
The following environments do not have clamping, so you can trust the arcs will look smooth.
- Skrillex
- Weave
You can also tweak multipliers and check in-game to prevent clamping on other environments.
Momentum and Tension
Momentum can refer to multiple concepts, most of which relate in one way or another to the physical momentum of the body. If you have physical intuitions about momentum, these will be useful for understanding this section.
Keep in mind that there is more at play than pure physics when a player is playing a Beat Saber map.
Several concepts are relevant for momentum mapping, but this section focuses on one of the most integral ones: Rotational momentum.
Rotational momentum is the idea that after a hand rotates in one direction, it will build momentum, making it more comfortable to continue rotating in the same direction. The larger a rotation is, the more momentum it generates.
| Rotational Momentum | |
|---|---|
 | This sequence follows momentum. The counter-clockwise rotation between the first two notes makes it more natural to continue with another counter-clockwise rotation. |
 | This sequence breaks momentum. After the first counter-clockwise rotation, trying to do a heavy rotation in the opposite direction feels unnatural. Additionally, since this is done on negative curvature, it will make this sequence particularly awkward for most players. |
TIP
After a rotation, following momentum by continuing to rotate in the same direction creates better flow.
Another aspect that significantly affects rotational momentum is relative positioning of notes. This can be seen through the effect of arm circles. While this effect is more relative and depends on other factors, as a general rule, a circling motion in one direction will help generate rotational momentum in the same direction.
| Momentum and Arm Circles |
|---|
 |
| The counter-clockwise arm circle will generate some rotational momentum that makes the rotation on the third swing more natural. |
TIP
Use arm circles in the same direction as rotation to help generate rotational momentum.
In a more general sense, more inverted and horizontally displaced patterns generate more rotational momentum than linear patterns.
| Exploiting Positioning to Build Momentum | |
|---|---|
 | While this sequence follows momentum, it does not build a lot of it due to the linearity of the second swing. |
 | Making the second swing an inversion and horizontally displaced makes a circling motion that helps the rotation on the last swing. |
Of course, if we just followed momentum forever, we would endlessly rotate in the same direction and never go back. This should be avoided as it gradually becomes more difficult to continue in that direction. This is because of tension which relates to the absolute rotation of each swing.
| Endless Momentum |
|---|
 |
| While this pattern technically follows momentum, it is unplayable without resetting due to tension. |
The further the swing angle is from a neutral angle (typically up/down or slightly palm-in), the more tension there is to rotate back towards a neutral position.
Tension will build as we continue rotating, and fights against momentum until we reach a limit, or apex, and begin rotating in the opposite direction (called a momentum reversal).
At this point, all the built-up tension will generate rotational momentum back in the opposite direction. The apex angle depends on context and the amount of momentum built up. Mappers should be conscious of this as it can relate to the emphasis and consistency of a map.
TIP
Use the apex of rotations to control intensity, emphasis and consistency.
| Momentum Apex |
|---|
 |
| In this very intense sequence, the apex hits (which are all forehand hits here) are on quite extreme angles. Momentum has transformed into tension that is then released on the opposite direction. |
Readers familiar with physics might notice that this is similar to periodic systems where energy oscillates between two different forms of energy (typically, potential and kinetic energy).
For example, a pendulum or a spring. Potential energy gets transformed into kinetic energy, accelerating the system, which then is used to accumulate potential energy on the other side, until an apex is reached, and a reversal happens.
The physics interpretation should be taken with a grain of salt as there are two main caveats to consider:
- Momentum is not just related to how the map plays. It can also be a great way to communicate intended motion, significantly helping readability. This effect can have the same or greater impact on playability (especially in slower maps). Momentum mapping relies on this "sub-language" of mapping to make extreme hits a lot more predictable.
- There are many other factors in a Beat Saber map. While in theory breaking momentum will reduce readability and cause awkward patterns, it does not make them unplayable. A momentum break might be imperceivable, worth it for other reasons, or actually purposeful. It is good to be aware of how momentum and tension work, but like most other rules in mapping, you can break them in clever ways to enhance your representation, gameplay, and map identity.
TIP
Momentum and tension relate as much to readability as they do to physical gameplay.
WARNING
A good map can still break momentum. But it will do so purposefully and intelligently.
Example
Many mappers will follow momentum almost exclusively in their maps. GalaxyMaster is a prominent example, and you can see the principles at work in maps like https://allpoland.github.io/ArcViewer/?id=362c5&t=31 .
Read more...
- GalaxyMaster has published a summary of what he considers the main principles of momentum mapping.
- Kansas' incomplete glossary is heavily focused on momentum and related concepts.
Pattern Setup
Pattern setup refers to any immediate preparation before a pattern that helps readability and playability. It is an abstract concept that relates to all the topics covered so far, but it is worth considering the concept by itself.
Pattern setup can be achieved by things like:
- Cleverly using handedness before a pattern to make it clear what handedness the pattern will be, mainly by keeping variations consistent and predictable.
- Using handedness to enforce a certain parity for a pattern.
- Carefully tailoring sequences of rotations to get a certain angle for a pattern.
- Playing with spacing to achieve a certain position.
- Establishing a clear pattern of where the hands should be that the player can understand.
- Using rotations and positioning to aid full body motion.
- Using bombs to better communicate motions and make them more natural.
- Etc.
One key idea to consider when thinking about pattern setup is that you can work both forwards and backwards in time. You can place patterns in the map in order, based on what setup the previous patterns produced; you can also create a specific pattern idea, and retroactively modify earlier patterns to ensure proper setup.
TIP
Pattern setup is often about adjusting earlier patterns to create the desired situation for a later pattern.
Map Context
Where pattern setup refers to the immediate preparation before a pattern, map context refers to the more abstract idea of setting expectations within the map by using repeating concepts and/or patterns that the player understands and internalizes.
Map context can mainly affect the readability of patterns, with the same pattern changing from unreadable to obvious if it appears in a different map with different context.
Context can also affect other aspects of playability by influencing the player's playstyle. Such as, setting the expectation for larger rotations, more full body motion, being consistent with the amount of hand repositioning the patterns require to avoid handclaps and arm tangles, or establishing whether momentum should be expected or not.
It would be difficult to provide a full list of all aspects where context is relevant, but here are some typical aspects where context is helpful for making patterns playable:
- Being consistent with hard-to-follow parity (Using palm-up swings, resets, or both).
- Establish the expected intensity of rotations early on, and keep it consistent with respect to the intensity of the music.
- Use spacing consistently to signpost specific patterns, making them stand out more and easier to read.
- Keep a regular and clear policy for when the hands should be repositioned horizontally, making the map more comfortable to play.
- Establish full body motion patterns clearly near the beginning of the map.
- Be consistent about how you present cosmetic bombs, hold bombs, and bomb resets. That way, players will learn the pattern and read bombs much more easily.
- Be consistent in the intensity of apex rotations with respect to the intensity of the music, so players can predict when to continue rotating and when to reverse momentum.
Map context is critical in maps that aim to break some conventional rules about mapping ("gimmick" maps), so that the way in which the rules are broken is clear to the player.
TIP
If you want to use risky, unconventional, or extreme patterns, it is usually best to introduce them early on in the map in clear ways.
Example
https://allpoland.github.io/ArcViewer/?id=35b26 uses very unconventional flow, with lots of palm-out hits, some of which are also inverted. However, it establishes a clear pattern of swaying and leaning in a sort of conflicting way early on and continues throughout the map in how the swings transition and both their parity and angles. This allows the player to engage with this style of movement early on and have a much better time playing the map.
Read more...
GalaxyMaster has published some thoughts on pattern setup versus map context.
Jump Settings
Jump settings affect the whole map and change both how fast the objects move towards the player, and how far away they spawn.
While there are many values that describe jump settings, most of them depend on each other. There are 3 parameters the game uses to define a map's jump settings: BPM, Note Jump Speed (NJS), and Spawn Offset.
BPM is the tempo of the song. This should be set as part of your audio setup and completely determined by the song itself, so while it varies between songs, it is not something you can adjust.
Note Jump Speed (NJS) controls the speed at which objects approach the player, in meters per second. It should be the first parameter you adjust after you do the audio setup. If you readjust it later, you should also readjust other jump parameters.
NJS affects playability in two different and contradicting ways, with one of of these being more noticeable than the other:
Higher NJS reduces the timing window to hit notes, making timing stricter. This can have cascading effects on gameplay, incentivizing more stiff play, making hand repositioning harder, and causing more missed notes. This effect might be hard for players to clearly identify while playing, but will dramatically change the feel of the map even with small adjustments to NJS.
When a map is very dense and/or complex, resulting in lots of clutter, slightly higher NJS settings can help readability by increasing the spacing between notes. This effect is small and will not compensate for heavily cluttered maps, which should be fixed in more relevant ways, but it can be a useful tool when the map is inherently very dense and extra help is required. Faster maps will also naturally force more strict timing on swings, so a small increase in NJS will not have as dramatic an effect on timing compared to slower maps.
The recommended approach to deciding NJS is to keep it as low as possible without the map getting too cluttered.
TIP
Keep NJS as low as possible, and increase it only in small amounts when there is no better way to reduce clutter. 16 is a good starting point for Expert+.
There is, however, such a thing as too low NJS which will make timing harder to read and incentivize early swinging. It is recommended to start from a baseline and adjust from there based on feel. Here are some recommended NJS ranges:
| NJS range | When to use | Example |
|---|---|---|
| 0-8 | Do not use. Excessively low. Reading timing is difficult and notes will easily clump together. | |
| 8-12 | Very low NJS. Adequate for Easy or Normal difficulty maps with very low note density. | Link |
| 12-14 | Low NJS. Adequate for Normal or Hard difficulty maps, or Expert maps with low note density. | Link |
| 14-16 | Mid-low NJS. Most Hard and Expert maps will have NJS in this range, as well as some Expert+ maps with low note density and a floaty feel. | Link |
| 16 | Standard Expert+ NJS. This is normally the baseline NJS most people start from for Expert+ maps. An Expert+ map of standard note density should probably have this NJS. | Link |
| 16-18 | Mid-high NJS. A lot of Expert+ maps will be in this range. The effect on timing is not very noticeable and it may help readability slightly. | Link |
| 18-20 | High NJS. The effect on timing begins to be noticeable, but most people can play it. Use for moderately cluttered maps. | Link |
| 20-22 | Very high NJS. The effect on timing is very noticeable, affecting the player's swings; as well as significantly increasing the map's difficulty. For very fast and complex maps, this NJS might be warranted. | Link |
| 22-25 | Extremely high NJS. Arguably, no map needs to go this high, but for particularly extreme challenge or speed maps, some may feel that this range is warranted. Timing is extremely tight and most players will have issues with it. | Link |
| 25+ | Do not use. There is essentially no good reason to use NJS above 25 for any map. NJS becomes one of the main difficulties in the map. |
The third and final parameter is spawn offset, which is directly linked to three other values:
- Half Jump Duration - how far away in beats objects spawn
- Jump Distance - how far away in meters objects spawn
- Reaction Time - how far away in milliseconds objects spawn
The following detail dropdown is a technical explanation of these values, but it is not relevant for most mappers.
Technical Details
A map's jump distance is technically defined by a value called half jump duration, which is the number of beats ahead of their song time that objects spawn. A map has a "base" half jump duration calculated through an algorithm, based on the BPM and NJS. Then, the spawn offset (also measured in beats) gets added to it, to produce the final half jump duration.
The jump distance is then a consequence of the final half jump duration and NJS, and is measured in meters, being double the distance from the player to the notes when they spawn.
The reaction time is the amount of time, in milliseconds, ahead of an object's song time that it spawns. In other words, the actual amount of time a player has to see and process an object before it reaches them.
For example, for a map with 120 BPM and an NJS of 16, the base half jump duration will be calculated to be 2 beats. If the map has an offset of -0.5, that makes the final half jump duration 1.5 beats. At 120 BPM, that is 750 ms of reaction time (1.5 beats at 120 BPM takes 750 ms). At 16 NJS, that is 24 jump distance (at 16 meters per second, in 750 ms an object moves 12 meters, and the double of 12 is 24).
In practice, the recommended approach is to choose your preferred reaction time, and adjust the spawn offset to reach the desired reaction time. Some editors, like ChroMapper, allow you to directly modify reaction time, automatically adjusting the spawn offset accordingly.
TIP
Generally it is simplest to focus on reaction time, and ignore jump distance, half jump duration and spawn offset; letting them be automatically calculated.
However, some mappers and players prefer that the half jump duration is aligned with the tempo of the music, typically on quarters of a beat. This will make the notes spawn in sync with the song. Many players do not care and/or notice this effect at all, while others do. Aiming for a precise reaction time or aligning the half jump duration with the music are both acceptable approaches.
Reaction time preferences vary quite a bit between players. A shorter reaction time will make a map feel faster, will often help players time their swings more accurately, and reduce the amount of clutter. However, it will also make a map feel more tense and players may struggle to process the objects and move in time.
Some players use mods or in-game settings to adjust the reaction time of maps they play to their own taste. The reaction time of your map should be a reasonable reaction time for players that do not adjust it, based on the map's speed, the amount of clutter, and the physicality of the movements:
- Faster maps encourage shorter reaction times, for the sensation of speed and to reduce clutter.
- More dense maps encourage shorter reaction times, to reduce clutter.
- Maps with larger and more physical movements encourage larger reaction times, to be able to process the required motion and perform it.
Here are some general reaction time ballparks:
| RT range | When to use |
|---|---|
| 0-350 ms | Do not use. Very few players can comfortably play at this range, and those who can will use mods to adjust it themselves. |
| 350-425 ms | Very short RT. It is rarely justified to set this as the default reaction time of a map, as players who require it will use mods. However, it can make sense for extremely fast and very cluttered maps. |
| 425-500 ms | Short RT. This is below what most players will use, but it might be reasonable for very fast maps. |
| 500-600 ms | Standard Expert+ RT. Most Expert+ maps will be in this range, with 500 ms being more adequate for fast maps and 600 ms for slow maps with large movements. |
| 600-750 ms | Long RT. This can be used for Expert+ maps if they involve particularly large or hard to process movements, but many players might struggle with early swinging or being confused with the amount of clutter. |
| 750-1200 ms | Very long RT. Reserved for very floaty maps, or lower difficulties with lower note density and lower NJS. Easy and Normal difficulties will normally be in this range. |
| 1200+ ms | Extremely long RT. While there is nothing inherently wrong with extremely long reaction time, a lot of players will dislike it, and at this range, it will hardly make any positive difference. To be used for aesthetic purposes, if at all. |
TIP
First, setup the map audio, including BPM. Then, choose an NJS setting. Finally, adjust the reaction time. If you modify the NJS, readjust the reaction time.
Vision
Vision blocks happen when an object obstructs the player's view of other objects, preventing the ability to properly see and read the map. Vision blocks are one of the most critical challenges to readability, and can be one of the most alienating aspects of a map for players.
The basic page on vision blocks contains the most important guidance on avoiding vision blocks.
Vision is sometimes one of the biggest constraints to mapping. While it can be very tempting to have worse vision for the sake of better spacing, hand position or momentum this is discouraged.
A mapper should always try to simultaneously achieve good vision, setup, flow, and representation. Borderline vision should only be considered on a case by case basis when no better solution can be found instead of a systematic approach.
If something truly is a vision problem, fixing it should be a priority.
Bad Practice
Do not sacrifice vision for the sake of pattern setup. This alienates players and the effects are harder to notice due to mapper blindness. Find patterns that are within acceptable vision ranges.
But what truly constitutes a vision issue? This is really difficult to answer definitively. Here are some general principles, but all of them have exceptions:
- Vision blocks are almost always produced by face notes (notes in the middle two lanes) blocking notes in the same half of the play area.
- Inline notes can also produce vision blocks (notes in the same grid position with short time distance between them).
- Vision blocks depend on NJS.
- When the note behind is very close in time to the one in front, it might be possible to see it on the side as it approaches, avoiding a vision block.
- When there is enough time between the notes, the player might be able to see the note behind in time to process it after swinging through the previous one.
- Vision blocks are subjective. Different players will have different experiences.
- Vision blocks become a smaller issue when replaying the map.
- Vision blocks can be made less problematic with better pattern setup, especially when using good momentum, and context.
The best approach to vision blocks is practical. Try, evaluate, adjust. There are two main aspects to this:
- Check the vision on any potentially problematic patterns while mapping. This can be done by checking in-game, or by using ArcViewer, a map preview tool that is geometrically accurate to the game's positions, sizes and spawning animations, making it a great tool to judge vision.
- Get external testplays from other players or mappers, preferably sight reads where they are not familiar with the map, to evaluate the actual effect of vision blocks.
TIP
The best approach to vision blocks is practical. Check in-game, use vision accurate previews and external testplays to determine the effect of potentially problematic vision blocks.
Credits
Content in this section was mainly authored by Undeceiver and AllPoland, with feedback from multiple members of the mapping Discord. An earlier version of this page (that was partly reused) was authored by Checkthepan, CyanSnow, Uninstaller, Skyler Wallace, Kolezan, Pyrowarfare, DarkGrisen, and Vaser888